Ever stood on a step ladder trying to re-grout a cramped shower only to wish your whole bathroom felt larger, simpler, and easier to clean? If you’ve dreamed of a spacious, modern shower with no lip or curtain, a wet room bathroom remodel might be the upgrade that finally makes your daily routine feel like a spa visit.
Introduction: Why Choose a Wet Room?
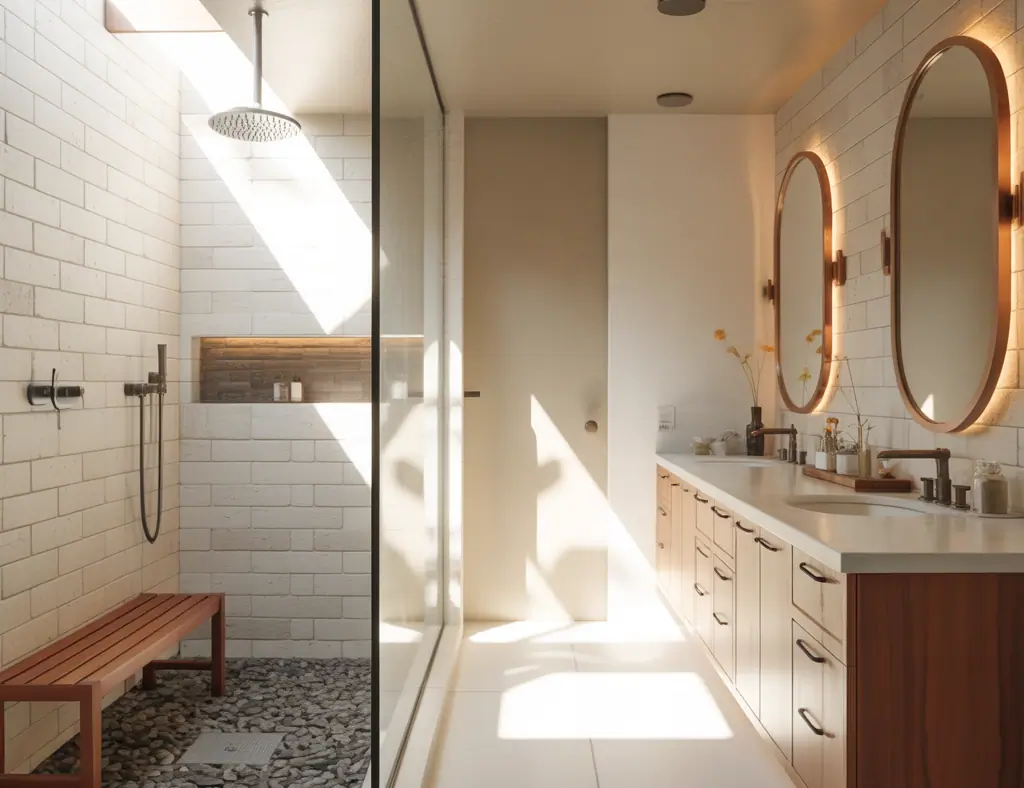
A wet room is a fully waterproofed bathroom with an open-plan shower area — no separate shower tray, and often a flush, curbless transition to the rest of the floor. For homeowners tackling a bathroom renovation or a DIY wet room conversion, the appeal is obvious: contemporary design, improved accessibility, and easier maintenance. In this article I’ll walk you through practical DIY tips, step-by-step ideas, design inspiration, and real-world advice so you can plan a successful wet room bathroom remodel that fits your home and budget.
What Is a Wet Room and Who Is It For?
Wet rooms work well for:
- Small bathrooms that need visual openness and a sense of space (wet room small bathroom solutions)
- Accessible design — curbless entries are ideal for mobility aids and aging-in-place
- Modern bathrooms where easy cleaning and minimalism are priorities
Key features of a wet room
- Full waterproofing (tank or membrane systems)
- Continuous floor finish (tile, epoxy, or sealed concrete)
- Efficient drainage — linear drains are common
- Proper ventilation to prevent moisture buildup
Planning Your Wet Room Bathroom Remodel
Good planning prevents expensive mistakes. Start by assessing your space, plumbing, and structural floor. Will you need to lower the floor to fit a drain? Can the existing plumbing handle a new shower location? If you’re converting an existing bathtub or shower, measure carefully and sketch a plan.
Permits and professional help
Even if you’re a confident DIYer, consult local building codes. Waterproofing and drainage often require professional assessment. Consider hiring a licensed plumber for drain work and an installer for the waterproof membrane unless you have experience.
Design Inspiration: Styles and Layouts
Wet rooms offer flexibility. Here are popular themes and long-tail design ideas to consider:
- Minimalist wet room with large-format porcelain tiles and a hidden linear drain
- Luxury spa wet room: rainfall showerhead, heated floors, bench seating
- Accessible wet room bathroom remodel with grab bars, fold-down seat, and curbless entry
- Industrial look: concrete floor, matte black fixtures, and exposed shelving
Color, texture, and lighting tips
- Use lighter tiles on walls and slightly darker flooring to ground the space
- Add a niche or vertical tile accent for texture and storage
- Layer lighting with recessed fixtures, a waterproof downlight in the shower, and LED strip under floating vanities
Step-by-Step DIY Wet Room Improvement Ideas
Below is a practical sequence for a DIY wet room bathroom remodel. Adjust depending on scale and whether you’re working with contractors on key tasks.
- Demo and prepare the subfloor: remove fixtures, tiles, and old trays. Inspect the joists and plywood for rot.
- Install or modify drains: decide on point drain vs linear drain. If floor lowering is needed, plan the slope to the drain (typically 1/4″ per foot).
- Waterproof the room: apply a waterproof membrane (liquid-applied or sheet membrane) to floors and walls up to at least 6 feet high or full height around shower area.
- Tile the floor and walls: use slip-resistant floor tiles and ensure grout and sealants are rated for wet environments.
- Fit fixtures: install valve bodies, showerheads, glass screens, and benches.
- Ventilation and finishing: install a powerful, quiet exhaust fan and caulk all joins. Add heated floors if desired.
DIY Tips for Success
- Test waterproofing with a water test (flood test) before tiling to catch leaks early.
- Use a polymer-modified thinset for bonding tiles to wet-room substrates.
- Choose a linear drain if you want a seamless look and simpler floor fall.
- Keep tools handy: long float, tile spacers, level, grout saw, and a quality notched trowel.
Waterproofing, Drainage and Ventilation — The Technical Essentials
The success of a wet room hinges on proper moisture control. Invest in a reputable waterproofing membrane and seal all penetrations around plumbing and drains. Consider the following real-world advice:
- Membrane: sheet membranes are forgiving for DIY; liquid membranes adapt well to complex shapes.
- Drainage: linear drains simplify floor gradients; ensure the subfloor depth allows for proper slope if retrofitting.
- Ventilation: high-capacity extractor fan and humidity-controlled switches prevent mold.
Budget and Timeline: What to Expect
Costs vary widely. A small DIY wet room conversion can be economical if you handle demolition and tiling; however, hiring professionals for waterproofing and plumbing spikes the budget. Typical timelines:
- DIY partial remodel: 2–4 weeks (including drying times)
- Contractor-led renovation: 3–6 weeks depending on scope
Factor in contingencies for hidden issues like rotten subflooring or rewiring. Always get at least two quotes if hiring pros.
Real-World Advice: Common Pitfalls to Avoid
- Skipping the flood test before tiling — don’t assume waterproofing is perfect.
- Choosing slippery floor tiles — opt for R10+ or textured porcelain designed for wet floors.
- Neglecting storage — add recessed niches or ledges to keep toiletries organized and reduce clutter.
Frequently Asked Questions
1. How long does a wet room bathroom remodel take?
A typical timeline ranges from 2–6 weeks depending on whether you DIY or hire contractors. Waterproofing and drying times are the main variables, so plan for about 1–2 weeks for prep and waterproofing and another 1–3 weeks for tiling and finishes.
2. Can I convert my existing bathroom into a wet room myself?
Yes, a confident DIYer can handle many tasks like demolition, tiling, and installing fixtures. However, consider hiring professionals for waterproofing membrane installation and plumbing/drain modifications to ensure a long-lasting, leak-free result.
3. Are wet rooms suitable for small bathrooms?
Absolutely. Wet rooms can make a small bathroom feel open and airy because they remove visual barriers like shower trays and curtains. Use light tiles, glass panels, and clever storage to maximize the effect.
Conclusion — Ready to Start Your Wet Room Bathroom Remodel?
A wet room bathroom remodel is an excellent way to modernize your home, improve accessibility, and create a low-maintenance, stylish space. With careful planning, proper waterproofing, and the right materials, you can achieve a high-end look — whether you take on a DIY wet room conversion or work with experts. If you’re inspired to begin, sketch your layout, budget your priorities, and consider booking a consultation for the tricky waterproofing and drainage work.
Want more hands-on project ideas? Check out our pages on DIY projects, kitchen upgrades at kitchen upgrades, and creative home design ideas to keep improving your space.
Ready to transform your bathroom? Start planning today and make your wet room dream a reality — and if you have questions about materials or steps, leave a comment or get in touch for tailored advice!