Staring at a cramped, outdated powder room and wondering how to make it feel larger without gutting the whole space? You’re not alone. Transforming a tiny bathroom into a bright, modern retreat is one of the most satisfying DIY projects—and opting for a walk in shower small bathroom design is a smart, stylish way to open up the room and add value.
Why Choose a Walk In Shower Small Bathroom?
Walk-in showers are perfect for small bathrooms because they eliminate bulky bathtubs and bulky enclosures, creating visual continuity and the illusion of space. Whether you want a curbless shower for easier access or a minimal glass panel to keep sightlines open, a small bathroom walk in shower can make a compact space feel airy and modern.
Planning: Measure, Visualize, and Prioritize
- Measure carefully: Note the full dimensions, ceiling height, and the drain location. Typical minimum shower width is 30–36 inches, but 32 inches can work with smart fixtures.
- Decide layout priority: Do you want a recessed niche, a bench, or more floor space? Prioritize one or two features to avoid overcrowding the design.
- Sketch a layout: Draw to scale or use a simple online planner. Plan door swing or consider a fixed glass panel to save space.
Design Ideas for a Small Walk-In Shower
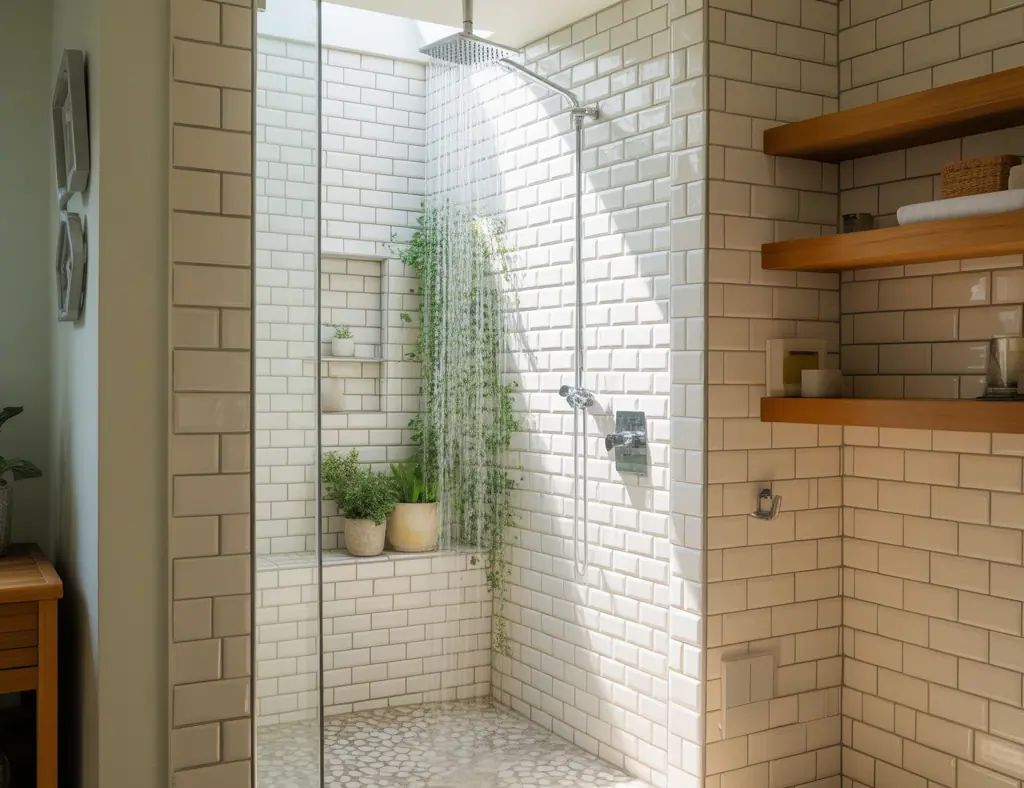
1. Go Glass and Open
Frameless or semi-frameless tempered glass panels keep the line of sight uninterrupted. A single fixed panel (rather than a full enclosure) provides splash protection while making the room feel larger.
2. Curbless or Low-Threshold Showers
A curbless shower (also called a roll-in shower) makes the floor continuous, visually expanding the area and improving accessibility. For retrofits, a low-threshold pan combined with a linear drain is often easier than full curbless conversion.
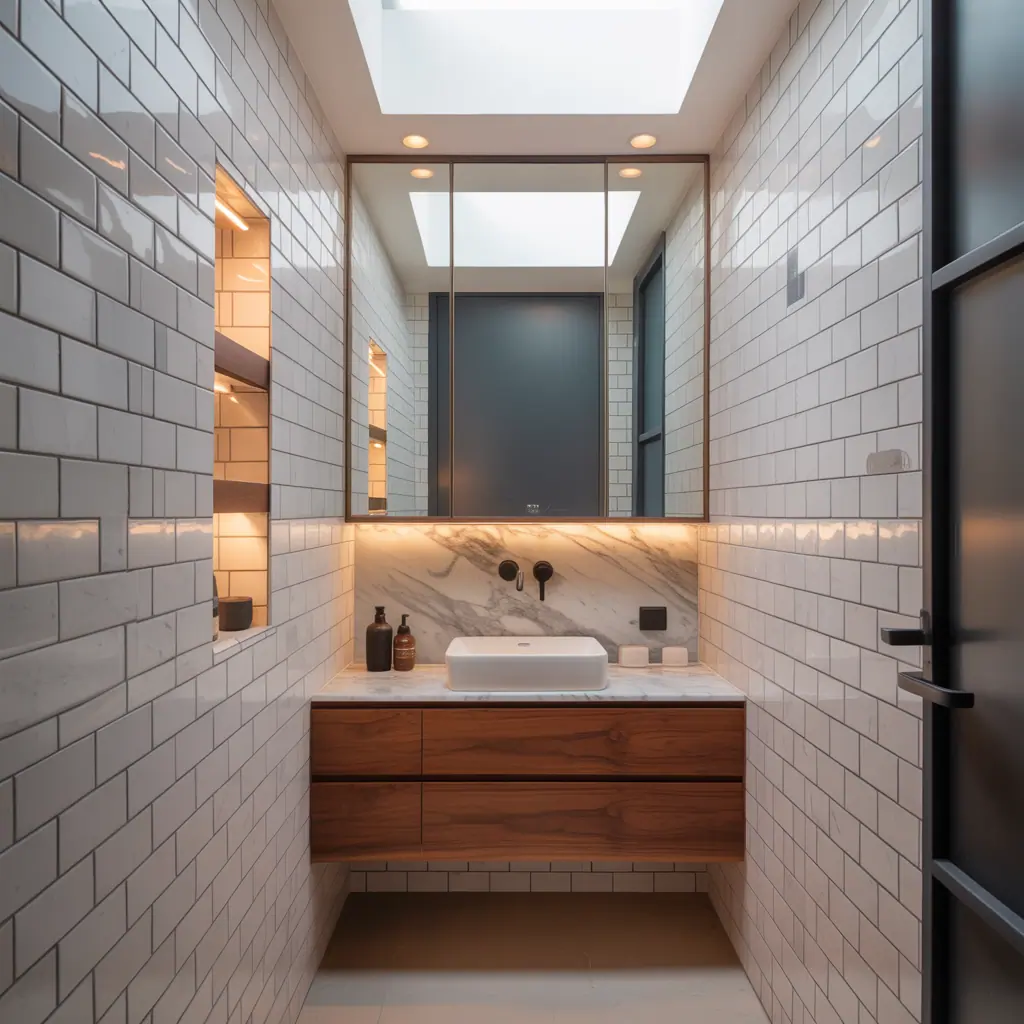
3. Vertical Tile and Light Colors
Use vertically oriented subway tiles or larger-format tiles to create height. Light, neutral colors reflect light and enlarge the perceived space. Consider a contrasting mosaic floor to add grip and visual interest.
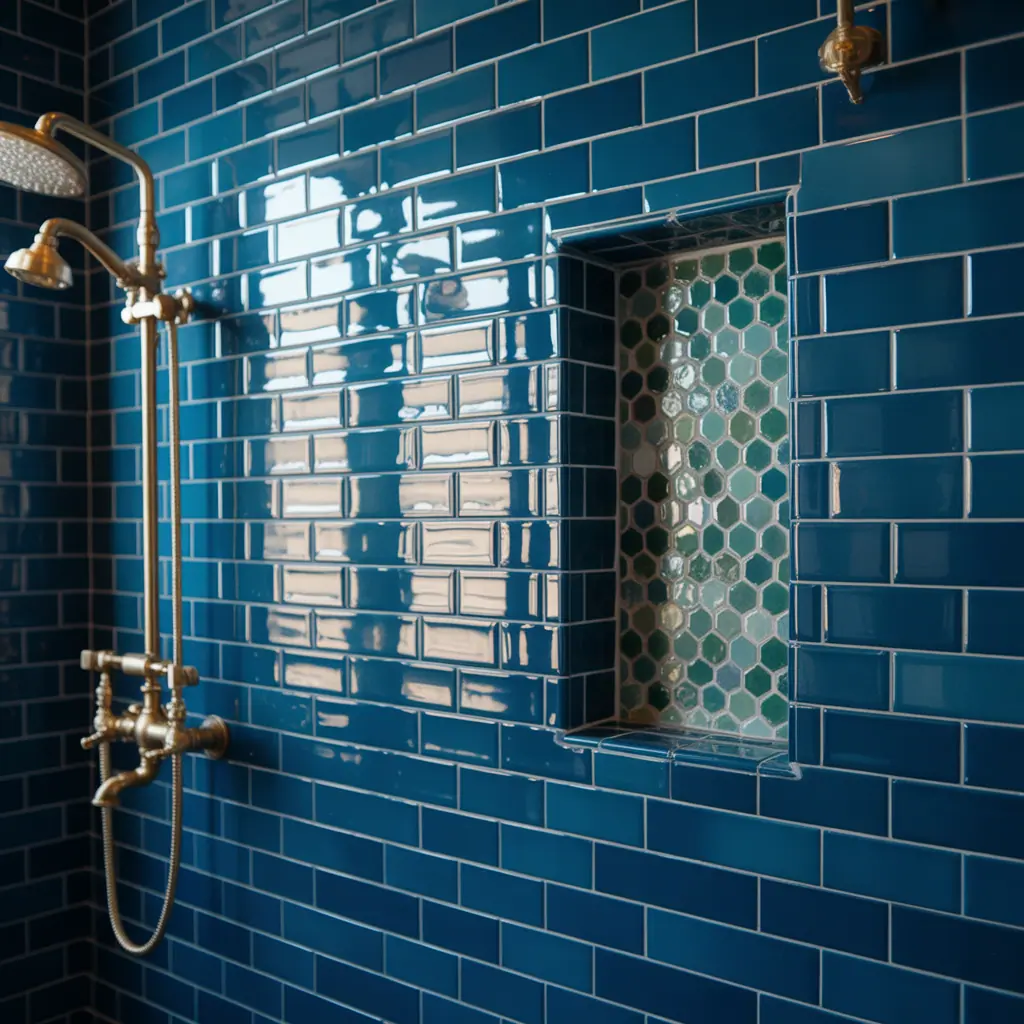
4. Built-In Storage
Recessed niches keep shampoo and soap off ledges and reduce clutter. Narrow vertical niches work well in tight showers and double as an architectural detail.
DIY Step-By-Step: Convert a Small Bathroom to a Walk-In Shower
Below is a practical, beginner-friendly roadmap. If you’re new to plumbing or structural changes, consult a pro for permit and code issues.
- Prepare the space: Turn off water. Remove tub or old stall, tiles, and subfloor down to the joists if needed.
- Check the drain: Decide between center, off-set, or linear drain. A linear drain near the wall simplifies slope planning for curbless showers.
- Install substrate: Use cement board or a waterproof foam shower base. For curbless, choose a pre-sloped linear drain system or build a mortar bed with proper fall (1/4″ per foot).
- Waterproof: Apply a membrane (liquid or sheet) over the substrate. Sealing is critical—don’t skip this.
- Tiling: Start with walls, then floor. Use smaller tiles on the floor for traction and easier slope work.
- Glass and fixtures: Mount the glass panel and install showerhead, valve, and drain covers. Use wall-mounted fixtures to save space.
- Finish and seal: Grout, caulk seams, and add trim. Install grab bars or a fold-down bench if desired.
Practical DIY Tips & Real-World Advice
- Start small: A single glass panel and a painted niche can modernize a space without a full demo.
- Use a linear drain: Easier slope and a cleaner look—especially helpful in tight, curbless conversions.
- Choose matte floor tiles: They look stylish and reduce slipping—important in small bathrooms where wet floors are common.
- Match grout to tile: A grout color close to your tile reduces visual interruptions and keeps the space feeling seamless.
- Ventilation matters: Upgrade or add an exhaust fan to prevent mold and keep a small bathroom fresh.
- Plan for maintenance: Install a glass treatment and keep a squeegee handy to reduce mineral build-up.
Budgeting & Materials: What to Expect
Costs vary widely: a simple refresh (glass panel, new tile, fixtures) can be done for a modest budget if you DIY. A full curbless conversion with professional plumbing and custom glass will cost more but adds value. Prioritize waterproofing, quality valves, and tempered glass—those elements deliver longevity.
Accessibility & Aging-in-Place Considerations
Walk-in showers are naturally accessible. For true universal design, include a non-slip floor, a handheld shower head, reinforced walls for future grab bars, and a small built-in bench. These upgrades are inexpensive compared to future remodels and make the space usable for all ages.
Frequently Asked Questions
1. Can I install a walk in shower in a very narrow bathroom?
Yes. Narrow bathrooms can accommodate a walk-in shower by using a fixed glass panel, choosing a linear drain, and orienting plumbing on one wall. A shower width of 30–36 inches is workable with careful planning.
2. Is a curbless shower practical in an older home?
It can be, but older homes often need subfloor adjustments to achieve the proper slope. A low-threshold pan or prefabricated shower base can be a simpler retrofit while still providing many curbless benefits.
3. What maintenance does a walk-in shower require?
Regular squeegeeing reduces soap scum, grout should be sealed yearly, and any silicone joints should be inspected for mold and replaced as needed. Good ventilation prevents moisture issues in small bathrooms.
Conclusion: Ready to Transform Your Space?
A walk in shower small bathroom renovation is one of the most impactful updates you can make—opening sightlines, improving accessibility, and modernizing your home. Start by measuring carefully, pick one or two standout features (like a curbless entry or built-in niche), and tackle the project in manageable steps. If you want more project ideas or step-by-step inspiration, check out our DIY projects and browse home design ideas for creative finishes. Ready to begin? Sketch your layout today and reclaim your bathroom as a stylish, space-saving retreat.
For more ideas on how to make a small space feel larger, check out our Ideas for Walk in Closet.