Ever stood in your backyard at dusk, wishing your patio had a warmer, more inviting glow — but you don’t want the same boring plastic lanterns everyone else uses? Whether you’re planning a summer barbecue, a cozy outdoor movie night, or just trying to elevate your curb appeal, tiki torches can transform a space. In this post I’ll walk you through creative tiki torch ideas decoration, practical DIY projects, and safety-forward tips so you can light up your outdoor living area with style.
Why tiki torches are a smart outdoor decor choice
Tiki torches offer more than just light — they create mood, guide walkways, and add a tropical or rustic touch. They’re versatile, budget-friendly, and perfect for homeowners who like to tinker. From citronella-filled bug-repelling torches to solar-powered LED conversions, there’s a tiki torch solution for every design aesthetic and safety preference.
Tiki torch ideas decoration: styles, themes, and placement
Here are style directions and placement strategies to turn ordinary tiki torches into focal points.
Design themes to consider
- Tropical escape: Bamboo poles, rattan accents, and bright patterned wraps for a Hawaiian vibe.
- Coastal minimalism: Weathered wood poles, white glass chimneys, and nautical rope.
- Rustic farmhouse: Metal torches with mason jar covers and burlap wraps.
- Modern chic: Black metal stakes and frosted glass globes or LED flame effects.
Placement and layout tips
- Line walkways and steps with shorter stakes for safe path lighting.
- Create clusters of 3–5 torches near seating areas for layered illumination.
- Install taller torches at corners to frame dining areas or garden beds.
- Keep at least 10 feet of clearance from structures and overhanging branches for open-flame torches.
DIY tiki torch projects (step-by-step)
Try these three practical DIY tiki torch decoration projects. Each uses easy-to-find materials and minimal tools.
1. Rope-wrapped tiki torch (coastal look)
Materials: bamboo or metal torch pole, exterior-grade rope, outdoor adhesive, spray sealant, torch head or oil reservoir.
- Clean the pole and sand lightly if metal to remove finish.
- Apply a thin bead of outdoor adhesive at the base and wind rope tightly upward, securing every 6–8 inches with a dab of glue.
- Trim the rope and seal the ends with adhesive; allow to cure per adhesive instructions.
- Install the torch head, add fuel or a citronella insert, and spray the rope with a UV-resistant sealant to prolong life.
2. Mason jar tiki torch centerpiece (table-friendly)
Materials: large mason jar, tiki torch wick kit, sand or pebbles, citronella oil or lamp oil, decorative ribbon or burlap.
- Fill the jar with sand or small stones to stabilize the wick assembly.
- Insert the wick holder and add lamp oil to just below the jar neck.
- Light outdoors only; place on a heat-resistant trivet and use a glass hurricane cover for wind protection.
3. Solar LED tiki torch conversion (safe alternative)
Materials: discarded tiki torch bodies or new stake, solar LED flicker light insert, epoxy or weatherproof tape.
- Remove the fuel head and clean the reservoir.
- Fit the solar LED insert into the opening; secure with epoxy or tape as needed.
- Position in direct sun; these are low-maintenance and great for apartment balconies or kid-friendly zones.
Practical tips for maintenance and safety
Good upkeep keeps your outdoor tiki torch decoration looking professional and safe.
- Use citronella fuel if you want bug-repelling benefits; follow the manufacturer’s instructions for filling and placement.
- Extinguish flames before leaving the area or going to bed; use a snuffer or cap to avoid smoke.
- Store fuel and spare wicks in a cool, dry place away from children and pets.
- For windy regions, choose torches with glass chimneys or opt for LED/safe alternatives.
- Check local fire codes — some HOAs or municipalities restrict open flames; solar or battery-operated torches are usually allowed.
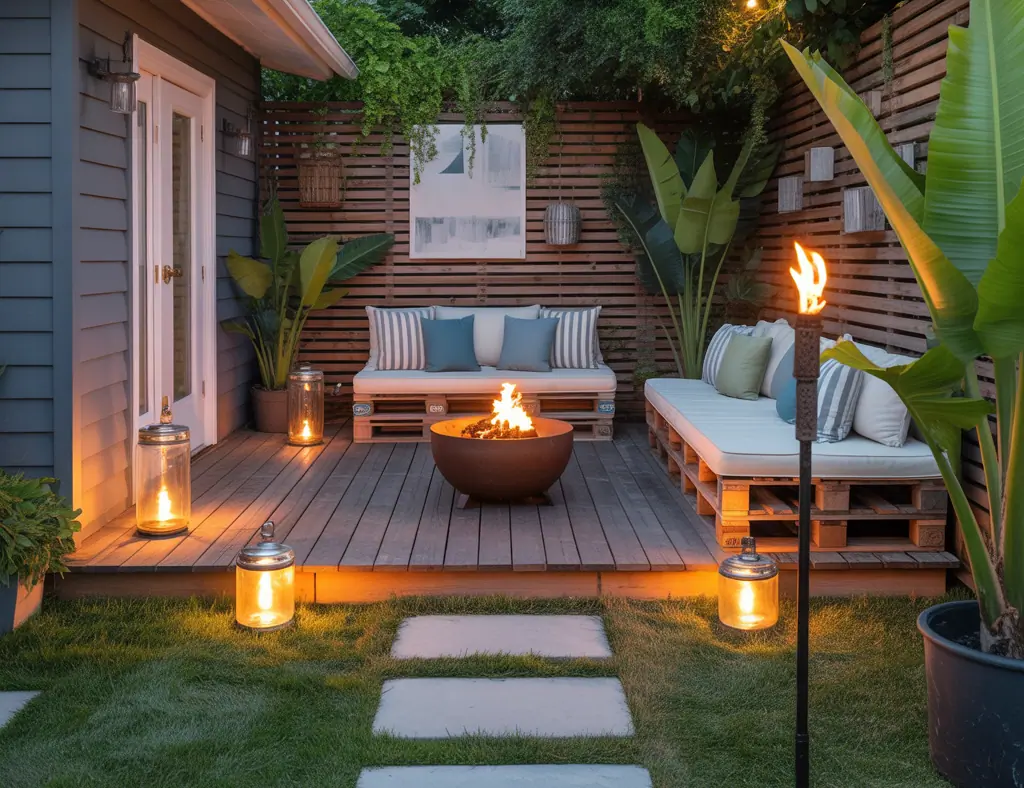
Creative styling and design inspiration
Mix materials and play with heights for a curated look. Try these combinations:
- Bamboo torches + string lights = instant tiki lounge.
- Black metal torches + concrete planters = urban terrace sophistication.
- Mason jar torches + eucalyptus garlands = rustic-chic centerpiece.
Consider color palettes (warm amber, ocean blues, or neutral earth tones) and repeat one or two motifs to tie the space together visually.
Budget-friendly sourcing and eco-friendly options
You don’t have to spend a lot to achieve polished results. Scour thrift stores for glass chimneys, repurpose old curtain rods as poles, or upcycle wine bottles into mini torches. For greener lighting, choose bioethanol burners or rechargeable solar LED inserts — they mimic a flicker without fumes.
Frequently Asked Questions
1. Are tiki torches safe to use around kids and pets?
Open-flame tiki torches should be placed well out of reach and extinguished when unsupervised. For family-friendly spaces, choose solar or battery-operated LED torches and fixed glass-enclosed designs to reduce risk.
2. What fuel should I use in tiki torches to repel mosquitoes?
Citronella oil-based fuels are commonly used for bug-repelling torches. While they can reduce mosquito activity nearby, they are not 100% effective—combine them with other measures (screens, standing water removal) for best results.
3. How do I keep tiki torches from tipping over in wind?
Use heavier bases or secure torches in the ground at least 12–18 inches deep where possible. For patio use, opt for weighted planters or concrete-filled bases. Glass chimneys or wind guards also help steady the flame.
Conclusion — Light up your next outdoor project
Tiki torch ideas decoration can turn an ordinary yard into a memorable outdoor living space. Whether you prefer the classic flicker of oil flame, the safety of solar LED tiki torch lighting, or upcycled DIY centerpieces, there’s a project here for every skill level and budget. Try one of the step-by-step projects above this weekend and see how a few torches can change the whole feel of your patio.
Ready to get started? Explore more inspiring DIY projects or browse home design ideas to pair with your new lighting — and if you’re updating a dinner area, check out creative kitchen upgrades for a seamless indoor-outdoor flow.
Call to action: Pick one tiki torch project, gather your materials, and light up your backyard tonight. Share your before-and-after photos or questions and I’ll help you troubleshoot the build.
Internal resources: DIY projects | kitchen upgrades | home design ideas