Have you ever chopped vegetables under a single overhead bulb and wished your small kitchen felt brighter, larger, and more functional? If your kitchen lighting leaves you squinting at countertops or creates harsh shadows while cooking, recessed lighting could be the simple upgrade that transforms the room. In this guide I’ll walk you through smart, practical ways to plan, install, and style small kitchen recessed lighting so your space looks bigger, works better, and stays energy-efficient.
Why recessed lighting works for small kitchens
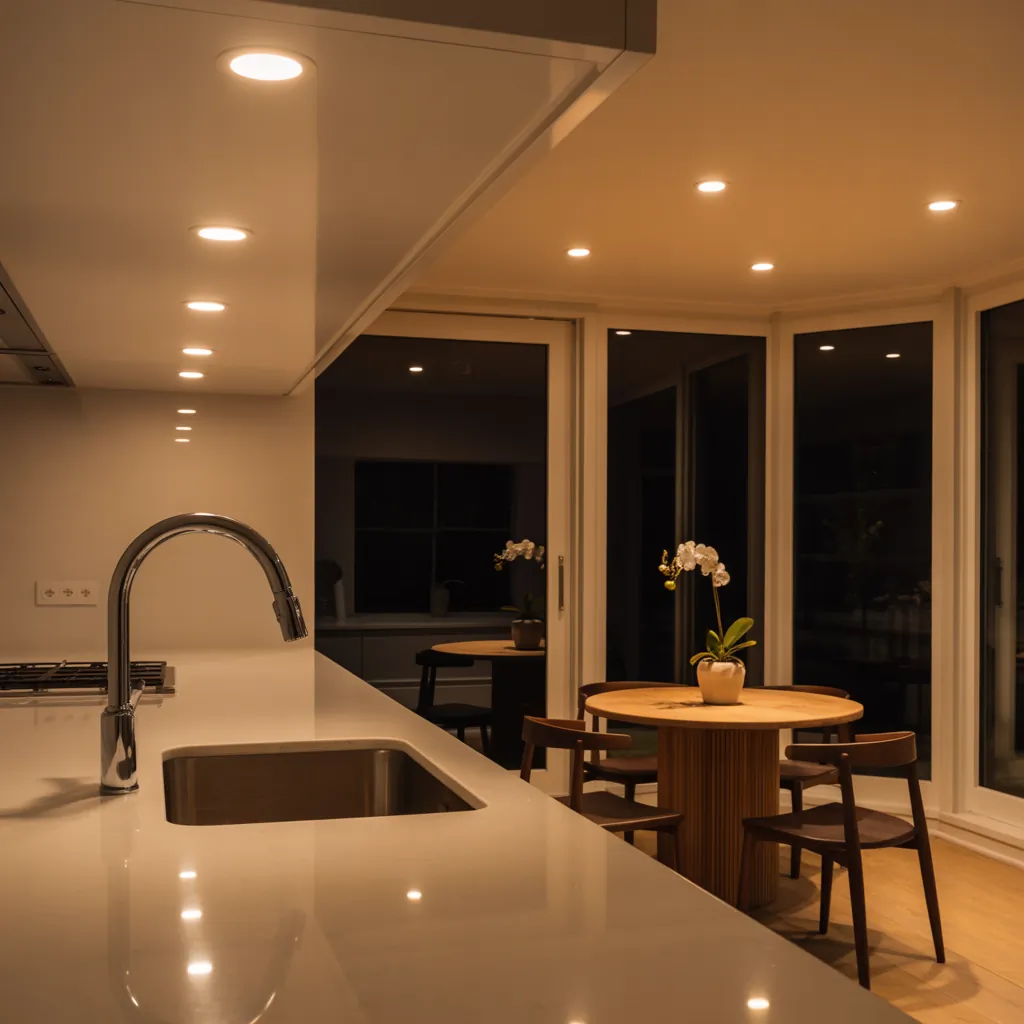
Recessed lights (also called can lights, downlights, or pot lights) are ideal for compact kitchens because they stay flush with the ceiling and distribute light evenly without cluttering the visual field. They create a clean, modern look while providing general ambient light that reduces shadows—especially when layered with task and accent lighting.
Benefits at a glance
- Maximizes headroom and sightlines in tight spaces
- Even illumination across countertops and work zones
- Flexible layout options to avoid dark corners
- Works well with under-cabinet and pendant lighting for layered design
Planning your small kitchen recessed lighting layout
Good lighting design starts with a plan. Measure your kitchen and sketch zones: prep area, sink, stove, island or peninsula, and any breakfast nook. Consider how many can lights and what spacing you need.
Rules of thumb for spacing
- Spacing rule: place recessed lights about half the ceiling height apart. For an 8-foot ceiling, space lights roughly 4 feet apart.
- Use smaller fixtures (3″–4″ or 4″–5″ LED trims) in compact kitchens to avoid oversized beams that wash out walls.
- Place task-focused lights 12–18 inches from the wall or cabinetry to illuminate countertops effectively.
Best small kitchen recessed lighting layouts
Here are three practical layouts that work in most small kitchens:
1. Grid layout for a galley kitchen
- Install a row of recessed lights centered along the ceiling, spaced evenly to light both counters.
- Add two focused cans near the stove and sink for extra task light.
2. Perimeter-first layout for U-shaped kitchens
- Place cans around the room perimeter 12–18″ from cabinets to illuminate the work surface.
- Fill center spaces as needed for balanced ambient light.
3. Island-focused layout for open-plan small kitchens
- Combine recessed lights above prep zones with a pendant or two over the island for style and task lighting.
- Use adjustable gimbal trims to highlight prep areas or accent shelves.
Choosing the right fixtures and bulbs
Making smart choices about fixtures and LEDs improves the final result.
- Size: 3–4″ fixtures are often best in small kitchens. 6″ cans can overpower small ceilings.
- IC-rated vs non-IC: Choose IC-rated housings if your fixture will contact insulation; that affects safety and code compliance.
- Trim style: Baffle trims reduce glare; adjustable trims (gimbal) provide directional light; reflectors offer brighter, wider beams.
- Color temperature: 2700K–3000K gives a warm, inviting look; 3000K–3500K can make a kitchen feel brighter and more modern.
- CRI: Aim for a CRI of 90+ for accurate food and surface colors.
- Dimming: Use LED-compatible dimmers for mood and energy savings.
DIY: Step-by-step for installing recessed lighting in a small kitchen
Note: If you’re not comfortable with electrical work, hire a licensed electrician. For DIYers with basic wiring skills, here’s a common retrofit process for inserting LED recessed cans into an existing ceiling:
- Plan layout and mark ceiling locations, avoiding joists, HVAC ducts, and plumbing.
- Turn off power at the breaker and verify with a non-contact voltage tester.
- Cut holes using the template provided with the fixture or retrofit kit.
- Run cable from your power source to the first fixture and between cans, stapling cable per code.
- Make connections inside the fixture’s junction box: hot to hot, neutral to neutral, ground to ground. Use approved wire connectors.
- Insert housing (remodel or new-construction) and secure per manufacturer instructions.
- Install LED module/trim and attach trim to housing. Replace breaker cover and test lights.
- Install a compatible dimmer and fine-tune brightness and color if using tunable LEDs.
Quick safety and code tips
- Always turn off power at the breaker and verify lines are dead.
- Follow local electrical codes and pull permits when required.
- Use IC-rated fixtures if they’ll contact insulation; this prevents overheating.
Design inspiration: layering light for a small kitchen
Recessed lighting should be one layer in your scheme. Combine it with:
- Under-cabinet LED strips for countertop task light and shadow reduction.
- Pendants over islands or dining nooks to add personality and scale.
- Accent lights (small adjustable recessed or LED tape) to highlight open shelving or backsplashes.
Try a warm white (2700K–3000K) recessed ambient layer with cooler task under-cabinet lights if you want crisp prep lighting. Mixing finishes and trim styles lets recessed lights blend or stand out as design features.
Real-world tips & budgeting
- Retrofit LED kits simplify installations and often fit existing can housings—good for budget-minded DIYers.
- Expect materials and DIY supplies for a small kitchen (4–8 lights) to cost roughly $150–$600 depending on quality; professional installation will add labor costs.
- Test layouts with temporary clamp lights or cardboard cutouts taped to the ceiling to avoid surprises.
- Replace old incandescent bulbs with LED equivalents to reduce heat and energy bills.
Frequently Asked Questions
For a typical small kitchen (about 80–120 sq ft), 4–6 recessed lights spaced evenly usually provide good ambient coverage. Use the spacing rule—half the ceiling height—to determine exact placement and add focused cans above work zones.
Yes, homeowners with basic electrical skills can install retrofit LED recessed lights. However, if you must run new wiring, work near gas lines, or are unsure about local codes, hire a licensed electrician. Always turn off power and follow safety guidelines.
Yes. LEDs are more energy-efficient, emit less heat, and last far longer than incandescent or halogen bulbs. They also come in a range of color temperatures and high CRI options for accurate color rendering—important in kitchens.
Conclusion — Brighten your small kitchen recessed lighting project today
Upgrading to small kitchen recessed lighting is one of the most impactful, low-visual-clutter improvements you can make. With careful planning, the right fixtures, and layered lighting that includes under-cabinet and pendant options, your compact kitchen will feel larger, safer, and more stylish. Ready to get started? Try sketching a layout, picking your LED trims, and testing placement with temporary lights. If you want project ideas or step-by-step inspiration for the actual install, check out our DIY projects, explore handy kitchen upgrades, or browse home design ideas to see what fits your space. Light up your kitchen and enjoy cooking in a brighter, better-designed room!