Standing in a cramped bathroom with a measuring tape in one hand and a Pinterest mood board in the other, you wonder: can I fit a tub and a shower without sacrificing space or style? If that sounds familiar, you’re not alone. Choosing the right shower tub layout transforms how your bathroom functions and feels — whether you’re tackling a weekend DIY or planning a full remodel.
Why the right shower tub layout matters
Layout is more than aesthetics. The way you arrange a shower and tub affects plumbing costs, accessibility, storage, and resale value. A smart bathroom layout can make a small space feel larger, reduce future maintenance headaches, and even improve safety for kids or seniors. Use layout planning to balance function (drainage, plumbing access) with design (tile, glass doors, niches).
How to choose the right shower tub layout
Before you swing a hammer, measure. Map your bathroom footprint, door swing, window placement, and existing plumbing. Think about how the space will be used daily: family baths, quick morning showers, or a relaxing soak. Consider these long-tail layout options that fit many home configurations:
- Alcove shower tub (three-wall tub-shower configuration) — space-efficient and common in older homes.
- Corner shower tub layout — ideal for awkward floor plans where a corner can free wall space.
- Walk-in shower with a separate freestanding tub — a luxury option if you have the square footage.
- Shower-tub combo with sliding or hinged glass doors — great for small bathrooms seeking a modern look.
Popular shower tub layouts and when to use them
Alcove (standard) shower tub layout
Best for small to medium bathrooms. An alcove sits between three walls, minimizes plumbing relocation, and is often the easiest for DIYers to install. It’s the classic tub-shower combination you see in many home remodels.
Corner shower tub layout
Works well in oddly shaped bathrooms or when you want to maximize floor space. Corner tubs can create a spa-like feel but may need custom surrounds or tile work.
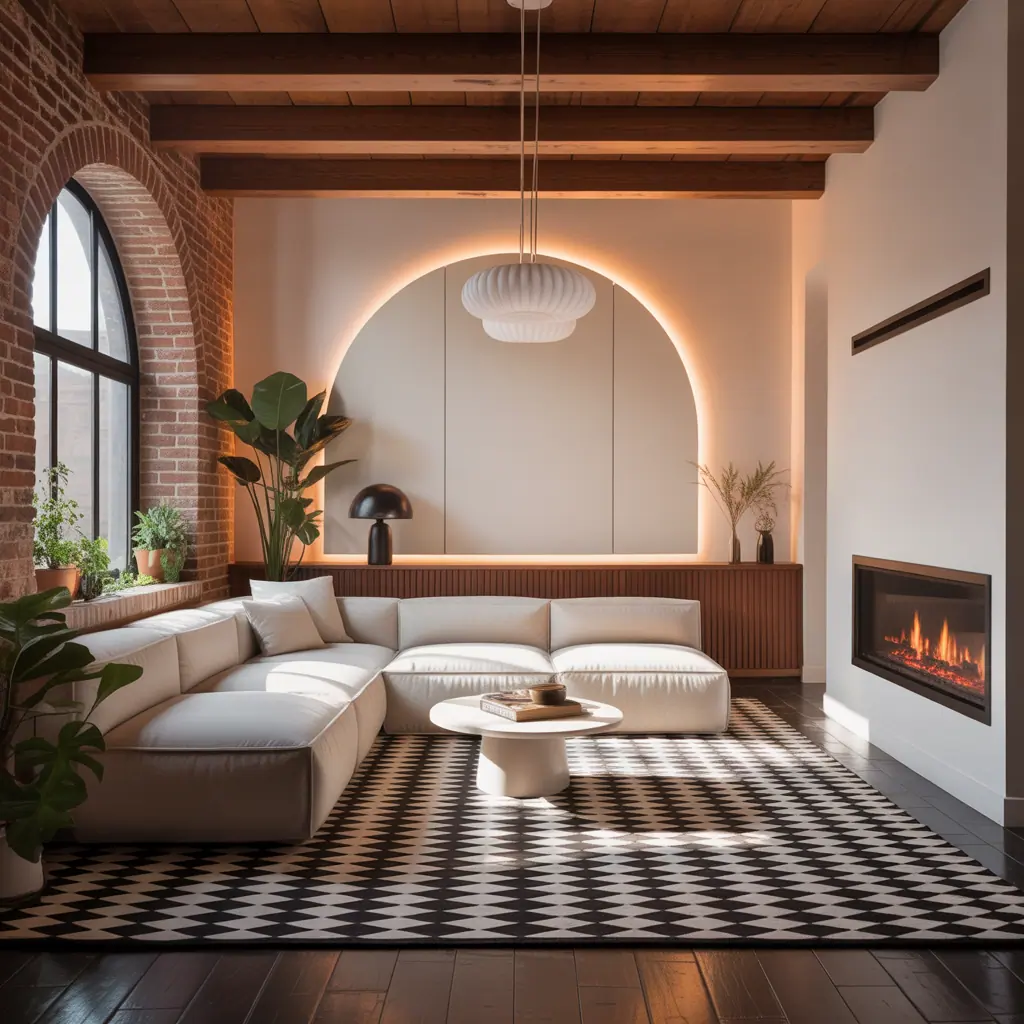
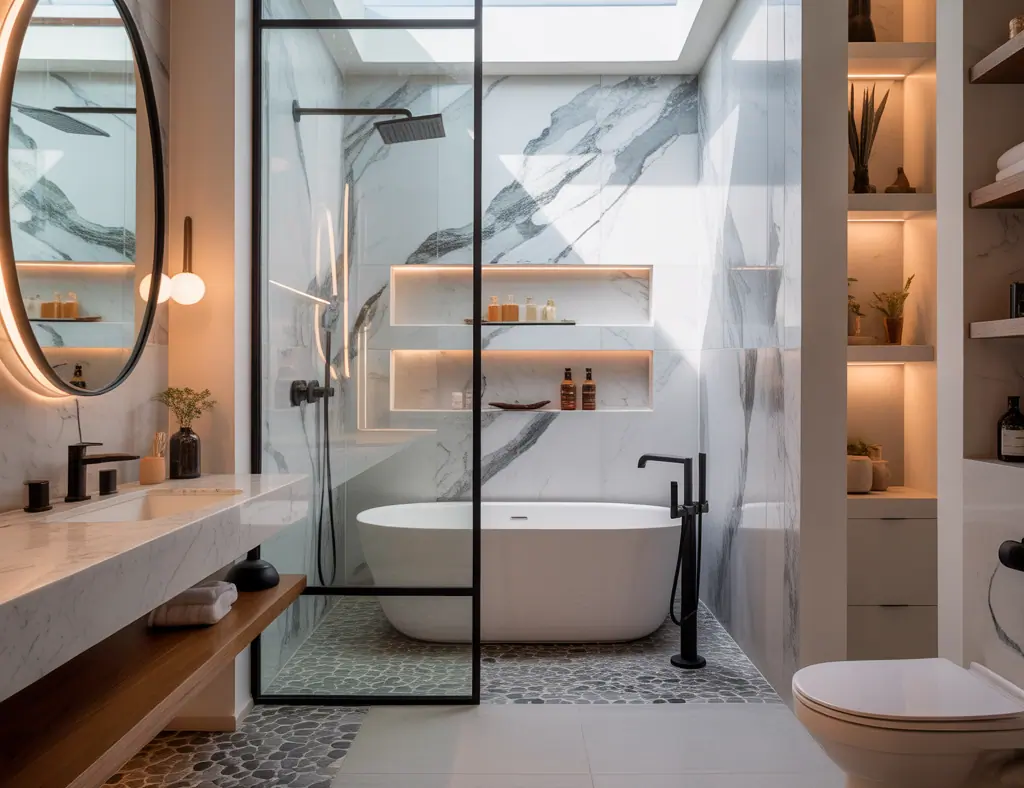
Walk-in shower with separate tub
If your budget and space allow, separating a walk-in shower from a freestanding tub creates a high-end spa experience. This layout is popular in master bathrooms where both quick showers and long soaks are desired.
Step-by-step DIY improvement ideas for a better shower tub layout
Ready to improve your layout without overspending? Follow these realistic steps to plan and execute smart updates.
- Assess and measure: Measure the room, window heights, door swings, and existing drain location. Sketch two to three layout options to compare.
- Decide plumbing changes: Moving a drain or changing wall locations increases cost. Keep new tub/shower near existing plumbing to save time and money.
- Choose your tub-shower type: Pick an alcove tub, corner unit, or freestanding tub based on space and style. For small bathrooms, consider a compact 48–60 inch alcove tub.
- Frame and waterproof: If reconfiguring walls, update framing and install a waterproof backing (cement board and proper waterproofing membrane) before tile.
- Tile and finishes: Use large-format tiles to visually expand a small shower tub layout. Include a recessed niche for soap and shampoo to avoid bulky shelves.
- Install glass or curtain: Glass doors open up sightlines; a curved shower curtain or glass can make the room feel larger while keeping water in.
- Test and maintain: Run water tests to ensure drainage and watertight seals. Maintain grout and caulk annually to prevent leaks.
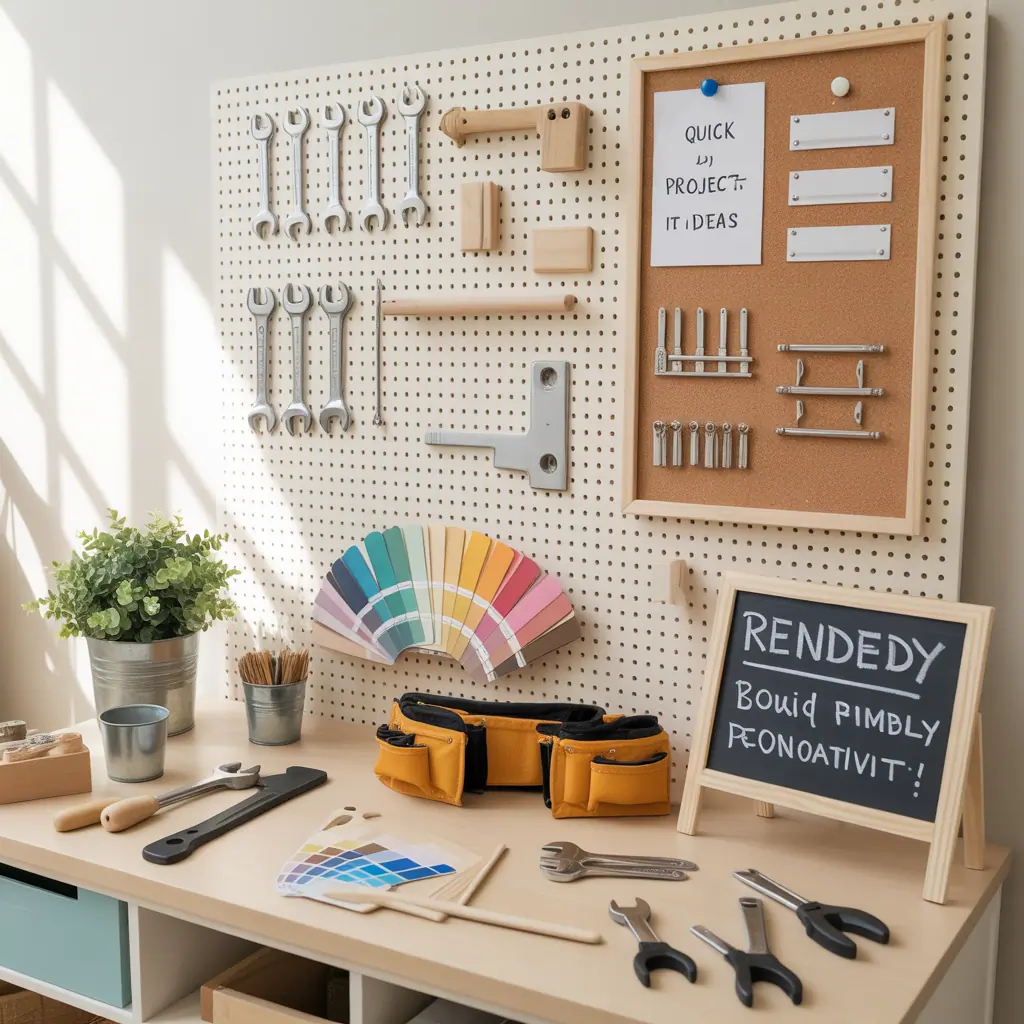
Tools and materials checklist
- Measuring tape, level, and pencil
- Plumbing tools (wrenches, PEX or copper supplies if you’re moving lines)
- Cement backer board, waterproof membrane, tile, grout
- Silicone caulk, tub surround or tile trim
- Glass door kit or curtain hardware
- Safety gear: gloves, goggles, dust mask
Budget-smart tips
- Keep the tub near existing plumbing to cut labor costs.
- Refinish an existing tub instead of replacing if the shell is solid.
- Mix high/low finishes — splurge on a tile accent wall, economize on basic fixtures.
- Do demolition and tiling yourself if you have the skills, hire licensed pros for plumbing and electrical work.
Design inspiration: style choices for your shower tub layout
Design touches elevate a practical layout into something beautiful and personalized.
- Use vertical subway tiles or large tiles to make the ceiling feel higher.
- Add a built-in bench in an alcove or corner layout for accessibility and relaxation.
- Install a linear drain for a modern look and easier slope planning in curbless showers.
- Choose matte black or brushed brass fixtures to add contrast and character.
- Consider a pocket door or barn door if space is tight and you want to avoid door swings.
For more project ideas and step-by-step guides, see our DIY projects and browse related home design ideas to combine bathroom inspirations with kitchen upgrades and other remodeling plans.
Real-world advice: common pitfalls and how to avoid them
- Don’t overlook ventilation — proper exhaust fans prevent mold in tub-shower combos.
- Mind accessibility — if aging in place is a concern, install grab bars and consider lower thresholds.
- Confirm tile slope — inadequate slope can lead to standing water and leaks in the long run.
- Check local codes — some plumbing moves require permits and inspection.
Frequently Asked Questions
1. What is the best shower tub layout for a small bathroom?
For small bathrooms, an alcove shower tub layout or a compact corner tub usually works best. These layouts keep plumbing confined to one wall and maximize floor space. Choosing a clear glass door or a curved shower curtain can make the room feel larger.
2. Can I convert a bathtub into a walk-in shower?
Yes, converting a bathtub to a walk-in shower is common. Expect to adjust drainage and possibly move plumbing slightly. You’ll need to reconstruct the tub surround, waterproof the area, and install a shower pan or tile base. It’s a great way to improve accessibility and modernize the space.
3. How much does reconfiguring a shower tub layout cost?
Costs vary widely depending on scope. Minor updates (retiling, replacing fixtures) can be a few hundred to a few thousand dollars. Moving plumbing or increasing the footprint can cost several thousand to tens of thousands. Get multiple quotes and plan for a 10–20% contingency for unexpected issues.
Conclusion: plan your shower tub layout with confidence
Whether you’re working within a tiny footprint or redesigning a master bath, the right shower tub layout improves usability, safety, and curb appeal. Start with accurate measurements, keep plumbing changes to a minimum for budget-friendly updates, and mix form with function using simple design choices. Ready to take the next step? Sketch your ideal layout, gather materials, and consult our DIY projects and kitchen upgrades pages for more remodeling inspiration. Then pick one practical project — even a small update can make a big difference.
Want help planning your layout or a checklist to start your remodel? Leave a comment or download our planning worksheet to get started today.