Ever stood in your bathroom and wondered how a tired shower could become the oasis you deserve—without a full remodel? Maybe you’re staring at cracked grout, beige tile that feels frozen in 1998, or plain drywall that’s begging for personality. Whether you’re tackling a weekend DIY or planning a phased renovation, updating shower walls is one of the highest-impact, cost-effective projects you can do. Here are practical, creative shower ideas for walls that you can actually install, maintain, and enjoy.
Why Upgrading Shower Walls Makes a Big Difference
Shower walls set the tone for the entire bathroom. They influence perceived space, light, and the overall style—from spa-minimalist to vibrant boho. Choosing the right wall treatment affects waterproofing, maintenance, and resale value, so this isn’t just decoration: it’s smart home improvement.
Top Shower Ideas for Walls
Below are durable, eye-catching options—each with real-world pros and cons and DIY-friendly tips.
1. Classic Subway Tile (with a Modern Twist)
- Why it works: Timeless, inexpensive, easy to source.
- Variations: vertical stack, herringbone, or elongated 3×12 subway tiles for a modern look.
- DIY tip: Use spacers, a level, and a tile saw for clean cuts; choose epoxy grout for stain resistance.
2. Large-Format Porcelain or Stone-Look Tiles
- Why it works: Fewer grout lines create a sleek, seamless look and are easier to clean.
- Best for: Small showers that feel cluttered—large tiles visually expand space.
- Installation note: Heavy tiles need a strong backer and proper thinset; consider a pro for very large formats.
3. Waterproof Wall Panels (A Fast, Low-Mess Option)
- Types: PVC panels, acrylic, solid-surface sheets, and composite wall panels.
- Pros: Quick installation, minimal grout, great for renters or speedy updates.
- DIY tip: Cut panels with a fine-tooth blade, seal seams with silicone, and use adhesive recommended by the manufacturer.
4. Natural Stone and Mosaic Accents
- Why it works: Adds texture and luxury—perfect for a feature or accent wall.
- Keep in mind: Stone is porous and requires sealing; use mesh-backed mosaics to simplify installation.
5. Paintable, Waterproof Backer Systems
- Options: Cement backer board with waterproofing membrane (e.g., trowel-on or sheet membranes).
- Best for: Custom finishes like microcement or waterproof paint for a spa-like, continuous surface.
- DIY tip: Follow manufacturer instructions for membrane cure times and compatibility with tile or paint finishes.
Design Inspiration and Layout Ideas
Think beyond tile choice. Wall layout, grout color, and decorative details elevate the finished look.
Feature Wall or Accent Stripe
Create contrast with a mosaic strip, darker grout, or textured tiles on one wall. This draws the eye and adds personality without overwhelming the space.
Vertical vs. Horizontal Tile Layout
Vertical tiles make ceilings feel taller; horizontal layouts widen the visual space. For a modern twist, try diagonal or herringbone patterns on the back wall only.
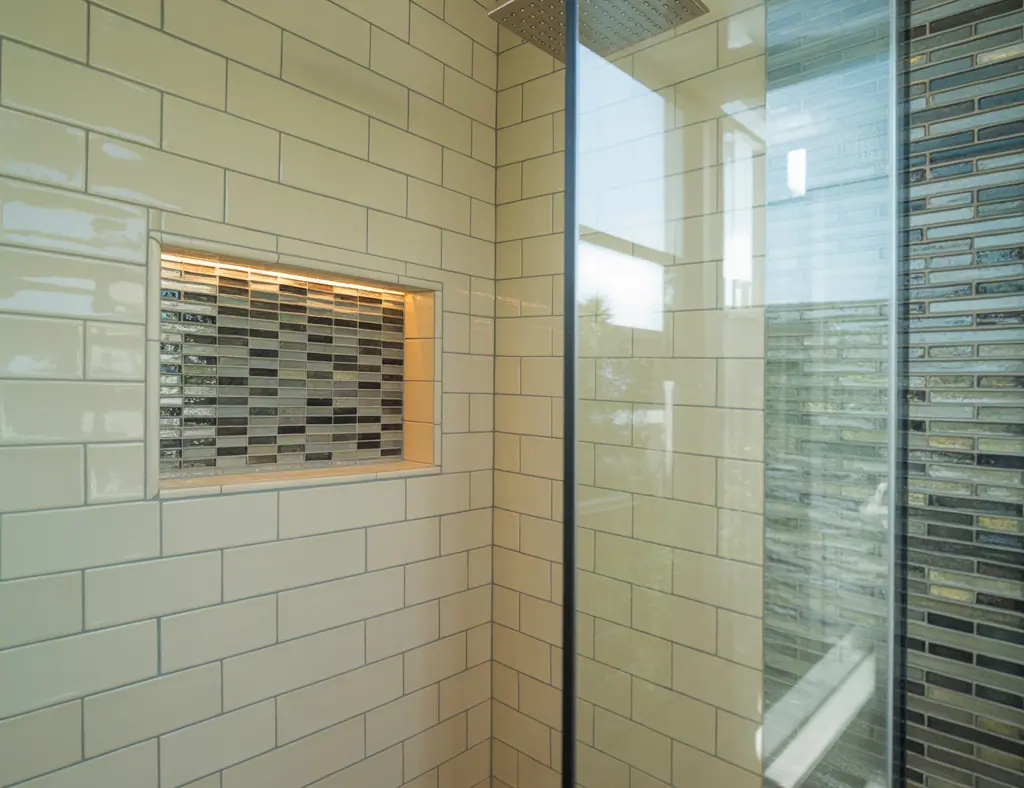
Recessed Niches and Built-In Shelving
Incorporate a recessed niche for shampoo and body wash. Line it with a contrasting tile or add an LED strip for subtle lighting—both functional and stylish.
Step-by-Step DIY: Retiling a Shower Wall
- Prepare: Turn off water if needed, remove old fixtures, and score caulk lines. Protect the floor and fixtures.
- Inspect the substrate: Replace damaged drywall with cement backer board and ensure studs are plumb.
- Waterproofing: Apply a waterproof membrane (sheet or liquid) over seams and corners—this step prevents leaks.
- Layout: Snap chalk lines and dry-fit tiles to avoid awkward cuts at edges.
- Set tiles: Use thinset mortar and a notched trowel; press tiles firmly and use spacers for even grout lines.
- Grout: After the thinset cures (usually 24 hours), apply grout and clean excess with a sponge. Consider epoxy grout for showers with heavy use.
- Seal: If using natural stone, apply a penetrating sealer once the grout is cured.
- Finish: Replace fixtures, apply silicone caulk along edging, and enjoy your refreshed shower.
Practical Maintenance and Longevity Tips
- Ventilation: Run the bathroom fan to reduce moisture buildup and prevent mold.
- Use the right grout: Epoxy or silicone-enhanced grout reduces staining and mold growth.
- Regular cleaning: Use pH-neutral cleaners on stone and mild detergents for porcelain and glazed tiles.
- Inspect seals: Re-caulk every few years where tile meets tub or glass to maintain a watertight seal.
Budget-Friendly vs. High-End Choices
If you’re on a budget, consider peel-and-stick tiles for a temporary refresh or invest in waterproof panels for a quick, affordable upgrade. For higher-end renovations, natural stone, large-format porcelain, and custom mosaics offer long-term beauty and durability that can increase resale value.
Tools and Materials Checklist
- Tools: Tile cutter or wet saw, notched trowel, grout float, tile spacers, level, caulk gun
- Materials: Cement backer board, waterproof membrane, thinset, tiles or panels, grout (epoxy or cement-based), silicone caulk
- Safety: Eye protection, gloves, dust mask
Frequently Asked Questions
Q: What are the most waterproof shower wall options?
A: Solid-surface waterproof wall panels, large-format porcelain tiles with a proper membrane, and fully tiled walls over a reliable waterproofing system are the most waterproof. Always use a certified grout and caulk for seams.
Q: Can I install tile over existing tile in my shower?
A: Yes, but only if the existing tile is secure, clean, and flat. Roughen the surface and use a proper bonding mortar. In many cases, removing old tile and inspecting the substrate is recommended to ensure long-term performance.
Q: How difficult is a DIY shower wall renovation?
A: Difficulty depends on the method. Installing waterproof panels or peel-and-stick tiles is beginner-friendly. Traditional tile work, especially with large-format tiles or natural stone, requires intermediate skills and specialized tools. Waterproofing and substrate prep are crucial—don’t skip them.
Conclusion — Start Your Shower Wall Makeover Today
With a mix of creative design choices and practical installation tips, upgrading your shower walls can transform your bathroom without a full gut job. From classic subway tile and striking large-format slabs to quick-install waterproof panels, there’s a solution for every skill level and budget. Ready to try one of these shower ideas for walls? Gather your tools, pick a design that matches your home, and start with one wall—then expand as your confidence grows.
Want more project inspiration? Check out our pages on DIY projects, kitchen upgrades, and home design ideas for tips and step-by-step guides to refresh other areas of your home.
Call to action: Share your favorite shower wall idea in the comments or upload a before-and-after photo to inspire other DIYers—let’s make bathrooms better, one wall at a time.