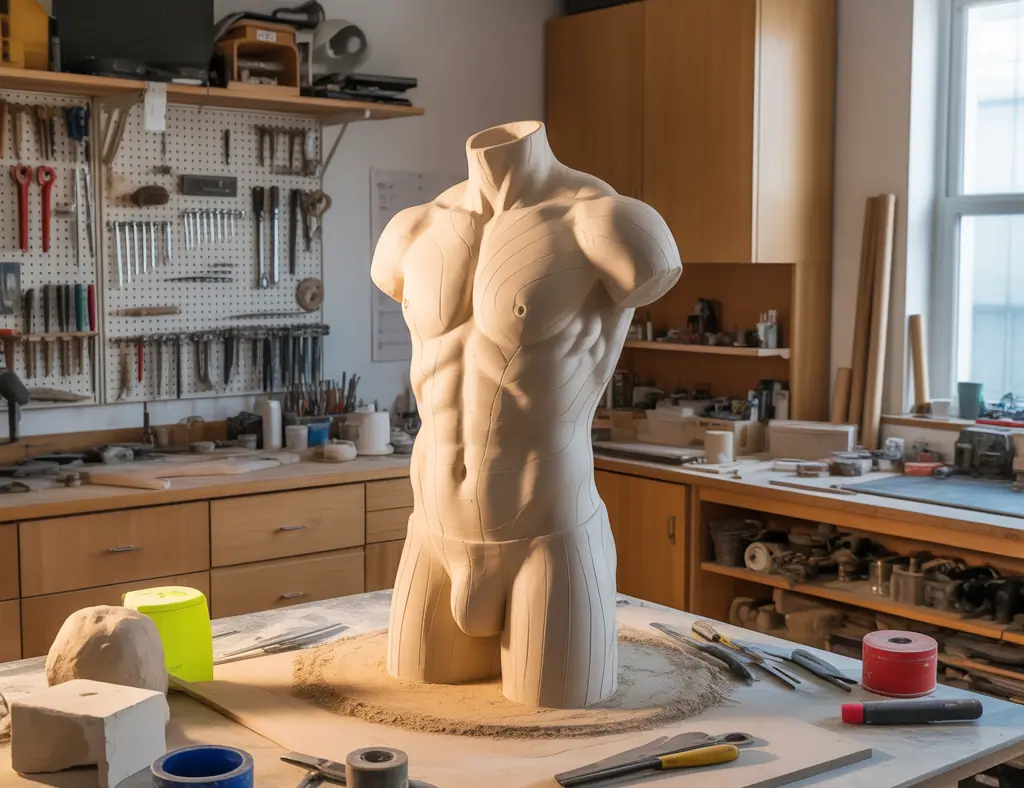
Have you ever tried to finish a clay torso on your kitchen counter while your partner wanted to cook dinner? If you’re frustrated by limited space, messy surfaces, and poor lighting, you’re not alone. Whether you’re carving life-sized forms or modeling small figurines, smart sculpting room body ideas can transform a cramped corner into a comfortable, productive studio that protects your home and inspires creativity.
Sculpting room body ideas
Why a dedicated sculpting studio matters
A dedicated space gives you better lighting, ventilation, and storage—three essentials for working with clay, plaster, resin, or metal. Separating messy materials from living areas protects finishes and family members from dust and fumes. Plus, a consistent workspace speeds workflow: tools stay organized, work-in-progress stays safe, and you spend less time setting up and cleaning.
Key features to prioritize
- Ventilation: Use an exhaust fan or portable dust extractor when sanding or mixing plaster. Even modest ventilation greatly reduces airborne particles.
- Durable flooring: Waterproof vinyl plank or painted concrete is easy to sweep and mop—avoid wall-to-wall carpet.
- Work surface: A sturdy adjustable-height bench or easel with a removable top protects surfaces and lets you work ergonomically.
- Lighting: Combine a bright overhead fixture with adjustable task lights (daylight-spectrum bulbs) to reveal subtle forms and shadows.
- Plumbing: If possible, add or locate your studio near a sink for tool washing and plaster cleanup.
Step-by-step DIY build plan for your sculpting workspace
Convert a closet, spare bedroom, or garage corner into a functional sculpting room with these practical steps.
- Choose the right space: Pick a room with natural light and access to ventilation or a window. Small sculpting studio ideas often start with a spare bedroom or corner of the garage.
- Prep the floor and walls: Install water-resistant flooring if needed. Paint walls a neutral mid-tone (soft grey) to accurately judge color and shadow.
- Set up ventilation: Install a window fan or inline exhaust near the workbench. Add a HEPA-rated portable dust extractor for sanding and dry material work.
- Build your workbench: Create a 2×4 frame topped with plywood and a replaceable MDF or melamine surface. Add wheels for mobility if you need to reconfigure the room.
- Install task lighting: Mount adjustable arm lamps on the bench and overhead daylight LED fixtures for even coverage.
- Create material zones: Dedicate one shelf for clays and polymers, one for casting materials (plaster, silicone), and a wet zone near a sink for clean-up.
- Organize tools: Use pegboard for hand tools, magnetic strips for metal scrapers, and labeled bins for small tools and armature supplies.
- Safety and finishing: Add a washable drop cloth, a respirator in a visible place, and a small first-aid kit. Include a display wall or shelf for finished pieces to keep things inspiring.
Storage, tools, and organization hacks
Smart storage saves time and prevents damage. These real-world tips work for hobbyists and pros alike:
- Vertical storage: Tall shelving units keep bulk materials off the floor. Use labeled clear bins so you can see contents at a glance.
- Pegboard & slatwall: Rearrangeable hooks and shelves make tool placement flexible as your projects change.
- Mobile carts: A rolling cart with drawers doubles as a portable tool station and tidy-up caddy when guests arrive.
- Drying racks: Install wall-mounted folding racks for plaster and clay pieces to cure without taking floor space.
- Armature storage: Keep wire, rebar, and mannequin forms in labeled tubes or hang them vertically to prevent bending.
Design inspiration: styles and finishing touches
Your sculpting room should feel like a creative retreat. Consider these themes and finishes:
Industrial loft
Exposed shelving, concrete floors, black metal stools, and Edison-style task lights create a rugged, professional feel ideal for large-scale body sculpture.
Minimalist studio
White walls, hidden storage, and a single adjustable worktable maintain focus on form rather than clutter. This is great if you also use the room for photography or display.
Compact corner studio
For small sculpting studio ideas, use fold-down work surfaces, wall-mounted lighting, and under-bench storage to maximize a tight footprint.
Practical safety and material tips
- When working with plaster or resins, mix in a well-ventilated area and wear a respirator. Keep MSDS sheets for materials on hand.
- Use puncture-resistant gloves when handling armature wire and metal tools.
- Keep a separate bin for wet rags to avoid spontaneous combustion risks with oil-based materials.
- Test finishes and sealants on scrap pieces to check cure time and color before applying to a final body sculpture.
Frequently Asked Questions
1. How much space do I really need to sculpt body forms at home?
You can start with as little as a 6′ x 6′ corner for small- to medium-scale works by using vertical storage and a fold-down bench. For life-size sculptures, plan for 10′ x 10′ or more to allow 360° access and safe movement of materials.
2. What lighting works best for sculpting?
Daylight-spectrum LEDs (5000–6500K) give the most accurate view of detail and shadow. Combine one overhead fixture with two adjustable task lamps—one at head height, one lower—to sculpt without losing subtle form cues.
3. How do I control dust and fumes in a home sculpting space?
Install a window or inline exhaust fan for air exchange and use a HEPA-rated dust extractor when sanding. Wear a proper respirator for fine particulates and follow manufacturer instructions for resins and solvents.
Conclusion: Take your sculpting room from chaos to creative sanctuary
With thoughtful planning, durable surfaces, and a few clever storage solutions, these sculpting room body ideas will help you build a studio that supports better work and a healthier home. Start small—convert a closet or spare corner—and iterate as your needs grow. Ready to tackle your studio makeover? Browse our DIY projects for step-by-step builds, check creative layouts under our home design ideas section, or get inspired by multi-use solutions from our kitchen upgrades page to borrow storage and finish ideas.
Share your studio before-and-after photos or ask for layout feedback—I’d love to help you plan the sculpting room that brings your work to life. Get started today!