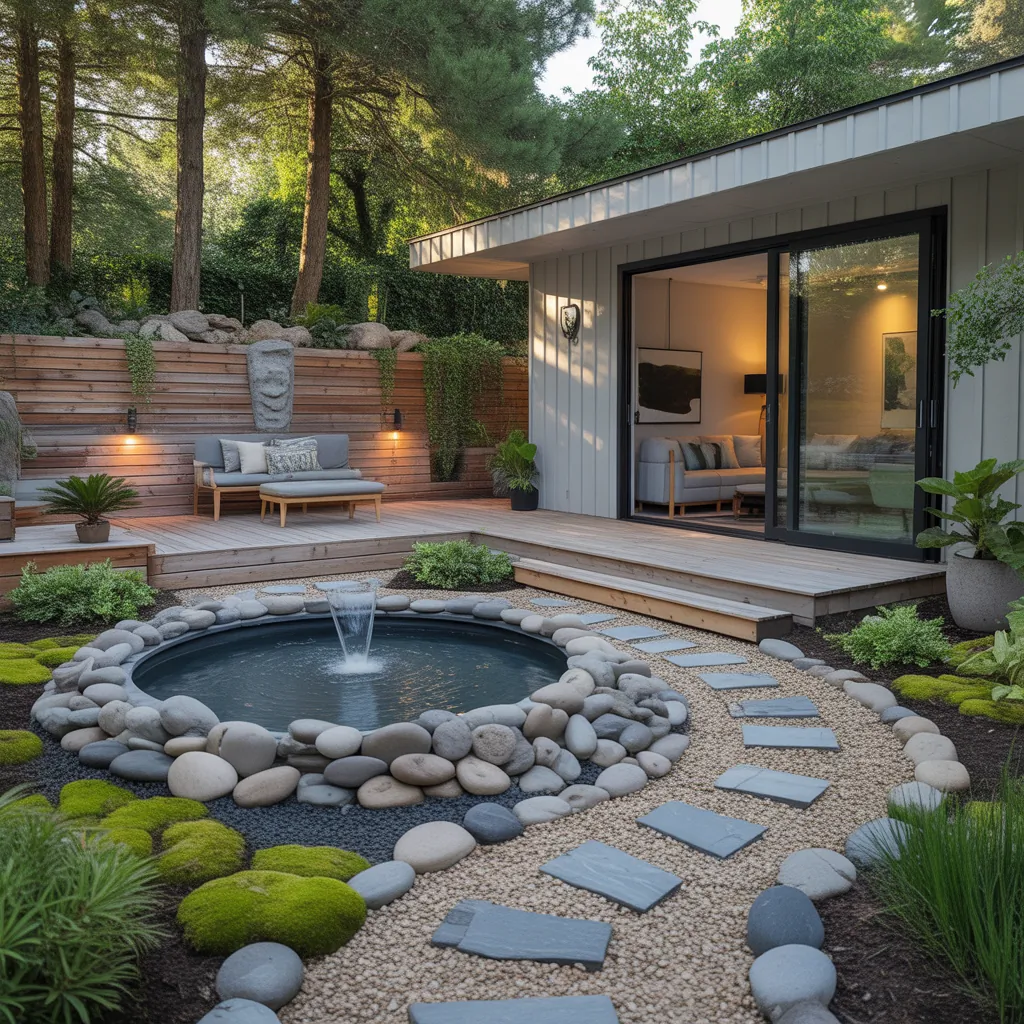
Ever stared at a tired patch of lawn and wondered how to turn it into something low-maintenance yet stunning? Maybe you want to hide drainage problems, add texture to a sloped area, or create a soothing focal point without hiring a landscaper. River rock landscaping picture ideas can give your yard that designer touch with a homeowner-friendly DIY approach.
Why Choose River Rock for Your Landscape?
River rock—smooth, rounded stones worn by water—adds natural texture, color variation, and durability. Unlike crushed gravel, river rocks are large enough to stay in place, resist erosion, and work well around plants, pathways, and water features. They’re perfect for dry creek beds, rock mulching, borders, and accents that photograph beautifully for before-and-after shots.
River Rock Landscaping Picture Ideas: Inspiration and How-Tos
Below are practical projects and design ideas you can try this weekend, plus tips to stage great photos of each result.
1. Dry River Bed
Ideal for guiding runoff away from foundations and adding natural movement to a flat yard.
- Materials: landscape fabric, 3–6″ river rocks, boulders (optional), edging, garden shovel.
- Step-by-step:
- Photo tip: Shoot at a 45-degree angle to show flow and use golden-hour light for warm tones.
2. River Rock Pathway
A soft, organic path that works well between garden beds or to a backyard seating area.
- Materials: paver edging, compacted sand base, 1–2″ river rock or mixed sizes, landscape fabric.
- Steps:
- Tip: Use stepping stones or larger flat rocks in the center for safer footing and visual interest.
3. Rock Mulch Around Plants
Replace organic mulch with river rock for a long-lasting, drought-friendly groundcover around succulents, ornamental grasses, and perennials.
- Use 1–2″ river rock and a weed barrier beneath. Keep rocks a few inches away from plant crowns to avoid rot.
- Mix in smaller gravel near roots to improve drainage and help with temperature moderation.
4. River Rock Patio Accent & Fire Pit
Define a backyard social area by creating a circular river rock border or surrounding a fire pit with smooth stones.
- Design with color contrast: pairing gray pavers with warm-toned river rocks creates depth.
- For safety, leave a non-flammable buffer between flames and rocks and set pavers firmly on a compacted base.
Design Tips: Colors, Sizes, and Plant Pairings
Choosing the right stones and plants helps your river rock landscape photograph and function well.
- Stone size: Use 3–6″ river rocks for dry creek beds and accents; 1–2″ for pathways and mulch.
- Color palettes: Cool grays and blues pair with silver foliage; warm tans and browns complement red mulch and warm-toned gardens.
- Plants: Combine with native grasses, lavender, sedum, and ornamental grasses for texture contrast and easy care.
- Scale: Use larger boulders as focal points to balance wide expanses of small rock.
Practical DIY Tips & Maintenance
- Weed control: Install a permeable landscape fabric, but avoid impermeable plastic that traps water.
- Edging: Steel or stone edging prevents rock migration onto lawns and walkways.
- Cleaning: Use a leaf blower for light debris; for deeper cleaning, lift and rinse rocks yearly.
- Budgeting: Expect river rock costs to be higher than crushed gravel—plan by cubic feet and factor in delivery bulk.
- Safety: Wear gloves; river rocks can be heavy. Use a wheelbarrow and proper lifting technique.
How to Stage River Rock Landscaping Picture Ideas for Great Photos
Since your goal might be to create Instagram-worthy before-and-after shots, follow these quick styling tips:
- Shoot during golden hour for soft shadows and rich colors.
- Include a human element (hand on a rake, kid on stepping stone) to show scale.
- Take wide shots to show layout and close-ups for texture contrast—river rocks photograph beautifully up close.
- Use props like a vintage watering can or lantern near the rock bed for lifestyle appeal.
Step-by-Step Weekend Project: Build a Small River Rock Accent Bed
- Plan (1 hour): Sketch the area and measure square footage.
- Prepare (2–3 hours): Remove grass, level soil, and lay landscape fabric.
- Place features (1 hour): Arrange boulders and larger stones first.
- Add river rock (2 hours): Spread stones with a wheelbarrow and rake into place.
- Plant and finish (1 hour): Install drought-tolerant plants and edge the bed.
Most small projects can be completed in a weekend with one helper and basic tools.
Costs & Where to Buy
River rock pricing varies by region and size. Buying by the ton is cost-effective for large areas; smaller bags are fine for accent projects. Ask suppliers about clean versus screened stones—clean stones are ready to lay, while screened options may include fines that shift over time.
Frequently Asked Questions
Q: Is river rock good for drainage?
A: Yes. Larger river rocks allow water to flow through and reduce runoff when paired with proper grading and landscape fabric. They are commonly used in dry creek beds and around downspouts.
Q: Will river rock attract weeds?
A: Weeds can still appear. Prevent them by installing a permeable weed barrier and using a 2–3″ depth of stone. Pull visible weeds early and consider a pre-emergent in spring if persistent.
Q: Can I mix river rock with other landscape materials?
A: Absolutely. Mixing river rock with mulch, pavers, gravel, or native plants adds contrast and function. Use larger rocks for focal points and smaller stones for filling and pathways.
Conclusion: Try These River Rock Landscaping Picture Ideas This Season
River rock landscaping picture ideas offer practical, attractive solutions for drainage, low-maintenance beds, pathways, and accents that photograph beautifully. Start with a small weekend project, stage your before-and-after shots using the photo tips above, and scale up as you gain confidence. Ready to get started? Browse our DIY projects for more step-by-step guides or explore home design ideas to match your landscape to your home’s style. If you want kitchen or interior inspiration next, check out our kitchen upgrades page.
Share your river rock transformation and inspire others—then come back for more practical ideas and pro tips.


