Ever opened your pantry to find a sad, sprouting bag of potatoes right when you were about to prep a family meal? You’re not alone. Between kitchen upgrades, weekend projects, and trying to reduce food waste, knowing how to store potatoes properly is one of those small home-improvement wins that saves time, money, and frustration. In this article I’ll walk you through practical, design-forward potato storing tips, step-by-step DIY storage ideas, and real-world advice so your spuds stay firm, tasty, and ready for dinner.
Why proper potato storage matters
Potatoes are a staple, but they can quickly go soft, sprout, or become bitter if stored improperly. The right environment preserves texture and flavor, prevents spoilage, and reduces waste — and you don’t need a professional root cellar to do it. Understanding temperature, humidity, light exposure, and air flow is the first step to mastering potato storage at home.
Potato storing tips: the basics every homeowner should know
1. Ideal temperature and humidity
Store potatoes in a cool, dark place around 45–50°F (7–10°C). Too cold (like a refrigerator) and the starch converts to sugar, making potatoes sweet and gritty when cooked. Too warm and they sprout. Aim for moderately high humidity — about 80–90% — to prevent shriveling without encouraging rot.
2. Keep them in the dark
Light causes greening and the production of solanine, a bitter compound. Use opaque containers, covered bins, or a dark pantry shelf. Good ventilation is also essential to prevent moisture buildup and mold.
3. Ventilation and separation
Potatoes need air. Avoid sealed plastic bags. Instead, use breathable materials like burlap sacks, mesh bags, wooden crates with slats, or purpose-built storage bins with ventilation holes. Remove damaged or bruised potatoes immediately to prevent spread of rot.
4. Don’t store potatoes with onions or apples
Onions and apples emit ethylene gas, which accelerates sprouting and decay in potatoes. Keep them in separate storage areas.
DIY potato storage projects for any budget
Build a simple ventilated potato box (step-by-step)
- Materials: 1 wooden crate or 1/2″ plywood to build box, 1″ slats for ventilation, screws/nails, drill, sandpaper, breathable paint (optional), thermometer/hygrometer.
- Cut and assemble the box: build a rectangular box roughly 18″ x 12″ x 12″. Space slats about 1/2″ apart on sides for airflow.
- Sand and finish: avoid varnishes that seal the wood completely — a light coat of breathable paint or natural oil is fine.
- Label and place: keep box on a cool, dark shelf or in the basement, off concrete by 1–2″ on small feet to allow air circulation.
- Monitor: add a small thermometer/hygrometer to track conditions and rotate potatoes periodically (first in, first out).
Convert a pantry drawer into a potato station
If you’re doing kitchen upgrades, turning a lower pantry drawer into a potato storage drawer is stylish and functional. Install a mesh or slatted drawer bottom for airflow, mount small vents or a passive vent grate to the cabinet door, and use labeled compartments to separate varieties. This integrates beautifully with modern kitchen design while keeping potatoes out of sight and in the right conditions.
Root cellar alternative for small spaces
No basement? Create an insulated “mini-root cellar” by placing a sturdy cooler or insulated box in the coolest part of your home (garage or closet). Line with straw or newspaper for insulated humidity control, and check temperature regularly. This is a great DIY project when you want long-term potato storage without extensive construction.
Design inspiration: stylish and functional potato storage
Good storage can also look good. Consider these ideas:
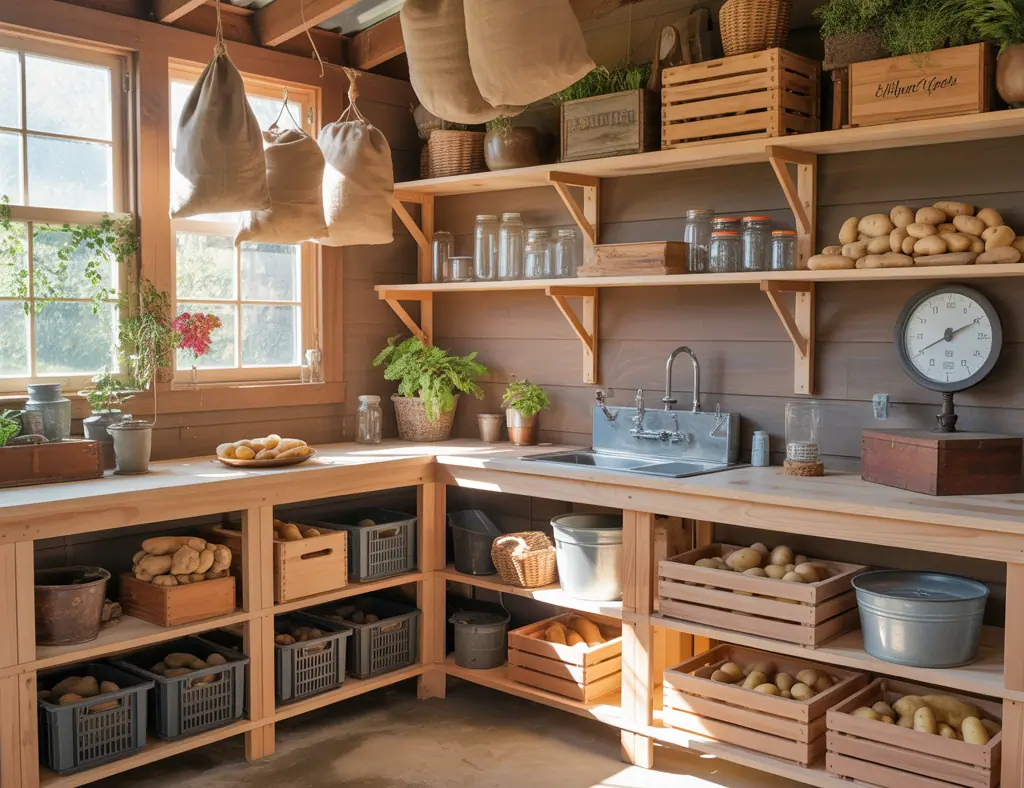
- Reclaimed wood crates stacked in a pantry for a rustic, farmhouse look.
- Bespoke pull-out mesh drawers built into a kitchen island for a modern, minimal aesthetic.
- Wall-mounted racks with breathable bags that double as decor in an industrial-style kitchen.
These ideas blend function with aesthetics so your potato storage complements your home design. For more project inspiration, check out our pages on DIY projects and home design ideas.
Real-world potato storing tips and troubleshooting
Dealing with sprouting
Sprouts are harmless but reduce the potato’s quality. Remove sprouts and use potatoes quickly. To prevent sprouting, store at cooler temperatures, in darkness, and remove any tubers that show early sprouting signs.
Wet or rotting potatoes
If you find a wet or rotten potato, discard it immediately and inspect the rest. High humidity or trapped moisture causes rot — improve ventilation and replace any non-breathable containers.
Storage lifespan by method
- Cool dark pantry: 2–3 months depending on variety
- Basement or root cellar: 3–6 months for many varieties
- Refrigerator: Not recommended — will alter flavor and texture
Frequently Asked Questions
Can I store potatoes in the refrigerator?
No. Refrigeration converts potato starch to sugar, changing flavor and texture and causing dark spots when cooked. Use a cool, dark, ventilated area instead.
How long will potatoes last if stored properly?
When stored in ideal conditions (cool, dark, 45–50°F, high humidity), most potatoes last 2–6 months depending on the variety and whether they were cured properly after harvest.
Can I store potatoes and onions together?
Do not store them together. Onions emit ethylene gas that causes potatoes to sprout and spoil faster. Keep them in separate bins or areas.
Conclusion: Try these potato storing tips and make it a DIY win
Mastering potato storage is an easy home improvement that pays off at every meal. Use these potato storing tips — control temperature and humidity, keep them in the dark, provide ventilation, and try a simple DIY ventilated box or pantry drawer conversion. Small design tweaks and smart organization keep your potatoes fresher, reduce waste, and give you another satisfying weekend project. Ready to upgrade your kitchen storage or try a DIY potato box? Explore our kitchen upgrades ideas and start building today.
Have questions about building a potato box or choosing the best spot in your home? Leave a comment or try one of the projects — your kitchen (and your wallet) will thank you.