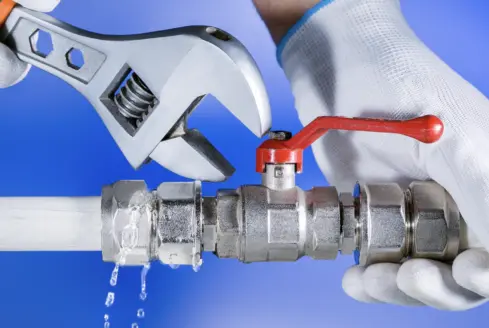
Identifying and repairing plumbing leaks in your home can save you a significant amount on your water bill and prevent costly damage. Leaks increase your water consumption unnecessarily and may lead to structural issues if left unattended. Early detection is key to maintaining a safe and efficient plumbing system.
Start by inspecting valves and fixtures for any visible signs of leaks. Then, monitor your pipes and water meter closely to pinpoint the exact source. Here’s some practical homeownership advice that can help you manage plumbing leaks effectively.
Where Do Leakages Happen?
Plumbing leaks often occur due to loose pipe couplings, worn washers and gaskets, or malfunctioning fixtures. Common leak sources in a home include:
Toilets
A running toilet can waste up to 200 liters of water daily. Typical leak points include the water supply line, flapper valve, fill valve, or overflow pipe.
Faucets
Drips from faucet spouts and leaks at the base often result from deteriorated washers and O-rings. If you’re unsure, consider consulting a professional plumber Bigstuff3 Plumbing Advice to prevent costly mistakes.
Showerheads
Persistent drips may be caused by worn washers or mineral buildup inside the showerhead. Leaks can also occur at joints and connections.
Water Heater
Leakages may arise from loose pipes, malfunctioning valves, or corrosion in the tank. The pressure release valve’s drain line could also leak.
Dishwasher
Water may leak from door gaskets or feed lines. Pools of water may also appear underneath the dishwasher if leaks are present.
Washing Machine
Leaks can occur from the door gasket, drain hose, or water supply lines. Check for water puddles beneath the machine as an indicator.
Refrigerator
Water leaks may come from worn door gaskets or the water line supplying the ice maker.
Pipes
Pipes may leak because of corrosion, freezing, loose couplings, or cracks. Sewer drain joints and connections can also drip.
Water Heater Pan
If the protective pan beneath the water heater is connected to a drain line, leaks may originate from this pan.
Exterior Hose Bibs
Leaking valves, worn washers, and O-rings in outdoor spigots can cause unexplained basement leaks.
Examining Fixtures
Begin your leak detection by thoroughly inspecting all fixtures in your home. Look under sinks for mold, mineral deposits, or standing water https://www.usgs.gov/centers/national-minerals-information-center/mineral-industry-tennessee. After turning the main water supply back on, check all joints for any leaks.
Turn showerheads and valves on and off to detect drips around joints. Run your washing machine and dishwasher empty to check for leaks near door seals and connectors.
Examining Supply Valves
To isolate a leak, close the shut-off valves one at a time on each fixture. If closing a specific valve stops the leak visible on your water meter, the issue is within that fixture’s supply line. Inspect the valves for your washing machine, toilet, faucets, and the main shut-off valve.
This step helps determine if the leak is in your entire plumbing system or localized to a specific fixture. Turning off supply valves individually can help eliminate outflow and pinpoint the problem area.
Observing the Water Meter
Locate your water meter—usually found in the basement, crawlspace, or a concrete box near the street. Record its current reading when no water is being used.
Return after two hours (or longer) without any water consumption to check if the meter reading has changed. A higher reading indicates a leak. For more accurate results, avoid using water for at least four hours before rechecking.
To differentiate between indoor and outdoor leaks, close your home’s main shut-off valve and record the meter reading. If the meter still registers movement, there may be leaks in exterior hose bibs or underground irrigation systems learn more.
Checking Pipes
Interior Pipes
Inspect visible supply and drain pipes in crawlspaces, basements, and under sinks for signs of corrosion, rust, discoloration, or mineral buildup. Pay attention to condensation or moisture indicating potential leak spots.
For homes with slab foundations, check ceilings and walls for wet spots or moisture accumulation.
Exterior Pipes
Look for pools of water around the basement or crawlspace floor. By shutting off interior valves as previously mentioned, you can determine if leaks are coming from outside pipes or your home’s plumbing system.
Regular monitoring of your plumbing helps detect issues early. Be alert for signs like mold, dampness, gurgling sounds, or unusual odors.
Locating External Leakages
When checking for leaks, don’t overlook your home’s exterior and its supply lines. Outdoor plumbing components, such as irrigation systems and hose bibs, can malfunction and cause costly water waste and property damage.
Inspect areas where pipes pass through exterior walls or the foundation. Use a moisture meter and listen carefully for running water sounds to detect hidden leaks outside.
For further information about leak detection and repairs, please visit our Home Appliances category and explore 10 Eco-Friendly Materials to Consider When Building Prefabricated Homes for expert advice.
Regular maintenance and prompt leak detection improve your home’s water efficiency and prevent potential damage. With rising water costs and increasing environmental concerns, addressing leaks is more important than ever. Incorporating smart water monitoring systems can enhance leak detection by alerting homeowners immediately, helping conserve water and reduce utility bills. Investing in durable plumbing fixtures and scheduled inspections every six months can extend the life of your plumbing system while ensuring leaks don’t go unnoticed. Remember, early action can save both water and money, protecting your property in the long run.