Have you ever stood at the edge of your backyard, staring at a plain fence and thought, “If only my vegetable patch had a gate that matched its personality”? Whether you’re battling rabbits, corralling kids, or simply trying to make your backyard feel more intentional, the right gate sets the tone. In this guide to outdoor vegetable garden gate themes, I’ll walk you through inspiring design ideas, practical DIY tips, and step-by-step plans so your garden entrance is both beautiful and functional.
Why the garden gate matters (and how a theme helps)
A gate isn’t just a functional entry point — it’s the first impression for anyone approaching your vegetable beds. A themed gate can enhance curb appeal, improve security (keeping pests and pets out), and support plant growth (trellis gates, for example). Think of it as an extension of your home’s aesthetic: rustic, modern, cottagey, or whimsical. Below are themes and design options that work specifically for vegetable gardens.
Outdoor vegetable garden gate themes
These gate styles are tailored to vegetable plots: they balance durability, ventilation, and often offer climbing support for vining crops.
1. Rustic farmhouse gate
- Materials: reclaimed wood, simple cross-bracing, black iron strap hinges.
- Why it works: weathered wood blends with natural beds and hides dirt build-up.
2. Cottage trellis gate
- Materials: lattice top or arched trellis, soft paint color.
- Why it works: provides a climbing surface for peas, pole beans, or morning glories.
3. Modern minimalist gate
- Materials: horizontal slatted wood or metal panels with small gaps for air/light.
- Why it works: clean lines complement contemporary landscaping and require low maintenance.
4. Wrought iron or metal gate
- Materials: powder-coated steel or aluminum for rust resistance.
- Why it works: high security and delicate scrollwork can look elegant without blocking airflow.
5. Living gate (green wall)
- Materials: metal frame with modular planters, or attached pots on a wooden frame.
- Why it works: adds growing space and a natural barrier, ideal for microgreens or herbs.
6. Upcycled pallet or door gate
- Materials: repurposed wood door or pallets, sealed for weatherproofing.
- Why it works: budget-friendly and full of character.
7. Privacy and pest-proof gate
- Materials: tight slats or chicken wire backing, secure latch.
- Why it works: keeps out rabbits, deer (with taller fence), and curious children.
DIY step-by-step: Build a simple framed garden gate
This is a versatile plan adaptable to many themes. Estimated time: 4–6 hours. Skill level: basic carpentry.
Materials
- 2x4s for frame (top, bottom, two sides)
- 1×4 or 1×6 boards for slats
- Exterior screws and wood glue
- Galvanized strap hinges and latch
- Exterior paint or stain and sealant
- Optional: lattice or trellis panel
Tools
- Circular saw or miter saw
- Drill/driver
- Clamps
- Measuring tape and square
- Level
Steps
- Measure the opening: subtract 1/2″ to 1″ for clearance so the gate swings freely.
- Cut the frame pieces and assemble a rectangular frame using glue and screws. Use clamps to square it before screwing.
- Attach slats vertically or horizontally, spacing them 1/2″–1″ for airflow. For a trellis top, leave space for lattice attachment.
- Sand and apply exterior stain or paint. Two coats of sealant protect against rot.
- Install hinges on the gate and post; a helper is useful for holding the gate at height while you fasten the hinges.
- Attach latch and test swing. Adjust hinge placement if the gate sags—use a drop-down pin or gate stay if needed.
Design finishes and practical upgrades
Small details make a big difference:
- Hardware: choose stainless steel or powder-coated hinges and latch for longevity.
- Pest control: add hardware cloth behind slats to stop small animals without blocking airflow.
- Weatherproofing: use end-grain sealer on cut wood and slope the top rail to shed water.
- Planters and hooks: attach box planters or tool hooks to the gate for instant functionality.
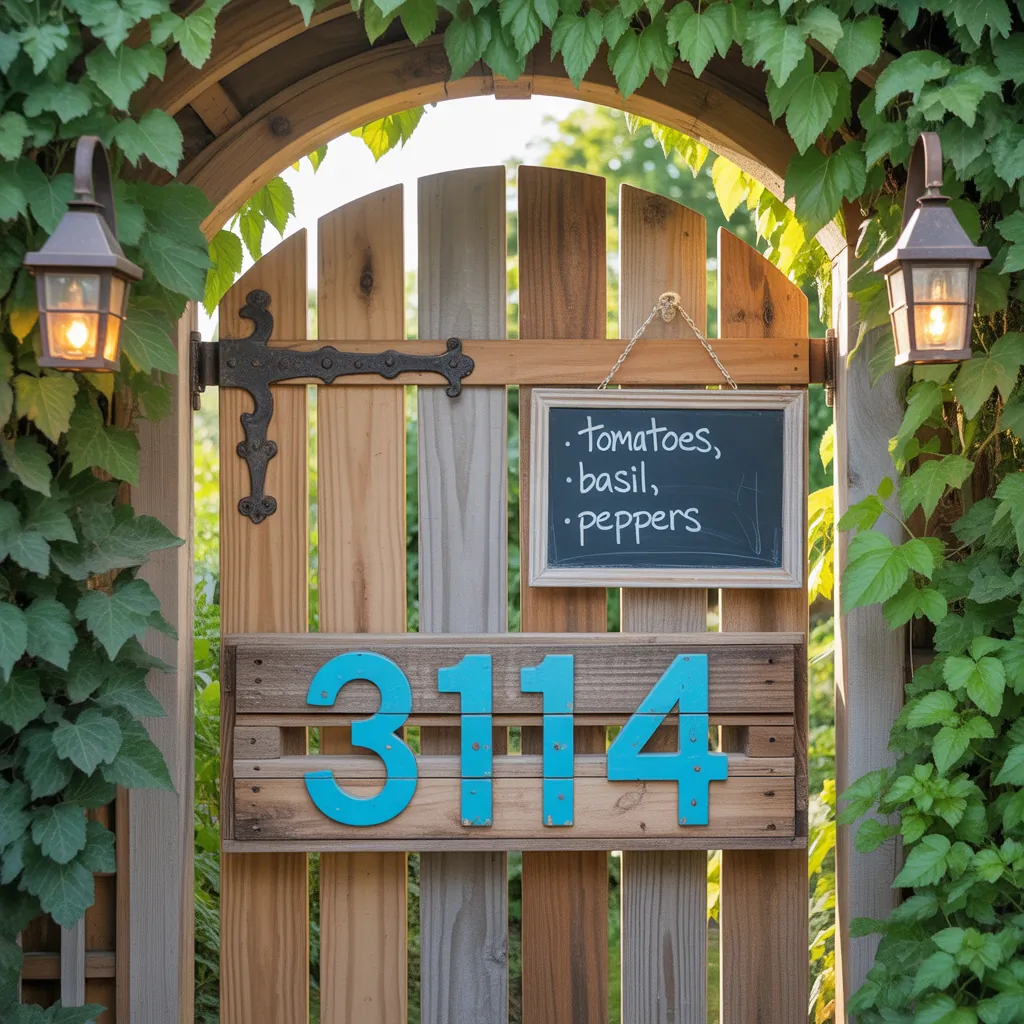
- Signage: paint a charming sign with your garden name or planting schedule.
Sizing, clearance, and safety tips
Practical measurements keep your gate working smoothly:
- Standard pedestrian gate widths: 36″ for accessibility; 30″–32″ is common for tighter spaces.
- Height: 3’–4′ often deters small critters; taller gates (5’–6′) are better for deer-prone areas.
- Clearance: leave a small gap at the bottom (1/2″–1″) so the gate doesn’t catch on soil or mulch.
- Support posts: use pressure-treated posts or metal t-posts set in concrete for stable hinges.
Design inspiration: mix and match themes
Try combining ideas for a custom look. A modern horizontal slat gate with an attached trellis provides both privacy and climbing supports. A reclaimed door painted a bright color adds cottage charm to a minimalist yard. Look for inspiration in materials you already have — old tools can become hooks, and leftover cedar becomes garden signage.
Real-world advice from the trenches
From years of DIY builds, here are practical lessons:
- Measure twice, cut once. Gate alignment is all about precision.
- Pre-drill screw holes to avoid splitting, especially near edges.
- Test hardware on a scrap piece to ensure the finish matches your design before final installation.
- Consider seasonal access: make clamps or removable panels if you need to bring in large tools or wheelbarrows.
Frequently Asked Questions
Q: What is the best gate for a vegetable garden?
A: The “best” gate balances airflow, durability, and ease of use. A framed wooden gate with slats is a top choice — it’s robust, breathable for plants, and easy to customize with trellis panels or mesh to keep pests out.
Q: How tall should a vegetable garden gate be to keep rabbits out?
A: Rabbits can often jump a foot or two, so a gate and fence at least 2–3 feet high helps deter them. For extra protection, add hardware cloth at the base or extend the fence 6–12 inches below grade if burrowing is an issue.
Q: Can I install a gate myself, and what tools do I need?
A: Yes — many gardeners build and install their own gates with basic carpentry skills. Essential tools include a saw, drill, level, measuring tape, and a helper for hanging the gate. Follow a step-by-step plan and use weather-resistant materials for longevity.
Conclusion: Make your entrance as intentional as your planting
A thoughtfully designed outdoor vegetable garden gate ties your gardening efforts together — it’s the welcome mat for your harvest and a tiny front door to an edible landscape. Use these outdoor vegetable garden gate themes and the step-by-step plan to create an entrance that’s practical, pest-resistant, and beautiful. Ready to start building? Check out more DIY projects for garden upgrades, browse ideas for how your kitchen could showcase that harvest in kitchen upgrades, or get broader inspiration on home design ideas. Share a photo of your gate and I’ll help troubleshoot or suggest finishing touches!