Ever stood in your small, outdated bathroom wondering how to get that iconic mid century modern vibe without gutting the whole room? Maybe you’ve scored a vintage sunburst mirror at a thrift sale and now want the rest of the space to match. Whether you’re tackling a weekend refresh or a budget remodel, mid century modern bathroom ideas can give your space clean lines, warm wood tones, and retro-modern charm—without sacrificing modern comfort.
What Is Mid-Century Modern Bathroom Style?
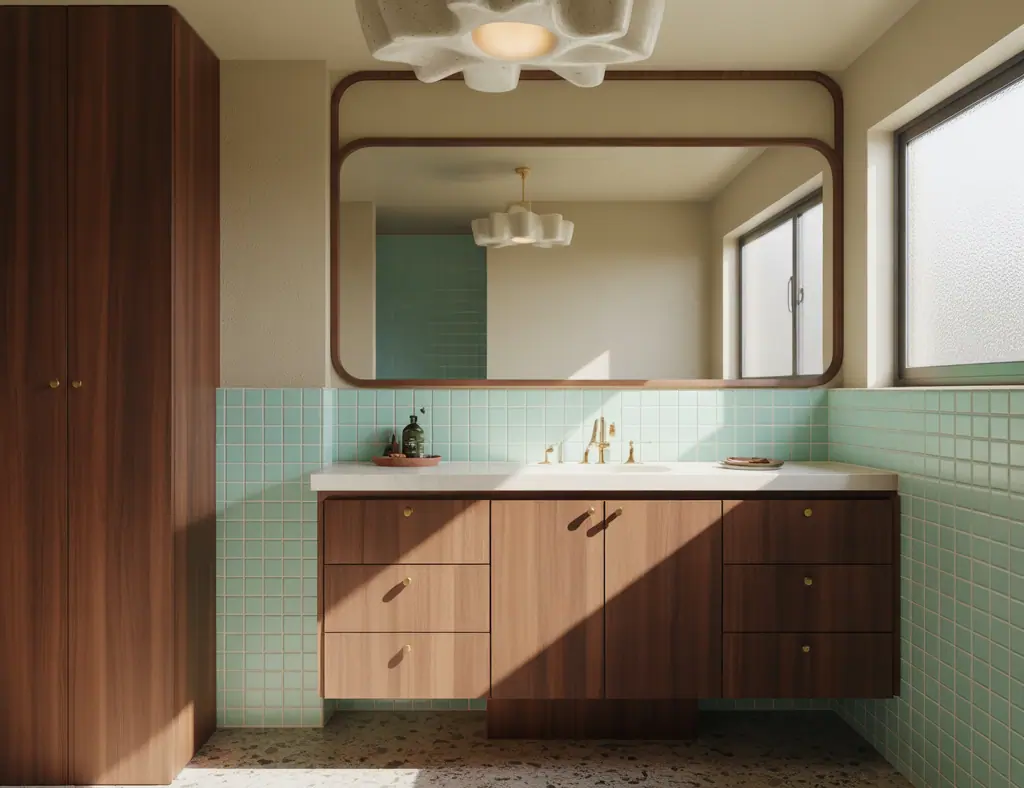
Mid-century modern bathroom design celebrates functionality, simple forms, and organic materials. Think floating vanities with splayed legs, warm teak or walnut accents, geometric tile patterns, brass or matte-black fixtures, and pops of color like avocado green or mustard yellow. The result is a retro modern bathroom that feels curated, airy, and livable.
Key Elements to Nail the Look
- Warm wood and floating vanities: Choose vanities with tapered legs or floating designs to create a vintage silhouette.
- Iconic hardware and fixtures: Brass, brushed gold, or matte black taps and showerheads give that mid-century polish.
- Geometric tiles and terrazzo: Hex tiles, chevrons, or terrazzo floors add pattern while staying period-appropriate.
- Statement mirrors: A sunburst or round mirror instantly reads mid-century modern.
- Clean lines and minimal clutter: Open shelving with woven baskets keeps the look streamlined and practical.
Mid Century Modern Bathroom Ideas: Easy DIY Upgrades
Below are practical, step-by-step projects and design inspiration that work for small budgets and DIY skill levels.
1. Install a Floating or Splayed-Leg Vanity (Weekend Project)
- Measure your space and choose a mid-century vanity or refurbish a thrifted dresser (look for splayed legs or add new tapered legs).
- Turn off water and remove old vanity. Disconnect plumbing (hire a plumber if unsure).
- If installing floating: secure a sturdy cleat and use studs with heavy-duty anchors; for splayed-leg pieces, anchor the back to studs for stability.
- Reconnect the sink and plumbing. Seal edges with silicone. Finish with brass hardware for authenticity.
Tools: drill, stud finder, silicone gun, adjustable wrench. Time: 1–2 days. Why it works: A mid century bathroom vanity defines the room and creates the signature silhouette instantly.
2. Create a Geometric Tile Accent Wall (Advanced Beginner)
Pick a statement area—behind the vanity or inside the shower—and install geometric tiles (hex, chevron, or elongated subway tiles laid vertically). Use tile spacers for symmetry, and choose a grout color that contrasts slightly for definition. If full retiling feels big, consider stick-on tiles or a partial backsplash.
3. Update Lighting with Retro Fixtures (Easy)
- Swap out builder-grade fixtures for globe sconces, mid-century pendant lights, or a wall-mounted vanity lamp in brass or matte black.
- Consider warm LED bulbs (2700K–3000K) to complement wood tones and create a cozy glow.
4. Add Terrazzo or Patterned Flooring (Professional or DIY Tile)
Terrazzo is a hallmark of mid-century design. For a budget-friendly alternative, look for terrazzo-look vinyl or peel-and-stick tiles. If you’re tiling yourself, pick a small-scale pattern to avoid overwhelming a compact bathroom.
5. Accessorize with Retro Details (Instant Impact)
- Sunburst or round mirror over the vanity
- Open shelving with woven baskets and ceramic dispensers
- Brass towel bars and mid-century knobs
- Bold but simple artwork and a single accent color for towels or a small rug
Practical DIY Tips & Real-World Advice
Want this to look intentional rather than themed? Follow these practical rules:
- Stick to a limited palette: Two main neutrals (white and warm wood), one accent color (teal, mustard, or olive), and metallic hardware.
- Mix old and new: Combine vintage-inspired pieces with modern fixtures for reliability—modern plumbing with retro aesthetics.
- Know when to hire pros: Electrical and complex plumbing are best left to licensed contractors. Save on cosmetic changes and finish-work for DIY.
- Budget tips: Splurge on the vanity and fixtures, save on paintable wall panels and peel-and-stick tiles.
- Scale matters: For small bathrooms, use smaller tile patterns and fewer bold colors to keep the space feeling open.
Design Inspiration: Color Palettes and Materials
Some classic mid-century palettes and pairings to consider:
- Walnut + cream + brass + teal accent
- Teak + white subway tile + black fixtures + mustard towels
- Terrazzo floor + soft gray walls + walnut vanity + round mirror
Materials that scream mid-century modern: teak or walnut veneers, terrazzo, matte brass hardware, globe lighting, simple ceramic accessories, and graphic tile patterns.
Frequently Asked Questions
1. How can I make a small bathroom feel mid-century modern?
Choose a floating vanity to free floor space, use light neutral wall colors, incorporate one bold accent (tile or mirror), and keep clutter off countertops with open shelving or recessed storage. Scale down patterns and use warm wood tones to add richness without crowding the room.
2. Are mid-century fixtures still available for bathrooms?
Yes—many manufacturers produce mid-century inspired faucets, lights, and hardware in finishes like brass, brushed gold, and matte black. For authentic vintage finds, thrift stores and salvage yards can yield sunburst mirrors, retro sconces, and vanities that you can refinish.
3. Can I install terrazzo myself?
True terrazzo is a specialized process best done by pros. However, you can achieve a similar look with terrazzo-look tiles, luxury vinyl, or epoxy kits designed to mimic terrazzo. These DIY-friendly options cut costs and save installation time.
Conclusion: Start Your Mid Century Modern Bathroom Project Today
Transforming a bathroom into a mid century modern retreat is surprisingly achievable with a few strategic updates—think a floating vanity, geometric tile accents, and warm metal finishes. Whether you tackle a weekend DIY or hire specialists for plumbing and tile work, these mid century modern bathroom ideas will give your space lasting style and comfort. Ready to start? Gather your tools, pick one project to begin, and explore more DIY projects for step-by-step help. If you’re inspired by broader home upgrades, check out our kitchen upgrades and other home design ideas for consistent style throughout your house.