Staring up at that awkward ledge above your cabinets and wondering if it has to stay forever? You’re not alone. Many homeowners face the same dilemma: a dated kitchen soffit that makes the space feel closed-in, collects dust, or hides plumbing and ductwork. Whether you’re tackling a weekend DIY or planning a full remodel, this guide delivers kitchen soffit inspiration, practical step-by-step ideas, and realistic tips so you can decide whether to cover, convert, or remove that soffit once and for all.
Why Soffits Matter: Function Meets Form
Soffits were often installed to hide HVAC ducts, electrical runs, or structural beams—but they can date a kitchen and reduce visual height. With smart design, a soffit can become an asset: a place for hidden lighting, crown molding, open shelving, or integrated storage. Before jumping into demolition, consider the function of your soffits and whether cosmetic updates can achieve the look you want on a budget.
Kitchen Soffit Inspiration: 12 Ideas to Transform Your Space
From modern minimalist to farmhouse charm, here are practical, beautiful options to reinvent your soffits.
1. Paint It Away — Instant Brightness
Paint is the quickest refresh. Use the same color as the ceiling to visually raise the height, or paint the soffit the same color as the cabinets to create a seamless built-in look. For contrast, choose an accent color that complements backsplash tiles.
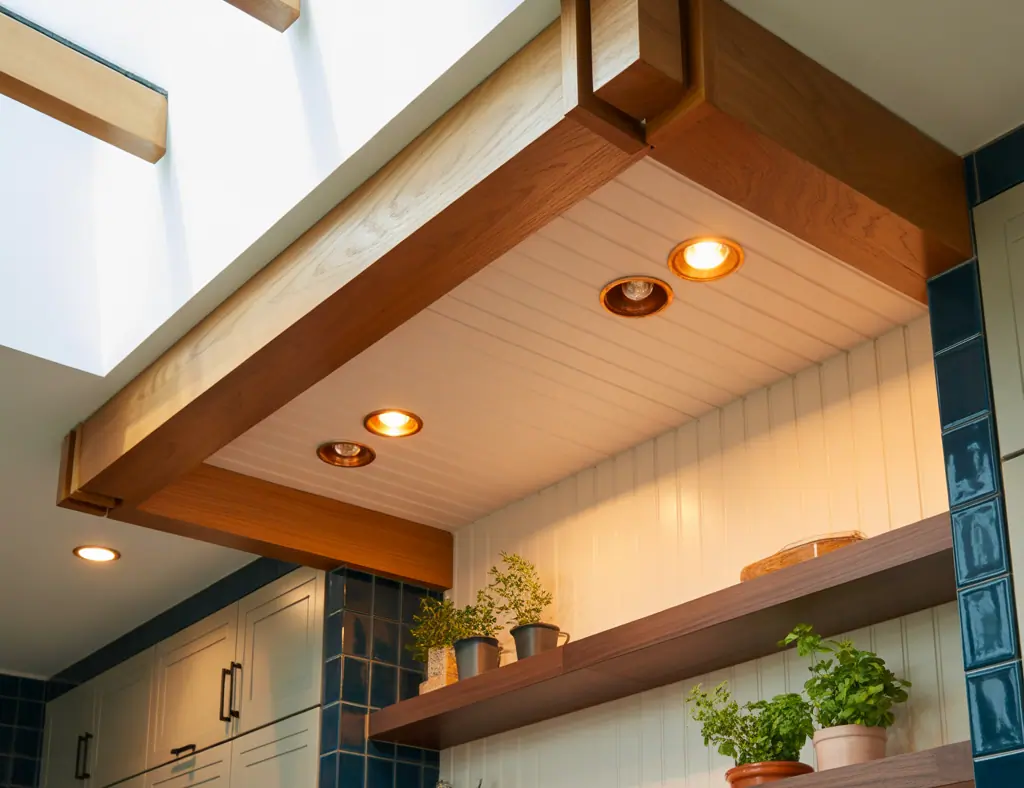
2. Add LED Strip or Recessed Lighting
Install LED strip lights or small recessed fixtures to add task lighting and drama. Warm white LEDs create cozy ambiance; daylight-balanced LEDs improve visibility for cooking. If wiring runs through the soffit, this can be a straightforward update—hire an electrician if you’re not comfortable with electrical work.
3. Crown Molding & Trim for a Finished Look
Simple trim can turn a bulky soffit into a custom architectural feature. Use crown molding and filler strips to create layered detail. This is a weekend carpentry project if you have basic mitering skills.
4. Shiplap or Beadboard Cladding
Cladding soffits with shiplap or beadboard gives farmhouse or coastal vibes. Lightweight MDF or PVC planks are easy to install and paint-resistant—ideal for renters who need removable solutions.
5. Open Shelving or Display Nooks
Convert part of a soffit into shallow shelves for cookbooks, plants, or decorative pieces. This makes previously wasted space functional and decorative without major construction.
6. Faux Beam or Timber Accent
Add faux beams to create a contrasting horizontal line and add warmth. Foam beams or lightweight wood wraps mimic the look of heavy timbers without structural changes.
7. Integrate Ventilation and Range Hoods
If the soffit conceals an old hood or vent, consider integrating a modern range hood or a sleek downdraft vent. This improves performance and updates the profile of the kitchen.
8. Conceal with Upper Cabinets
If soffits are shallow, extend upper cabinets up to the ceiling by building boxes or filler panels. This hides the soffit and adds storage. Use crown molding to blend the transition.
9. Textured Plaster or Venetian Finish
For a luxe update, apply a thin plaster, Venetian, or skim coat texture. This works best when the soffit is visually central and you want a seamless, high-end look.
10. Wallpaper or Decals for Pattern
Temporary wallpaper or decals are perfect for renters or those who want seasonal change. Choose a subtle pattern to avoid making the ceiling feel busy.
11. Remove the Soffit (When Possible)
Removing a soffit can open the room, but it may expose ducts or structural elements. Always confirm what’s behind the soffit—if it contains plumbing or load-bearing elements, consult a contractor or structural engineer. Removal can be DIY if the soffit is non-structural; otherwise plan for pro help.
12. Mix & Match: Half Removal + Decorative Finish
Sometimes the best compromise is partial removal. Open up central sections to create height while keeping boxed areas for utilities. Finish exposed areas with trim and paint to create a cohesive look.
Practical DIY Tips & Step-by-Step Plan
Here’s a simple workflow to approach a soffit update, whether you’re painting, adding trim, or removing it entirely.
- Inspect first: Remove a small access panel to see what’s inside. Take photos and note ducts, wires, or pipes.
- Decide on scope: Cosmetic (paint, trim, lighting) vs. structural (partial or full removal).
- Gather materials: Paint, molding, shiplap, LED strips, screws, caulk, joint compound, safety gear.
- Prepare the area: Turn off power if working near wiring, cover counters, and protect floors.
- Execute in stages: For painting—prime then paint two coats. For trim—measure, cut miters, secure with finishing nails, caulk seams, and paint. For removal—slowly deconstruct with a pry bar, cutting screws and checking for hidden systems as you go.
- Finish: Patch seams, sand, paint, and install lighting or decorative elements.
Real-World Advice: Budget, Timeline, and When to Call a Pro
Budget-friendly updates (paint, trim, LED strips) can cost under $200 and take a weekend. Mid-range projects (shiplap, added cabinetry) may run $500–$2,500 and take 2–7 days. Full removal with rerouting ducts or moving wiring can cost several thousand and require licensed pros. If you find load-bearing beams, gas lines, or complex HVAC in the soffit, stop and call a contractor—safety first.
Design Tips to Keep Your Kitchen Feeling Bigger
- Use light, neutral colors on soffits and ceilings to make the room feel taller.
- Match soffit color to cabinetry for a cohesive, built-in appearance.
- Install continuous crown molding to draw the eye upward.
- Employ linear lighting to emphasize horizontal lines and create perceived depth.
Frequently Asked Questions
Q: What is a kitchen soffit and why was it installed?
A soffit is a boxed section that runs above cabinets, typically installed to conceal HVAC ducts, pipes, or wiring. It can also be a design choice to create a finished transition between cabinets and ceiling.
Q: Can I remove soffits myself?
Maybe. If the soffit is only cosmetic, a careful DIY removal is possible. If it contains structural elements, plumbing, or HVAC, you should hire a licensed contractor. Always inspect first and turn off power when working near electrical runs.
Q: How do I modernize a soffit on a budget?
Paint it to match the ceiling, add LED strip lighting, install crown molding, or cover it with shiplap—each option is relatively low-cost and can dramatically change the look.
Conclusion: Turn That Awkward Ledge into a Design Win
Kitchen soffit inspiration doesn’t have to mean expensive renovations. With paint, lighting, trim, or creative shelving you can refresh the look and function of your kitchen in a weekend or plan a bigger change over time. Start by inspecting what’s behind the soffit, pick an approach that matches your skill level, and test a small area first. Ready to begin? Check out our DIY projects for tool guides, explore kitchen upgrades to plan a full remodel, or browse home design ideas for styling tips. Share your before-and-after photos and try one of these ideas this weekend—your kitchen will thank you.
Call to action: Want step-by-step help for your specific soffit? Describe your kitchen in the comments or send photos, and I’ll recommend the best DIY route or professional next steps.
For more kitchen island dining table combo ideas, check out this guide.
For more kitchen design ideas and inspiration, check out our Kitchen page.
For more kitchen design ideas and inspiration, check out our Kitchen page at HomeAdoW Kitchen.
For more ideas on how to utilize space above kitchen cabinets, check out Space Above Kitchen Cabinets.
For more ideas on how to utilize space above kitchen cabinets, check out Space Above Kitchen Cabinets.