Ever finished a weekend kitchen upgrade or backyard refresh and wondered how to match the polished look of your space with the food you serve? Maybe you’ve remodeled shelves, installed a new island, or built a rustic serving board — now you want your desserts to look just as intentional. If you’re asking, “How can I create key lime pie fancy decorations that impress without professional pastry skills?” you’re in the right place. This guide gives practical, step-by-step ideas and easy DIY decorating techniques that transform a basic key lime pie into a centerpiece-worthy dessert.
Why Presentation Matters: From Home Upgrades to Dessert Styling
Home improvement is as much about the details as the big projects. After investing time in kitchen upgrades or a refreshed dining area, your table should reflect that same care. A beautifully decorated pie not only tastes better to guests but complements your design aesthetic — think coastal, modern farmhouse, or retro chic. Presentation turns a homemade dessert into a curated experience.
Essential Tools and Supplies for Fancy Decorations
You don’t need a professional kitchen to create stunning dessert presentations. Here are affordable tools and pantry items that make decorating simple and repeatable.
Tools
- Piping bags and a small set of piping tips (star and round)
- Citrus zester or microplane
- Small offset spatula or butter knife
- Kitchen blow torch (optional, for meringue)
- Pastry brush and small cookie cutters (for stencils)
- Sharp knife and cutting board for garnishes
Ingredients and Decorative Supplies
- Fresh key limes or regular limes
- High-quality whipped cream or stabilized whipped topping
- Egg whites and sugar for meringue
- Edible flowers, candied citrus slices, or toasted coconut
- Crushed graham crackers, nuts, or sugar for rim texture
Key Lime Pie Fancy Decorations: Step-by-Step Designs
Below are several decoration ideas that suit different skill levels. Each includes step-by-step instructions so you can replicate the look at home.
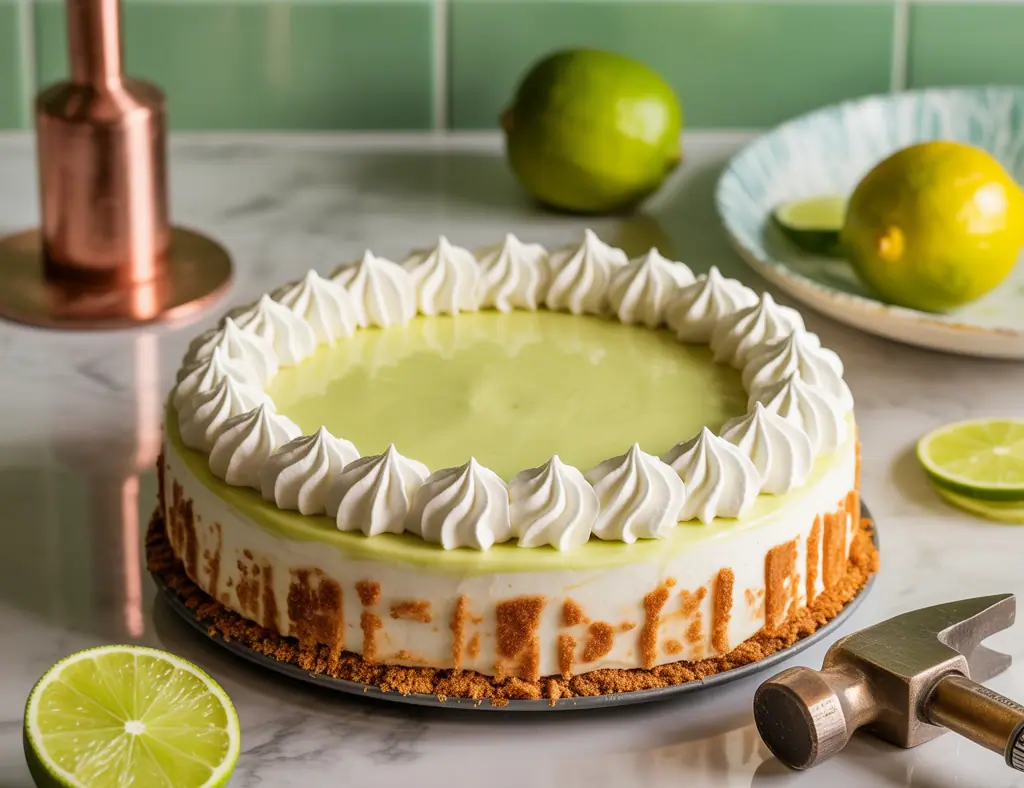
1. Classic Whipped Rosettes
- Chill your piping bag and tip for 10 minutes to help maintain shape.
- Fill with whipped cream (stabilized if making ahead) and hold at a 90-degree angle to the pie edge.
- Apply steady pressure to pipe rosettes around the perimeter, spacing evenly.
- Finish with a thin lime zest twist or a tiny edible flower on every other rosette.
Tips: Use a star tip for pretty texture and refrigerate until serving to keep rosettes firm.
2. Toasted Meringue Peaks (Elegant and Dramatic)
- Make a Swiss meringue: whisk egg whites and sugar over a double boiler until warm, then whip to stiff peaks.
- Spread or pipe the meringue over the pie in peaks.
- Use a kitchen blow torch to brown the tips lightly for that restaurant finish.
Tips: If you don’t have a torch, a very hot oven broiler for 30–60 seconds works — watch carefully.
3. Candied Lime Wheels and Zest Spirals
- Thinly slice limes and simmer in equal parts sugar and water for 10–15 minutes until translucent.
- Dry on a rack, then place a wheel or a folded zest spiral in the center of each slice of pie for an upscale, natural garnish.
Tips: Candied lime wheels can be made ahead and stored in an airtight container for a few days.
4. Tropical Crunch Accent
- Toast shredded coconut and chopped macadamia nuts until golden.
- Gently press along one side of the pie crust or sprinkle in the center for contrast.
Design idea: Combine toasted coconut with a drizzle of honey for a rustic, coastal look.
5. Stenciled Sugar or Lime Powder
- Create a stencil using parchment or a small cookie cutter.
- Sprinkle powdered sugar or finely grated lime zest over the stencil for a patterned top.
Tips: Use very fine zest and a light hand for crisp shapes; this works well for themed parties or celebration pies.
Plating and Serving: Design Inspiration
How you present the whole pie or individual slices matters just as much as the decoration. Consider these ideas:
- Serve on a reclaimed wood board or a white ceramic cake stand to match your kitchen aesthetic.
- Slice with a hot, clean knife for smooth edges—dip the blade in hot water and dry between cuts.
- Garnish each plate with a thin lime wheel, a dusting of zest, and a tiny sprig of mint or microgreens for color contrast.
- Arrange multiple mini pies or tartlets in a staggered pattern for buffet-style visuals.
Budget-Friendly DIY Hacks
Not every decorator needs bespoke tools. Here are smart hacks that use common household items:
- Use a zip-top bag with the corner snipped as a piping bag if you don’t own one.
- Create a stencil from a cereal box or sturdy paper for repeated patterns.
- Use a cheese grater or vegetable peeler for fast lime zest if you lack a microplane.
- Repurpose cookie cutters to make perfectly sized candied fruit rounds.
Frequently Asked Questions
Can I decorate a key lime pie the night before serving?
Yes, but choose decorations that hold up overnight. Candied lime wheels, toasted nuts, and dry zest work well. Avoid delicate whipped rosettes unless stabilized — meringue or firm whipped toppings can be made closer to serving to stay fresh.
How do I keep crust crunch when serving a creamy key lime pie?
Brush the baked crust briefly with melted white chocolate or a thin layer of melted butter, then chill before filling. This creates a moisture barrier to help keep the crust crisp longer when refrigerated.
What’s an easy meringue alternative if I’m nervous about eggs?
Use a stabilized whipped cream made with a bit of powdered sugar and gelatin or cream stabilizer. It mimics meringue’s volume with less fuss and is safer for those avoiding raw egg whites.
Conclusion: Try These Key Lime Pie Fancy Decorations at Home
Transforming a homemade key lime pie into a show-stopping dessert is one of the most satisfying DIY details you can add to your hosting repertoire. Whether you choose piped rosettes, torched meringue, candied lime wheels, or a tropical crunch, these key lime pie fancy decorations are designed to be approachable, affordable, and visually striking. Ready to experiment? Pick one design, practice once, and match your presentation to your kitchen upgrades and table setting. For more project ideas, check out our DIY projects and get inspired by kitchen upgrades and home design ideas.
Call to action: Try one of these decorating techniques tonight and share a photo of your finished pie—small design tweaks make a big impression.