Ever stared at a cold, cracked basement slab and wondered if you could turn it into a warm, stylish living area without breaking the bank? Or maybe you’re tired of scratched hardwood in a high-traffic family room and want a low-maintenance alternative that still looks modern. Indoor concrete floor ideas can transform ordinary spaces into show-stopping rooms — and many of the improvements are well within the reach of a determined DIYer.
Why Choose Concrete for Indoor Floors?
Concrete is no longer just for garages and basements. Modern finishing techniques — from polished concrete floors to stained and stamped concrete — offer a range of looks: sleek industrial chic, warm Mediterranean, or even faux tile and stone. Benefits include:
- Durability for high-traffic areas and pets
- Low maintenance: easy cleaning and simple sealing
- Cost-effective compared with full tile or hardwood replacements
- Compatible with radiant floor heating systems
- Versatility: color, texture, and pattern options
Quick Start: Assessing Your Existing Floor
Before you decide on a finish, inspect the slab. Here are practical DIY checks:
- Check for major cracks or uneven spots — mark them and measure depth.
- Test for moisture by taping a piece of plastic to the floor for 48–72 hours; condensation indicates a moisture issue that must be resolved.
- Note the slab thickness and whether there’s insulation or radiant tubing — important if you plan polishing or overlays.
Indoor Concrete Floor Ideas: Finishes and Techniques
Below are proven finishes and step-by-step approaches you can try, organized from simpler to more advanced.
1. Painted or Stenciled Concrete
Painted floors offer a quick refresh. Use a high-quality concrete floor paint or porch-and-patio enamel for durability.
- Clean thoroughly and etch if necessary to ensure adhesion.
- Repair cracks with concrete patching compound.
- Prime, then apply two coats of paint; add stencils or painter’s tape for patterns.
- Finish with a clear polyurethane sealer for extra wear resistance.
2. Stained Concrete (Acid or Water-Based)
Concrete stain penetrates the surface for a variegated, natural look that mimics stone or marble.
- Best for sealed, low-moisture slabs.
- Apply stain in layers, neutralize if using acid stain, then seal with a solvent-based sealer for gloss and protection.
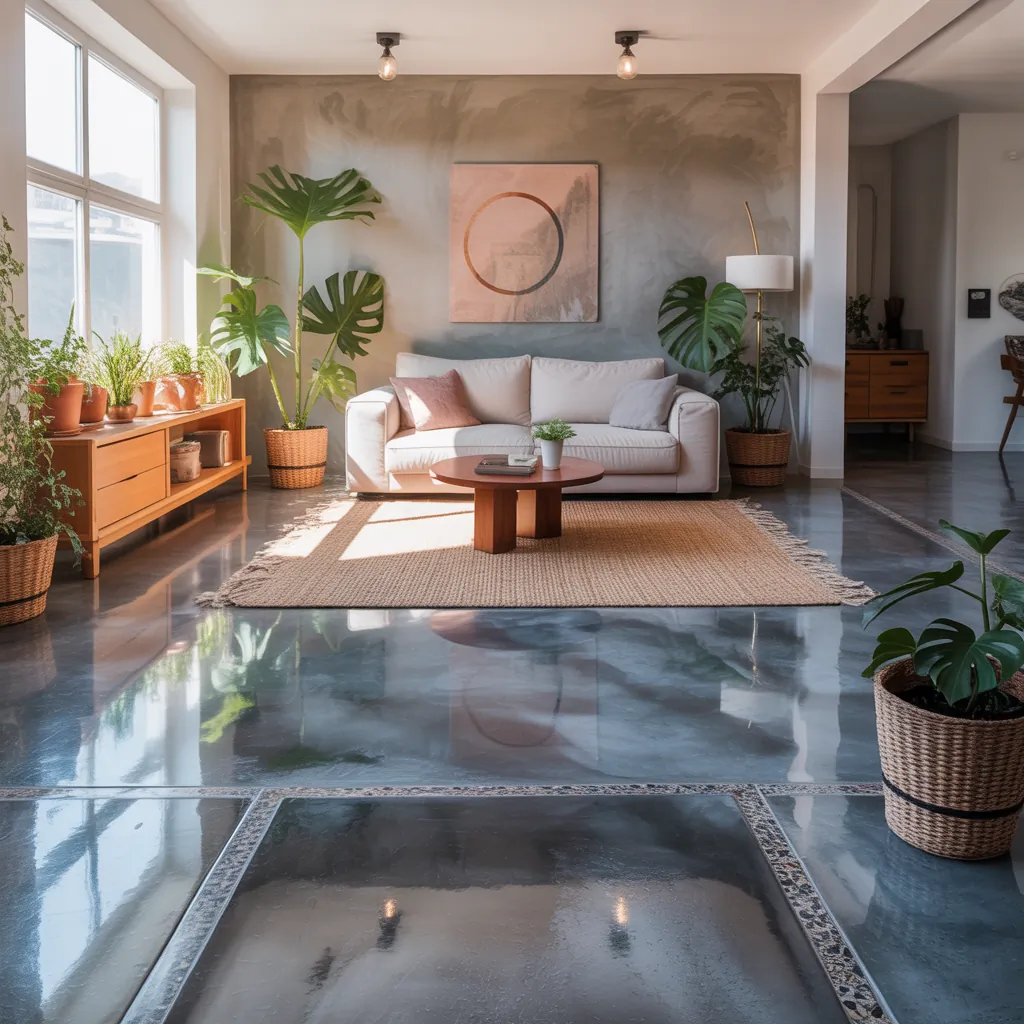
3. Polished Concrete
Polishing brings out a glossy, durable finish and reduces dusting. It’s a multi-step process involving diamond-grit grinding and often a densifier application.
Polishing tools can be rented for DIY projects, but plan for multiple passes with finer grits and a protective finish coat.
4. Epoxy and Polyaspartic Floor Coatings
Epoxy provides a thick, impact-resistant surface ideal for modern kitchens, laundry rooms, and garages that become living spaces.
- Ensure moisture levels are within product specs.
- Grind or etch the surface, then apply primer.
- Roll on base coat, optional colored flakes, then a clear topcoat for UV stability.
5. Concrete Overlays and Microtoppings
If your slab has imperfections, overlays (thin cementitious layers) can create a new smooth surface that can be colored, stained, or stamped. Great for achieving a tile or stone look without demolition.
Design Tips: Colors, Patterns, and Room Suitability
Think about how the floor will interact with light and furniture:
- Light gray or warm beige polished concrete reflects light and makes small rooms feel larger.
- Matte stained finishes hide scratches better in busy family rooms.
- Stamped or faux tile overlays suit traditional kitchens and dining areas.
- Use rugs to add warmth and reduce echo in open-plan spaces.
Practical DIY Tips and Tools
Save time and avoid costly mistakes with these real-world tips:
- Always test finishes in an inconspicuous area to confirm color and adhesion.
- Invest in good ventilation and proper PPE: respirator, gloves, knee pads, and eye protection.
- Rent a concrete grinder for polishing or prep — hand tools won’t deliver uniform results.
- Work in temperatures recommended by product manufacturers; humidity can affect curing and adhesion.
- For large cracks or structural issues, consult a professional before proceeding.
Budgeting and Timeline
Costs vary widely: painted floors are the most affordable, while polished concrete and professional overlays are pricier but longer-lasting. A DIY painted or stained project can be completed in a weekend, while polished floors or overlays may take several days to a week including prep and cures.
Maintenance and Longevity
Concrete floors are low-maintenance: sweep and mop regularly with a pH-neutral cleaner. Re-seal or re-coat every few years depending on foot traffic and finish type. For polished concrete, periodic buffing can restore shine without full re-polishing.
Before You Begin: A Quick Checklist
- Moisture test passed — or a moisture mitigation plan in place.
- Clear workspace and protect adjacent rooms from dust and fumes.
- Gather tools: grinder or etcher, patching compounds, primers, paint/epoxy, rollers, and PPE.
- Plan for curing/ventilation and temporary relocation of furniture.
Get Inspired: Real-World Room Ideas
Some popular ways homeowners use indoor concrete floors:
- Basement transformation: polished concrete with area rugs for a modern family rec room.
- Open-plan kitchen: epoxy floor with subtle flakes that hides spills and adds slip resistance.
- Urban loft: exposed concrete polished to a high gloss for an industrial-chic look.
- Sunroom or entryway: stained concrete with a warm tone and a decorative border.
Related Projects
If you’re thinking about a wider renovation, check out these internal resources for complementary ideas:
- DIY projects — step-by-step guides for home updates
- Kitchen upgrades — ideas that pair well with concrete flooring
- Home design ideas — styling tips and layout inspiration
Frequently Asked Questions
Yes, but polishing requires specialized equipment (diamond grinders and pads) and experience to achieve a uniform gloss. For small rooms, you can rent equipment and follow detailed guides; for large areas or if you want a high-gloss mirror finish, hiring a pro is recommended.
Perform a moisture test before finishing. If moisture is present, use a vapor barrier, moisture mitigation epoxy, or a suitable vapor-proof membrane. Addressing the source — poor drainage or high groundwater — may be necessary for long-term success.
Concrete is naturally cool and hard, but you can make it comfortable: add area rugs, underlayment, or pair concrete with radiant floor heating. Cushioned mats in work areas (like in front of the sink) reduce fatigue.
Conclusion — Ready to Transform Your Floors?
If your goal is durable, stylish, and budget-friendly flooring, these indoor concrete floor ideas give you creative options that fit many rooms and design styles. Start with a simple painted or stained finish if you’re new to DIY, or challenge yourself with polishing or overlays for a big impact. For step-by-step projects and inspiration, explore our DIY projects and home design ideas pages.
Feeling motivated? Grab your safety gear and a test patch area, and try a small project this weekend — then share your results or ask for advice in the comments below. Your floor could be the next room that wows.


