Ever opened the laundry room door only to be greeted by stale detergent fumes, cluttered counters, and a washer that seems to mock your life choices? If you’re dreaming of turning that neglected space into a warm, functional haven, these ideas rustic laundry room solutions will inspire you to pick up a hammer, pick a stain, and get to work this weekend.
Why choose a rustic laundry room?
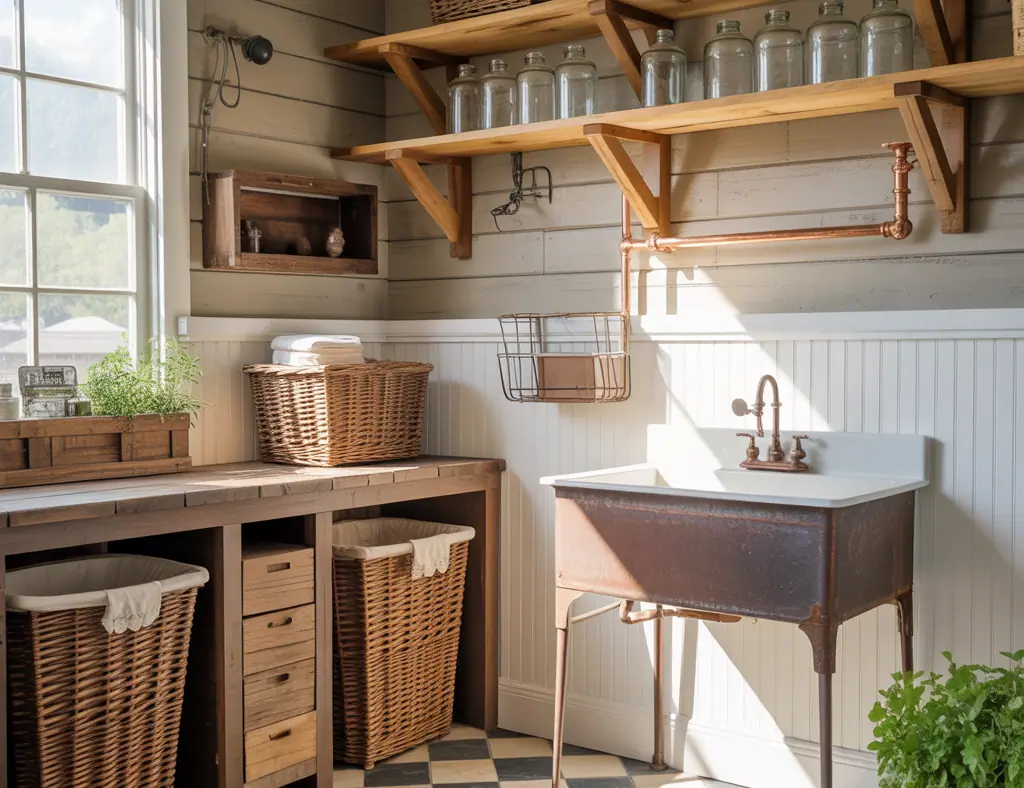
Rustic design blends natural materials, textured finishes, and practical simplicity — perfect for a high-traffic, functional space like a laundry room. A rustic farmhouse laundry room idea creates a cozy atmosphere while hiding messes, adding storage, and making laundry feel less like a chore. Whether you have a small laundry closet or a large mudroom combo, rustic elements can be adapted to fit any scale.
Ideas rustic laundry room: key elements to include
- Reclaimed wood or butcher block countertops for warmth
- Open shelving with industrial pipe brackets for storage and display
- Shiplap or beadboard accent wall to add texture
- Barn door or sliding door to save space and add character
- Baskets, hooks, and labeled jars to keep small items organized
- Matte black or oil-rubbed bronze hardware for a vintage touch
Smart layout and small-space solutions
Designing a small rustic laundry room requires smart use of vertical space and multifunctional surfaces. Consider stacking your washer and dryer, building floor-to-ceiling shelving, or installing a fold-down counter that doubles as a folding station.
Space-saving ideas for tiny laundry closets
- Install a retractable drying rack above the washer.
- Use narrow pull-out storage between machines for detergents and stain removers.
- Add a slim rolling cart on casters to hold supplies that tucks away when not in use.
DIY projects to create a rustic laundry room on a budget
Below are practical, step-by-step DIY ideas that use affordable materials and can be completed over a weekend.
1. Build a reclaimed wood countertop
- Measure and cut reclaimed boards or new pine to the width of your washer/dryer.
- Glue and screw boards together for a solid butcher-block top; sand smooth.
- Stain with a warm walnut or honey finish, then seal with a durable polyurethane or food-safe oil if you plan to use it near a sink.
- Mount the countertop on cleats or brackets for easy removal for maintenance.
2. Install open shelving with industrial pipe brackets
- Plan shelf lengths and mark studs for secure mounting.
- Assemble black iron pipe brackets and secure them to studs.
- Place stained shelves and style with woven baskets, mason jars, and labeled boxes.
3. Add a barn door or sliding panel
- Measure door opening and choose a sliding barn door kit sized to fit.
- Build or buy a plank-style door; stain or paint to match your rustic palette.
- Install the track above the opening and hang the door for instant character and space-saving function.
Styling and finishing touches
A few finishing touches make the difference between “just functional” and “beautifully rustic.”
- Textiles: choose linen or cotton dishcloths and a woven rug or runner to warm the floor.
- Fixtures: swap out basic knobs and faucets for matte black or antique brass options.
- Lighting: add a farmhouse pendant light or an industrial sconce for focused task lighting.
- Decor: vintage signs, framed botanical prints, and potted greenery add personality without clutter.
Practical considerations and real-world advice
Rustic design should not compromise durability. Keep these real-world tips in mind:
- Waterproofing: use water-resistant finishes near sinks and machines. Consider tile or sealed vinyl flooring for easy clean-up.
- Ventilation: ensure proper dryer venting and airflow to avoid mold and mildew.
- Electrical safety: any electrical upgrades should follow local codes — hire a licensed electrician for new outlets or lighting circuits.
- Maintenance: choose stain-resistant paint for walls and easily washable textiles for daily messes.
Budget-friendly swaps and material alternatives
You don’t need true reclaimed wood to get the look. Try these alternatives:
- Distress new pine boards with a few hits of a hammer and wire brush, then stain.
- Use shiplap-look MDF panels for accent walls for a cheaper and easier install.
- Purchase pre-stained butcher block from home centers instead of sourcing reclaimed wood.
Maintenance and longevity tips
To keep your rustic laundry room looking great for years:
- Reseal butcher block counters annually depending on use.
- Wipe down shelves and wipe up spills promptly to protect finishes.
- Inspect sliding hardware and hinges for wear and lubricate as needed.
Frequently Asked Questions
1. How can I create a rustic laundry room on a tight budget?
Focus on one or two high-impact elements: add open shelving, a stained wood countertop, and a shiplap accent wall. Use affordable materials like pine boards, MDF shiplap, and thrifted baskets to achieve the look without breaking the bank.
2. What are the best flooring options for a rustic laundry room?
Durable, water-resistant flooring is key. Consider luxury vinyl plank with a wood grain finish, glazed porcelain tile that mimics natural stone or wood, or sealed concrete for an industrial-rustic vibe. Add a washable runner for warmth.
3. Can I make a small laundry nook feel rustic without major renovations?
Yes. Paint the walls in a warm neutral, hang a small open shelf, use matching baskets, and install a farmhouse-inspired pendant light. A simple countertop over the machines or a fold-down table adds function and style.
Conclusion: Start your rustic laundry room makeover today
If your laundry room has been an afterthought, these ideas rustic laundry room projects offer a practical, stylish path forward. Start small with shelving or a stained countertop, and gradually layer in lighting, hardware, and decor. Ready to tackle a project? Check our DIY projects and browse related inspiration on home design ideas or kitchen upgrades for complementary rustic touches throughout your home.
Tell us which project you’ll try first — a reclaimed wood counter, barn door, or open shelves — and share your before-and-after when you’re done. Happy renovating!