Ever stood in your kitchen staring at plain tile or drywall and imagined something warmer, more lived-in — a backsplash that feels like a cozy farmhouse but still fits your modern life? Whether you’re planning a weekend DIY or a full kitchen refresh, these ideas for rustic backsplash will help you create a welcoming, handmade look without breaking the bank.
Why choose a rustic backsplash?
A rustic backsplash brings texture, warmth, and character into the heart of your home. From reclaimed wood that tells a story to natural stone that ages beautifully, rustic materials pair well with open shelving, butcher block counters, and vintage hardware. Rustic styles are versatile: they can be full-height statement walls or subtle accents behind the sink or stove. They also support sustainable choices by using reclaimed or locally sourced materials.
Rustic backsplash ideas to consider
Below are practical, style-forward options — each with DIY tips and real-world considerations so you can pick what best suits your space, budget, and skill level.
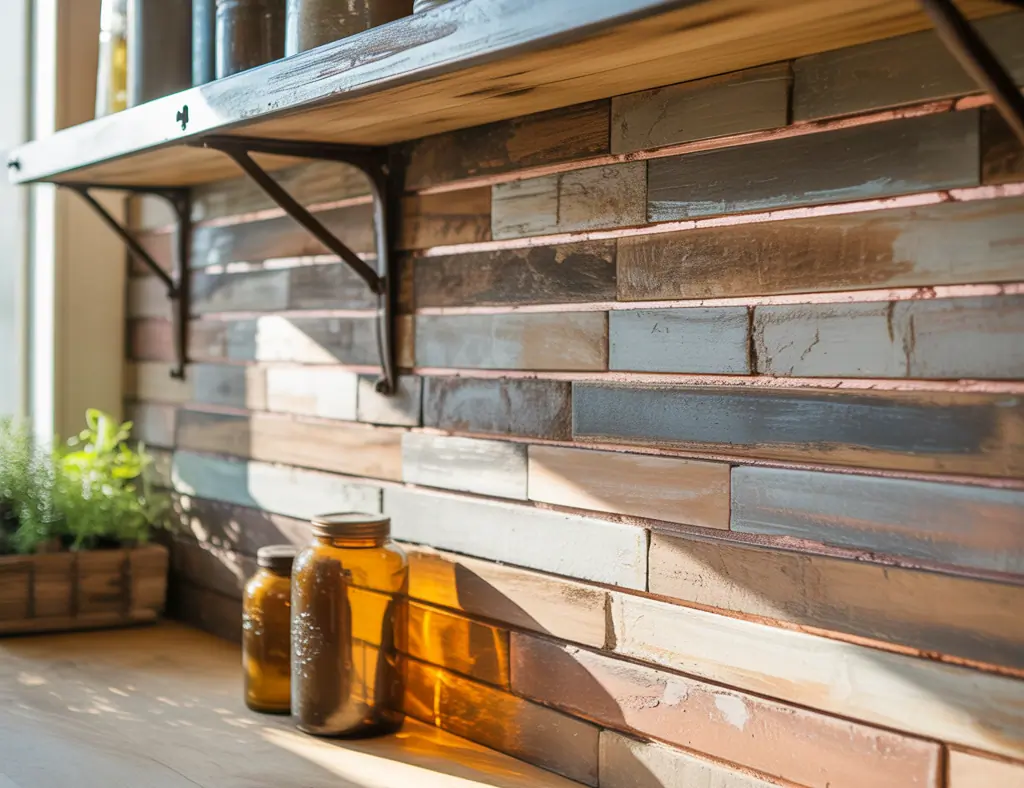
1. Reclaimed wood backsplash
Why it works: Adds warmth and a lived-in patina. Great for farmhouse and cottage kitchens.
- Materials: Reclaimed boards or barn wood, plywood backer, construction adhesive, finish (polyurethane or oil).
- DIY tip: Acclimate wood for 48 hours in the kitchen to reduce warping. Use a moisture-resistant backer like exterior-grade plywood behind the wood if your backsplash area is near the sink.
- Maintenance: Seal with a clear coat to protect from splashes; wipe spills promptly.
2. Exposed brick or faux brick veneer
Why it works: Brick offers rugged texture and an authentic rustic look with heat-resistant benefits behind a stove.
- Materials: Thin brick veneer, thinset mortar, grout, sealant.
- DIY tip: Brick veneer is lighter and easier to install than full brick — use a masonry primer and plan for grout color to match your rustic aesthetic.
3. Natural stone or slate tile
Why it works: Stone gives an earthy, tactile surface that’s durable and low-maintenance.
- Materials: Slate, flagstone tiles, natural stone mosaics, epoxy grout or urethane grout for durability.
- DIY tip: Choose honed or tumbled finishes to keep the rustic, non-reflective look. Seal stone periodically to prevent staining.
4. Shiplap or beadboard
Why it works: Clean lines with a classic farmhouse feel; an excellent choice for budget-friendly rustic makeovers.
- Materials: MDF or pine shiplap panels, paint or stain, caulk, sealant behind the stove/sink.
- DIY tip: Use moisture-resistant materials in high-splash areas and consider a semi-gloss or satin finish for easier cleaning.
5. Metal with patina (copper or tin tile)
Why it works: Adds vintage charm and reflects soft light while still reading rustic when treated with patina.
- Materials: Tin ceiling tiles or copper sheets, adhesive, clear lacquer to lock in patina.
- DIY tip: Patina develops over time — pre-patina panels speed up the look. Use behind a stove with heat-rated adhesive.
6. Mixed-material mosaic: stone + wood + tile
Why it works: Combines rustic texture with practical surfaces where durability is needed, like behind the range.
- DIY tip: Use a mosaic strip as an accent band or border to protect high-splash zones with tile while keeping rustic wood or stone elsewhere.
Step-by-step DIY project: Simple reclaimed wood backsplash
This straightforward project will give your kitchen instant personality.
- Measure the area and calculate board coverage (add 10% for waste).
- Prepare the wall: clean, remove loose paint, and attach exterior-grade plywood backer if needed for extra stability.
- Acclimate and sort planks by color and width for an intentional look.
- Cut boards to length; sand rough edges lightly.
- Apply construction adhesive to the back of the first board and press firmly to the wall; use finishing nails into studs for extra hold.
- Continue row by row, staggering seams for a natural feel. Check level periodically.
- Fill nail holes and gaps with wood filler if desired, then sand and apply a protective finish designed for kitchens.
- Seal edges and seams with clear silicone at the countertop junction to prevent water infiltration.
Pro tip: If you’re installing behind a stove, leave a small gap between the wood and cooktop or use a heat-resistant metal strip at the immediate rear of the range.
Choosing materials, finishes, and practical considerations
Think about moisture, heat, and cleaning when selecting a rustic backsplash. Wood looks amazing but needs sealing; stone and tile are naturally resilient. Consider these points:
- High-splash areas (sink, stove) benefit from stone, tile, or sealed metals for easy cleaning.
- Match grout and finish tones to the rustic palette — warm grays, soft creams, and earthy browns keep the look cohesive.
- Ventilation: ensure your range hood exhausts properly to reduce grease and humidity buildup.
- Lighting: under-cabinet lighting highlights texture and brings out the natural tones of a rustic backsplash.
Design placement ideas
Not every backsplash needs to be full-height. Consider these layouts:
- Full-height backsplash from counter to ceiling for a dramatic focal wall.
- Partial backsplash to the bottom of upper cabinets for a subtle rustic accent.
- Accent strip behind open shelving to frame dishes and create depth.
- Combination materials: tile behind the stove with wood or shiplap elsewhere for durability where you need it most.
Frequently Asked Questions
- Can I install a rustic backsplash myself?
- Yes. Many rustic options like reclaimed wood, shiplap, faux brick veneer, and certain tiles are DIY-friendly. Choose materials that match your skill level, follow proper wall prep and ventilation guidance, and use the correct adhesives and sealants.
- How do I keep a wood backsplash from warping?
- Acclimate wood to your kitchen’s humidity before installation, use a moisture-resistant backer, leave small expansion gaps at ends, and seal the surface with a water-resistant finish. Avoid direct water exposure and wipe up spills promptly.
- What is the most durable rustic backsplash material?
- Natural stone and tile are generally the most durable and low-maintenance choices for rustic backsplashes. Metal (tin or copper) also holds up well when properly sealed; wood requires more care but offers unmatched warmth and character.
Conclusion: Start your rustic backsplash project today
Whether you choose reclaimed wood, natural stone, or a clever mix of materials, these ideas for rustic backsplash can transform your kitchen into a cozy, intentional space. Pick a style that suits your daily needs, plan for moisture and heat, and don’t be afraid to try a weekend DIY project. For larger refreshes, explore our guides on kitchen upgrades and home design ideas to coordinate finishes and lighting.
Ready to pick a style? Gather your materials, sketch a layout, and start with a small accent area if you’re new to DIY — you’ll be surprised how quickly a rustic backsplash can change the whole room.