Have you ever stood in your garden or yard, admiring your plants but feeling like something just wasn’t quite finished? Maybe your flower beds blend too much into the lawn, or your pathway edges look uneven and untidy. If you’ve ever wondered how to give your outdoor spaces a crisp, polished look without spending a fortune or hiring pros, rock edging might just be your new best friend.
In this article, we’ll explore a variety of inspiring and practical ideas for rock edging that you can tackle yourself. Whether you’re a DIY beginner or someone looking for fresh landscaping ideas, you’ll find tips, design inspiration, and step-by-step help to create garden edge borders that make your outdoor areas pop.
Why Choose Rock Edging for Your Garden?
Rock edging is an excellent way to define garden beds, pathways, and yard borders. It creates a natural barrier that prevents grass and weeds from spreading into flower beds, protects mulch, and adds texture and interest to your landscape. Unlike plastic or metal edging, natural stone or rock blends seamlessly into outdoor spaces, giving your landscape an earthy and timeless look.
10 Creative Ideas for Rock Edging
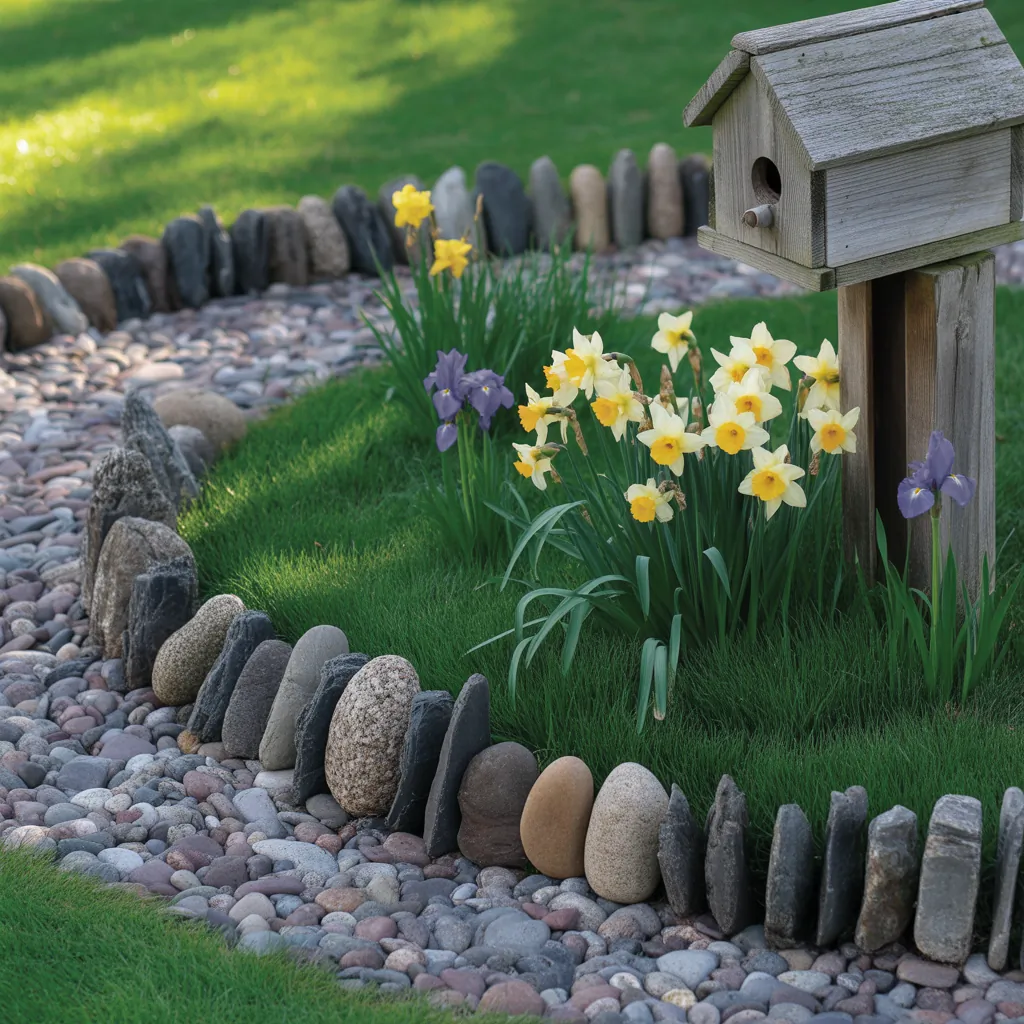
1. River Rock Border for a Smooth, Rounded Finish
Using smooth river rocks along your garden beds creates a gentle, flowing border that looks especially good in natural or cottage-style gardens. These rounded stones are easy to arrange by hand and don’t require mortar, making installation a breeze.
2. Flagstone Edging for a Rustic, Flat-Laid Appeal
Flat flagstones set upright on their edges create a clean, rustic border while also serving as stepping stones or mini retaining walls. Their flat surfaces also make them great for seating ledges in larger gardens.
3. Stacked Rock Columns for Sculptural Interest
Create small columns or stacked rock pillars as focal points at the corners or entrances of garden beds to add height and structure. These can be dry-stacked or mortar-set, depending on your skill level and the permanence you desire.
4. Cobblestone Edging for Classic European Charm
Use rounded cobblestones to build neat, compact borders that look timeless. This style pairs wonderfully with brick pathways or picket fences and offers excellent durability.
5. Slate Rock Borders for a Sleek Modern Look
If you prefer sharper edges and a sleek finish, slate slabs trimmed into rectangular shapes can be laid vertically or horizontally along beds, creating a contemporary boundary that’s both subtle and elegant.
6. Mixed Stone Mosaic for Colorful Variety
Combine different types, sizes, and colors of rocks to create a mosaic-like border bursting with personality. This is a fantastic option if you want a border that acts as an art feature in your garden.
7. Boulder Accent Edging for a Bold Statement
Place large boulders strategically along beds or pathways to add rugged texture and natural grandeur. These work best in larger gardens and can also serve as natural seating or climbing features for kids.
8. Raised Rock Wall Edging for Terraced Gardens
If your yard has slopes or uneven terrain, consider building low rock walls that act as both edging and retaining walls. This design prevents soil erosion and adds dimension to your landscape.
9. Pebble Pathway Borders for Soft Contrast
Small pebbles along paths or garden beds create a soft, delicate line that contrasts nicely with lush greenery and colorful blooms. You can mix pebbles with mulch for added texture.
10. Natural Stone Slab Steps with Rock Border
Incorporate natural stone step slabs bordered with smaller landscape rocks for a functional and aesthetic combination, perfect for garden paths or entryways.
Step-by-Step DIY Tips for Installing Rock Edging
Ready to roll up your sleeves and create your own rock edging? Here’s a straightforward guide to help you get started:
- Plan Your Design: Sketch your garden or pathway outlines and decide the shape and style of edging that complements your space.
- Choose the Right Rocks: Depending on your design, select appropriate rocks — smooth river stones, flat slate, cobblestones, or boulders.
- Prepare the Area: Clear the border zone of grass, weeds, and debris. Use a spade or edging tool to cut a shallow trench about 4-6 inches deep and the width of your rocks.
- Add a Base Layer: Lay landscape fabric to prevent weeds, then add a 2-inch layer of crushed gravel or sand for stability and drainage.
- Place the Rocks: Arrange the rocks carefully according to your design, fitting them tightly together. For stacked or taller edging, use landscape adhesive or mortar.
- Backfill and Compact: Add soil or mulch behind the edging to secure the rocks and create a smooth transition between beds and lawn.
- Maintenance: After installation, periodically check for loose stones and reposition if necessary. Remove weeds and replenish mulch to keep your border looking pristine.
Design Inspiration: Blending Functionality and Style
Rock edging is more than just practical — with a little creativity, it becomes a centerpiece of your overall landscape design. Here are a few inspirational ideas to consider:
- Combine different stone types and sizes to break the monotony and provide texture contrast.
- Pair rock edging with flowering ground covers like creeping thyme or moss to soften hard edges.
- Use lighting behind or beneath the rocks to create enchanting nighttime garden effects.
- Coordinate rock colors with home exterior materials for a cohesive look.
- Create curved or wave-shaped borders rather than straight lines to mimic natural landscapes.
Frequently Asked Questions About Rock Edging
The cost varies widely depending on the type of rock, quantity, and whether you do it yourself or hire a professional. DIY rock edging typically ranges from $1 to $5 per linear foot, making it an affordable landscaping upgrade.
Rock edging is relatively low-maintenance compared to other borders. Occasional weed removal and repositioning of displaced stones are the most common upkeep tasks, making it a great long-term investment.
Yes! Rock edging works beautifully around trees and shrubs, protecting roots and soil while giving your planting beds a tidy, defined edge. Just ensure the stones are placed carefully to avoid root damage during installation.
Conclusion: Transform Your Outdoor Space with Rock Edging
Rock edging is an easy, effective way to add charm, structure, and durability to your garden and landscape. With countless styles—from smooth river stones to bold boulders—you can customize your borders to fit any aesthetic and functional needs. By following simple DIY steps and choosing the right materials, you can elevate your outdoor space and boost your home’s curb appeal without breaking the bank.
Ready to start your landscape transformation? Grab some rocks, get your gloves on, and check out our other DIY projects and home design ideas for more creative inspiration!