Have you ever opened an inherited or thrifted hutch only to feel overwhelmed by dated trim, yellowed glass, and clutter? You’re not alone. Transforming a bulky, old-school hutch into a sleek centerpiece is one of the most satisfying home improvement projects you can do—especially if you love budget-friendly DIY makeovers. In this post I’ll share practical, modern hutch decor ideas that blend style and function so your display cabinet becomes a curated focal point instead of a dusty catch-all.
Why modernize your hutch?
Updating a hutch is more than cosmetic: it improves storage efficiency, highlights your favorite pieces, and can even increase the perceived value of a room. Modern hutch styling helps create cohesion with contemporary kitchens, dining rooms, or living spaces and gives you a chance to express a personal design aesthetic—from minimalist and Scandinavian to modern farmhouse or mid-century modern.
Ideas for modern hutch decor
Below are tested styling and DIY ideas to modernize an old hutch or dress up a new one. Use them as standalone updates or combine several for maximum impact.
1. Fresh paint and updated hardware
- Why it works: A coat of paint instantly modernizes form and color while swapping hardware updates the silhouette.
- Colors to consider: matte black, deep charcoal, warm white, soft greige, or muted navy for contemporary flair.
- DIY tip: Lightly sand and prime veneer or previously stained wood, use a high-quality satin or eggshell paint, and finish with modern pulls or sleek brass knobs.
2. Add interior or shelf lighting
- Why it works: LED strips or puck lights create depth, add warmth, and spotlight decorative objects.
- Installation: Use adhesive battery-operated LED strips for easy installs—no electrician needed. For a permanent look, hardwire recessed puck lights.
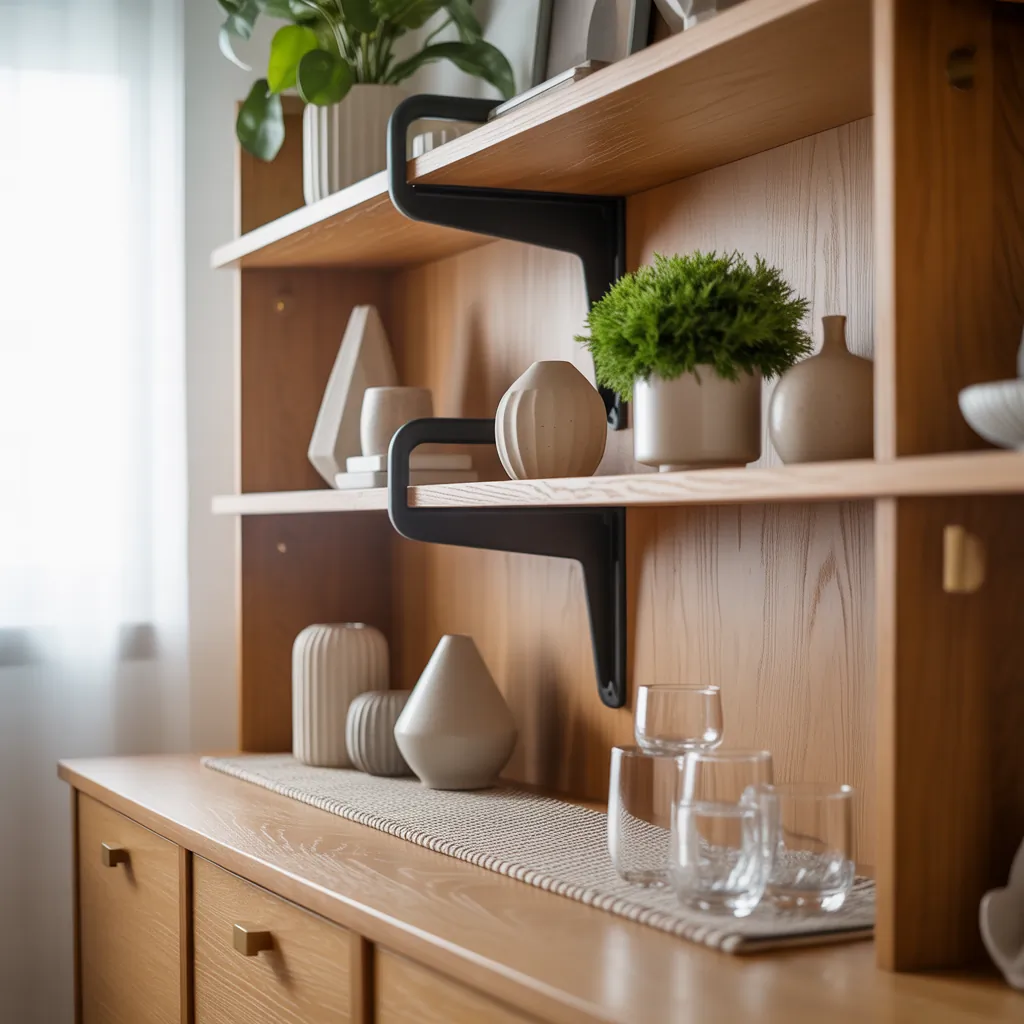
3. Open-shelf styling for curated displays
- Use negative space: Avoid overcrowding. Aim for groupings of 3–5 objects with varying heights and textures.
- Balance: Pair a stack of plates with a sculptural vase and a framed photo; alternate vertical and horizontal elements.
4. Mix materials and textures
Combine glass, matte ceramics, woven baskets, and small metallic accents to create a contemporary, layered look. Consider adding a backing material like beadboard, wallpaper, or a mirrored panel for contrast.
5. Incorporate plants and living elements
- Small potted succulents or trailing pothos brighten shelves and soften hard lines.
- Tip: Use saucers and consistent planters to maintain a cohesive modern aesthetic.
6. Minimalist modern approach
- Stick to a restricted color palette—two neutrals and one accent color.
- Group similar pieces and leave empty space to emphasize the clean lines of a contemporary hutch.
7. Modern farmhouse and rustic contemporary combos
Blend reclaimed wood touches with matte black metal hardware and white ceramic accents for a relaxed but modern farmhouse vibe.
8. Functional storage upgrades
- Add pull-out trays or baskets to keep everyday items accessible but out of sight.
- Install dividers or tiered risers on the shelves to maximize storage and display.
9. Create a built-in look
Marry the hutch to the wall with trim, a painted surround, or built-in baseboards to make it feel architectural and intentional—great for open-concept spaces.
10. Repurpose and upcycle
Turn an old hutch into a bar cart, media console, or a pantry extension. Replace the top glass with open shelving for a more modern, airy feeling.
Step-by-step DIY makeover plan
- Assess the hutch: Note structural issues, real wood vs. veneer, and whether shelves are adjustable.
- Clean and prep: Remove hardware, clean surfaces, sand lightly, and prime if needed.
- Paint or stain: Apply 2–3 thin coats for even coverage; allow drying time between coats.
- Update interior: Add lighting, change shelf backing, and install shelf liners or risers.
- Replace hardware and add finishing touches: New knobs, baskets, and curated décor.
- Style intentionally: Edit down the items, use odd-numbered groupings, and leave breathing room.
Design inspiration and styling combinations
Here are quick pairings based on popular modern looks you can recreate:
- Scandinavian modern: Pale paint, light wood accents, minimal ceramics, lots of white space.
- Mid-century modern: Bold color base, tapered legs (or illusion with trim), geometric accessories.
- Industrial chic: Dark paint, metal hardware, exposed Edison-style lighting, concrete or black accents.
- Contemporary coastal: Soft blues and whites, woven textures, glass floats and driftwood pieces.
Real-world tips from experienced DIYers
- Test paint samples on an inconspicuous area—lighting can change the color dramatically.
- Use command strips or removable hangers for artwork and small frames if you rent or don’t want to drill.
- Measure twice before buying inserts or new shelving—standard pieces don’t always fit vintage cabinet depths.
- Store heavier items on lower shelves for stability and safety.
Frequently Asked Questions
Q: What are the easiest ways to make a hutch look modern on a budget?
A: Paint the exterior in a contemporary color, swap old hardware for sleek pulls or knobs, and declutter into curated groupings. Battery LED lighting and a fresh backing like peel-and-stick wallpaper can also elevate the look inexpensively.
Q: How do I style a hutch without it looking cluttered?
A: Use negative space. Limit items to a few meaningful pieces per shelf, vary heights, and group items in odd numbers. Keep a consistent color story and alternate decorative pieces with functional storage baskets to maintain balance.
Q: Can I modernize a vintage hutch without damaging its value?
A: Yes—if preserving value is important, choose reversible updates: paint the interior only, swap hardware for period-appropriate replacements, or use adhesive lighting. Avoid permanent structural changes if you intend to keep resale value.
Conclusion
Refreshing your space with thoughtful ideas for modern hutch decor is one of the most rewarding DIY projects—whether you’re working with an antique find or a new display cabinet. Start with one simple change (paint, hardware, or lighting), then layer in styling and functional updates. For more step-by-step inspiration, check out our DIY projects and kitchen upgrades pages to continue your home improvement journey. Ready to tackle a hutch makeover? Grab your paint brush and pick one styling idea to try this weekend—share your before and after to inspire others!