Ever glanced at your mailbox and thought, “There has to be a way to make this look a little more charming?” If your mailbox post is just an ordinary wooden post or an outdated metal pole, it might be time for a simple home improvement project with a big impact. Whether you’re a DIY enthusiast or just looking for easy, stylish upgrades, finding the perfect ideas for mailbox posts can completely transform your curb appeal and reflect your personal style.
Why Upgrade Your Mailbox Post?
Your mailbox post is one of the first things visitors and passersby notice about your home. A well-designed mailbox post not only adds character but also enhances the overall look of your front yard. Plus, it’s a budget-friendly project you can tackle in a weekend, even if you’re new to DIY. From rustic wooden posts to decorative metal designs, there are dozens of ways to make your mailbox stand out.
Top 15 Inspiring Ideas for Mailbox Posts
1. Classic Wooden Post with Decorative Trim
For a timeless look, use pressure-treated lumber or cedar wood for durability. Add decorative trim or molding to the top of the post and paint it to match your home’s exterior. This simple upgrade adds a subtle yet sophisticated touch.
2. Rustic Log Mailbox Post
Embrace natural textures by installing a raw log or large branch as a mailbox post. Seal it with weatherproof stain to maintain its rustic charm and longevity.
3. Metal Pipe with a Modern Twist
Use galvanized steel pipe or black iron for an industrial or minimalist look. Paint it matte black for sleekness or add custom patterns with metal stamps.
4. Repurposed Ladder or Vintage Furniture
DIYers love upcycling! Consider mounting your mailbox on an old wooden ladder, a vintage post, or even an antique chair for a quirky, personalized vibe.
5. Concrete or Stone Mailbox Post
For ultimate durability and a modern feel, create a concrete post with embedded stones or mosaic tiles. You can mold your own forms to personalize the design.
6. Painted PVC Pipe
PVC is lightweight and easy to work with. Paint it bright or pastel colors to create a cheerful mailbox post that stands out without requiring heavy tools.
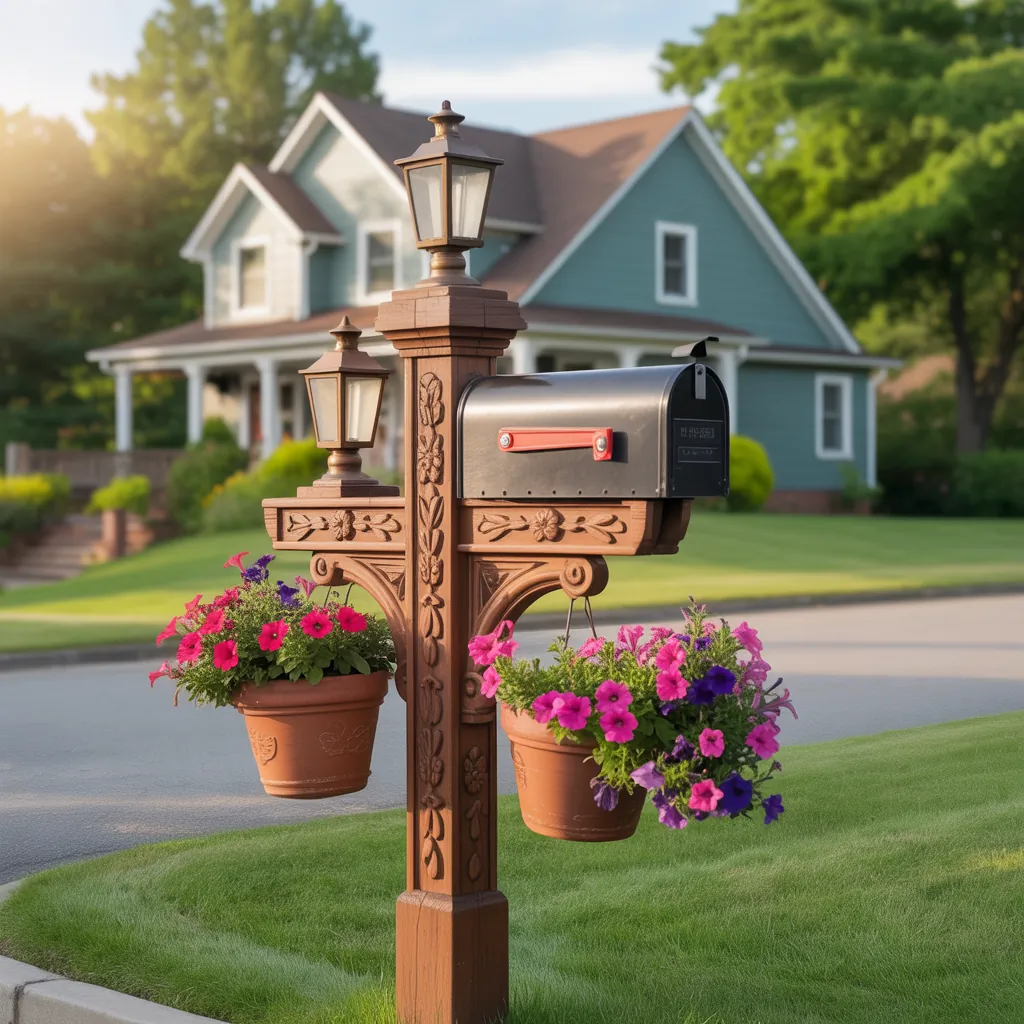
7. Flower Box Integration
Add a planter box around the base of your mailbox post. Fill it with seasonal flowers or succulents to blend natural beauty with functionality.
8. Nautical-Themed Post
Perfect for coastal homes — use driftwood, rope accents, or even an old anchor affixed to the post for a beach-inspired look.
9. Whimsical Character Post
Paint your mailbox post as a gnome or a robot, or decorate with themed embellishments showcasing your personality.
10. Brick or Masonry Post
A brick mailbox post adds classic elegance and substantial presence. If you’re comfortable with masonry, this project can bring a polished upgrade to your entryway.
11. Wrought Iron Ornamental Post
Add intricate scrollwork or custom iron designs for a decorative touch and robust build.
12. Stained Wood with Carvings
Give your mailbox a personal touch by carving initials, dates, or simple patterns into a stained wood post.
13. Integrated Lighting Post
Install solar or low-voltage lights either on top of or along the sides of your mailbox post for visibility and charm during nighttime.
14. Bold Color Block Design
Paint your mailbox post in bold stripes, geometric shapes, or ombre patterns to add a modern artistic appeal.
15. Dual Mailbox Post for Shared Drives
If you share a driveway or live in a duplex, build a wider post that holds two mailboxes, complemented by matching embellishments.
Step-By-Step DIY Tips for Installing a Mailbox Post
- Check Local Regulations: Confirm your municipality’s rules about mailbox height, distance from the curb, and placement.
- Choose Your Material: Decide between wood, metal, concrete, or upcycled materials based on style and maintenance preferences.
- Gather Tools and Supplies: Common tools include a post hole digger, level, drill, saw, paint, sealant, and mounting hardware.
- Dig the Post Hole: Hole depth generally should be 2-3 feet for stability — deeper in areas with frost line considerations.
- Set the Post: Position your post in the hole, use concrete or tamped gravel for support, and ensure it’s perfectly vertical.
- Attach the Mailbox: Follow mailbox manufacturer instructions or secure the box directly to the post with screws.
- Customize and Finish: Paint, stain, or decorate the post. Add planters, lighting, or decorative elements last.
Design Inspiration to Match Your Home’s Style
Think about your home’s architecture when choosing your mailbox post design. A Craftsman bungalow pairs well with stained wood and simple lines, while a contemporary home invites sleek metal or geometric color-blocking. Don’t forget the landscaping around the post; plant beds or mulch can frame your new mailbox post beautifully and make maintenance easier.
Frequently Asked Questions About Mailbox Posts
The standard mailbox height is typically between 41 to 45 inches from the ground to the bottom of the mailbox. Always check your local postal service guidelines for exact requirements.
Pressure-treated wood, cedar, metal (like galvanized steel), and concrete are excellent materials for durability. Sealing and regular maintenance will extend the life of wooden posts significantly.
Most homeowners with basic DIY skills can install a mailbox post themselves using common tools and following guidelines carefully. However, if you’re unsure about local codes or ground conditions, consulting a professional is advisable.
Conclusion: Ready to Upgrade Your Mailbox Post?
Nothing says “welcome home” like a beautifully designed mailbox post that suits your style and enhances your home’s curb appeal. Whether you’re drawn to rustic charm, sleek modernism, or playful personalization, these creative ideas for mailbox posts offer inspiration and practical guidance to get started. With some creativity and a weekend of effort, you can transform your mailbox into a standout piece that makes a great first impression.
Feeling inspired? Dive into more DIY projects and explore other home design ideas to continue your home’s transformation journey today!