Ever moved into a living room that feels a little too bare — and wondered how to add personality without buying bulky furniture? Floating shelves are the perfect fix. Whether you’re decorating a rental, creating a gallery wall, or hunting for clever storage in a small space, these ideas for living room floating shelves will help you turn a plain wall into a standout focal point.
Why choose floating shelves for your living room?
Floating shelves (aka wall-mounted shelves or hidden bracket shelves) offer a clean, modern look and functional storage without taking up floor space. They work as a minimalist display for books and décor, a media console alternative under the TV, or as a layered gallery for plants and art. Plus, many options are budget-friendly and DIYable — so you can customize size, material, and finish to match your room.
Top design ideas for living room floating shelves
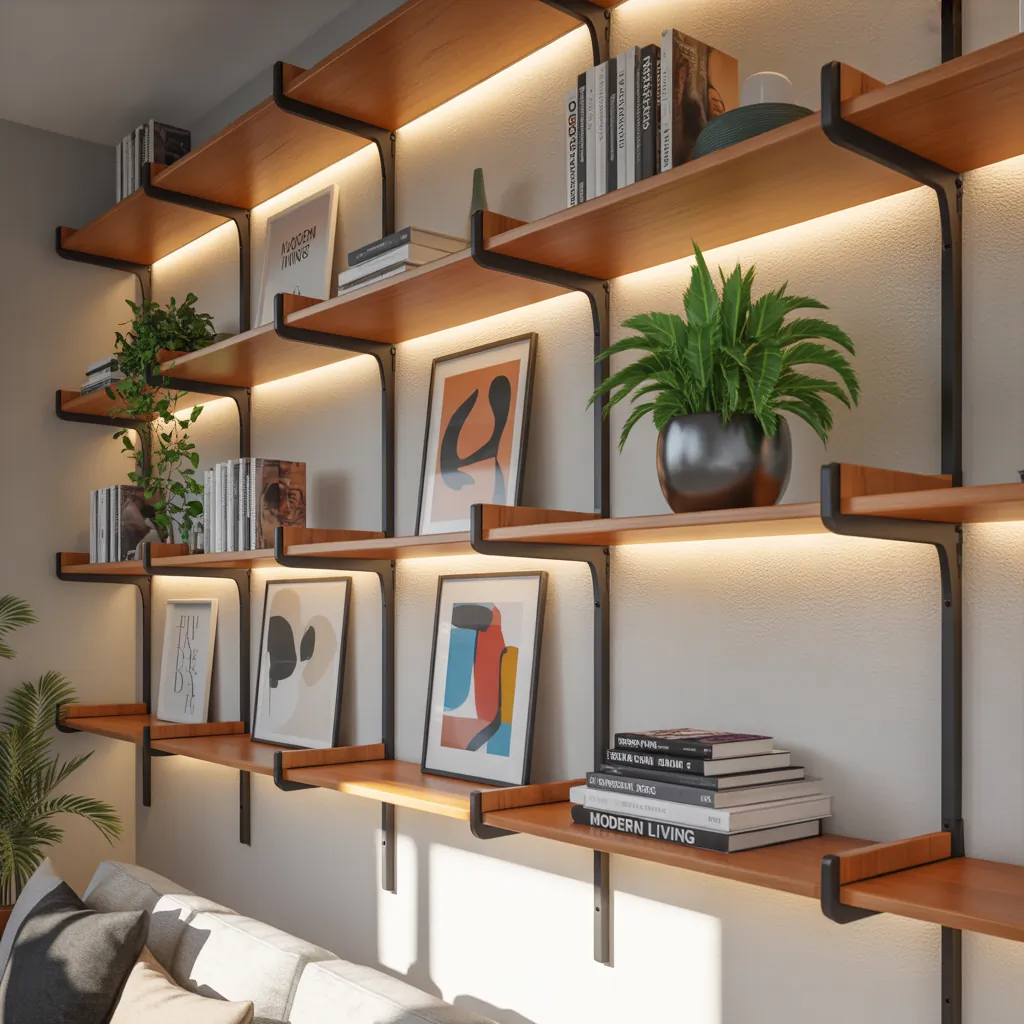
1. Staggered gallery shelves
Create depth by installing several shelves at varying heights and lengths. Use mixed materials — reclaimed wood planks with matte black metal brackets — to balance warmth and industrial edge. This layout works well behind a sofa or beside a fireplace.
2. Floor-to-ceiling shelving feature
For a dramatic look, run floating shelves from floor to ceiling on one wall. This creates a built-in effect and offers plenty of display space. Alternate open shelves with a few closed storage boxes to hide clutter.
3. Floating corner shelves
Utilize dead space by installing floating corner shelves. Triangular or wedge-shaped shelves are perfect for plants, small sculptures, or candles and make the most of awkward corners.
4. Media console made of long floating shelves
Replace a bulky TV stand with two long floating shelves: one for electronics and one for décor. Leave an opening behind the shelves for cable management, and add discreet anchors for heavier components.
5. Rustic wooden ledges
Bring warmth to a modern living room with chunky reclaimed wood ledges. Keep hardware concealed for a true floating look and finish with a durable sealant to protect against spills and fingerprints.
6. Minimalist thin floating shelves
For a Scandinavian vibe, install slim, light-colored wall shelves with clean lines. Limit the number of items to create negative space and highlight a few curated pieces.
Step-by-step DIY installation guide
Here’s a simple, reliable method to install most floating shelves safely and straight.
- Plan and measure: Mark the wall where you want the shelf. Use a level to ensure straight lines and measure for consistent spacing if installing multiple shelves.
- Find studs: Use a stud finder to locate studs for the most secure mounting. If studs aren’t available where you need them, choose heavy-duty anchors rated for your shelf load.
- Prepare materials: Gather floating shelf brackets or hidden-mount hardware, screws, drill, level, pencil, and anchors. Cut the shelf board to size and sand if needed.
- Mount the bracket: Secure the bracket to the wall using a level. Tighten screws into studs or anchors. Double-check horizontal alignment.
- Attach shelf: Slide the shelf onto the bracket. Some systems use screws through the underside of the board into the bracket — predrill to avoid splitting wood.
- Finishing touches: Fill visible screw holes with wood filler, touch up paint or stain, and seal exposed wood. Style your shelf.
Practical styling tips and real-world advice
- Balance form and function: Mix decorative items (art, vases) with practical storage (baskets, magazines). Vary heights for visual interest.
- Weight matters: Distribute heavier items near studs and closer to the wall. Avoid overloading a single shelf — check hardware weight limits.
- Layering trick: Place a framed print behind a small sculpture for depth, or stagger books both vertically and horizontally.
- Lighting: Add LED strip lights beneath shelves or small puck lights to highlight displays and create ambiance.
- Consistency: If installing multiple shelves, keep a consistent material or finish to avoid a chaotic look unless your goal is eclectic mixing.
- Rental-friendly options: Use adhesive floating shelf kits or invest in damage-free anchors if you can’t drill into walls.
Budget-friendly and advanced upgrades
If you’re on a budget, salvage wood from pallets or repurpose old furniture boards for an organic look. For a high-end upgrade, integrate behind-shelf cable channels, in-shelf lighting, or concealed drawer units to blend open display with hidden storage.
Ideas for living room floating shelves: layout examples
Single statement shelf
A wide, single shelf above the sofa can hold a row of frames and a lamp — quick to install, big visual payoff.
Symmetrical pairs
Install matching sets on either side of the TV or fireplace to frame the focal point and add balanced storage.
Asymmetrical collage
For a relaxed, gallery-like vibe, mix sizes and spacing. This works best when colors and textures tie the composition together.
Frequently Asked Questions
Q: How much weight can floating shelves hold?
A: Weight capacity depends on the shelf material, bracket type, and wall anchors. Properly anchored shelves into studs can hold 50–100+ lbs. Lighter drywall anchors may support 20–50 lbs. Always check manufacturer specs and distribute weight across multiple mounting points.
Q: Can I install floating shelves on plaster walls or brick?
A: Yes. For plaster, use a stud finder and choose appropriate anchors for plaster; for brick or masonry, use masonry anchors or sleeve anchors. Pre-drill holes with a masonry bit and use the right fasteners for long-term stability.
Q: Are floating shelves easy for beginners to install?
A: Yes — many floating shelf kits are beginner-friendly and include the required hardware. With basic tools (drill, level, stud finder) and attention to measurements, a single shelf can be installed in under an hour. For heavier installations, consider getting a helper or hiring a pro.
Conclusion — transform your walls with smart floating shelf choices
Whether you’re looking for practical storage or a stylish display, these ideas for living room floating shelves offer options for every style and skill level. Start small with a single shelf, try a DIY hidden-bracket installation, or commit to a floor-to-ceiling feature wall. Ready to tackle your next home project? Explore more DIY projects and get inspired by broader home design ideas — or check our kitchen upgrades for other clever shelving solutions throughout your house.
Want help picking the right shelf design for your space? Leave a comment or follow our step-by-step guides to create a personalized shelving solution today.