You’re cooking dinner, kids are doing homework on the counter, and your microwave is taking up precious workspace — again. Sound familiar? If you’re tired of a cluttered countertop or an awkward over-the-range unit, built-in microwave cabinet solutions can rescue both your kitchen’s flow and its look. In this guide I’ll walk you through practical, stylish, and straightforward ideas for built in microwave cabinet projects you can tackle yourself or design with a pro.
Why choose a built-in microwave cabinet?
Built-in microwave cabinets free up counter space, create a cohesive cabinetry look, and improve ergonomics. Whether you want the microwave at eye level, inside a pantry, or tucked under an island, there’s a layout that fits your cooking routine and design style. They also give your kitchen a custom, built-in feel without the cost of a full renovation.
Practical ideas for built in microwave cabinet
Here are high-impact, achievable ideas for integrating a microwave into cabinetry:
- Eye-level niche: Create a dedicated cabinet opening at standing height for easier access—great for families and anyone who wants to avoid bending.
- Microwave drawer: Install a microwave drawer under the counter or in an island for a sleek, hidden solution that doubles as a prep surface when the drawer is closed.
- Pantry integration: Place the microwave inside a pantry or tall cabinet with a pull-out shelf to maintain counter space and keep small appliances hidden.
- Above-oven combo: Stack the microwave above a wall oven inside a tall cabinet for a professional appliance wall look.
- Appliance garage: Add a flip-up door or sliding pocket door to conceal the microwave when not in use—ideal for open-plan kitchens.
Design inspiration & style ideas
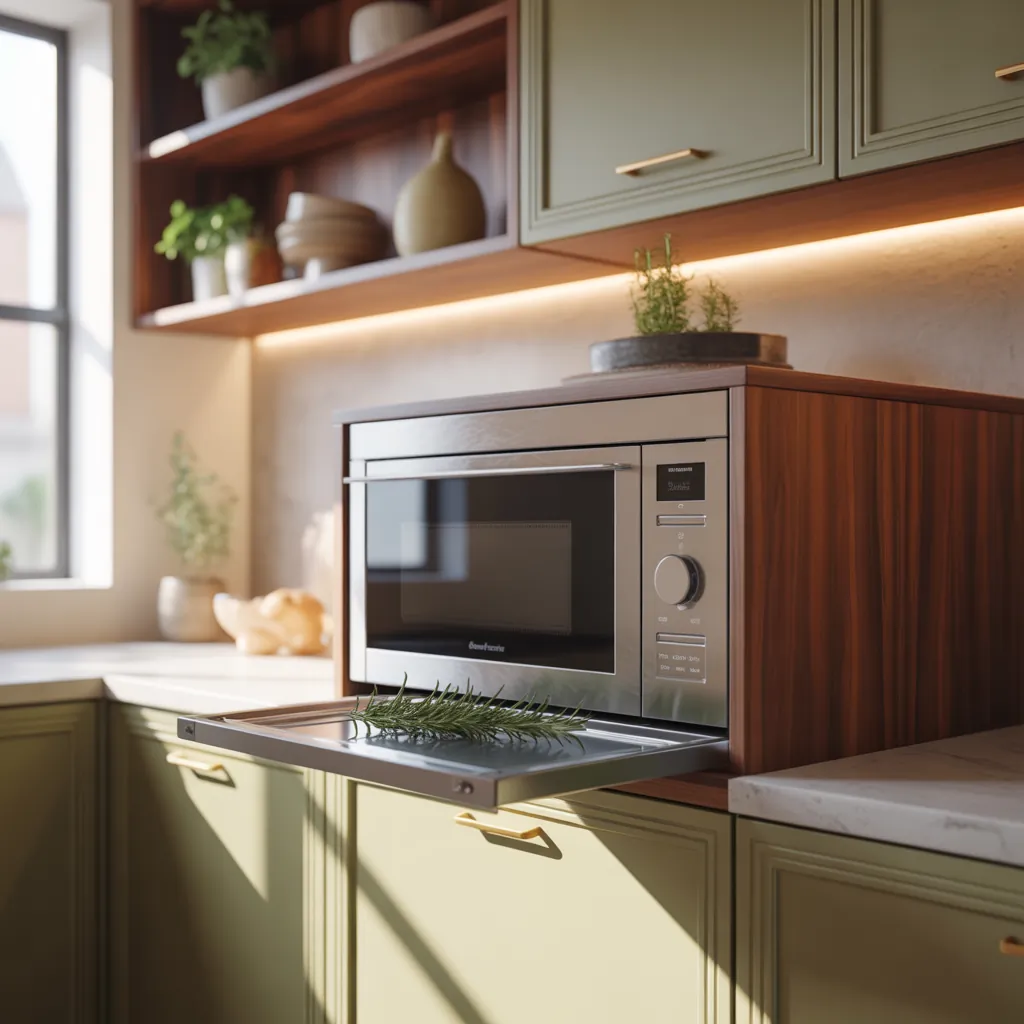
Modern minimal built-in microwave cabinet
Flush cabinet doors, a trim kit that matches the cabinetry, and a microwave drawer give a seamless, high-end vibe. Use matte finishes and hidden handles for a streamlined look.
Traditional & shaker-style integration
Frame the microwave opening with matching face frames and a decorative trim piece above the niche. A pull-out shelf finished to match your countertops keeps things cohesive.
Step-by-step DIY: Build a simple built-in microwave cabinet
This basic plan assumes you’re installing a countertop microwave into a custom cabinet niche or replacing an existing appliance. Adjust dimensions for your specific model.
Tools and materials
- Measuring tape, pencil, level and square
- Plywood or cabinet-grade MDF for the carcass
- 1×2 or 2×2 lumber for framing
- Screws, wood glue, trim/molding
- Microwave trim kit (optional) and ventilation kit if needed
- Outlet box and possibly a dedicated 120V circuit (check local code)
Build steps
- Measure the microwave’s external dimensions and recommended clearances. Note ventilation requirements and manufacturer’s specs.
- Frame the opening using 2x2s to create a rigid pocket. Use a level to ensure the shelf will be perfectly horizontal.
- Cut and install plywood panels for the back, sides, and shelf. Secure with screws and wood glue.
- Add a fixed or pull-out shelf. A pull-out shelf can save your back and make maintenance easier.
- Install an outlet inside the cabinet at the back of the cavity; consider hiring an electrician for new wiring.
- Finish with cabinet face panels, trim, and paint or stain to match adjacent cabinetry. Add ventilation openings or a trim kit per the microwave manual.
- Test fit the microwave, ensure proper airflow, and secure according to manufacturer instructions.
Ventilation, electrical, and safety considerations
Don’t skip this section—proper ventilation and electrical setup are critical. Some microwaves are designed for enclosed installations and come with dedicated trim kits and venting options. Others require venting to the exterior or a certain clearance above and behind the unit.
- Always follow the microwave manufacturer’s installation instructions.
- Install a grounded outlet inside the cabinet; avoid using extension cords.
- Ensure adequate airflow—consider a venting kit or louvered panel if the microwave is fully enclosed.
- When in doubt, consult a licensed electrician or cabinet pro for permanent electrical changes or complex cabinetry modifications.
Space planning & measurements
Measure twice, cut once. Typical guidelines:
- Allow manufacturer-recommended clearances on all sides.
- Eye-level microwaves are usually installed 42–48 inches from the floor to the center of the unit, depending on cooktop placement.
- Leave 1–2 inches behind the microwave for cord/ventilation unless a back panel is removable.
Budget-friendly tips and real-world advice
- Reuse existing cabinetry where possible—retrofit a shelf into a tall cabinet to save money.
- Buy open-box or last-year models of microwaves to lower appliance costs.
- Use paint and trim to make a standard countertop microwave look custom—often the cheapest route to a polished built-in appearance.
- Plan for future upgrades: size the cavity to accept a slightly larger microwave down the road.
Frequently Asked Questions
Q: Can any microwave be installed in a built-in cabinet?
A: Not always. Some counter microwaves are suitable for enclosed installation if you follow clearance and ventilation requirements; others need trim kits or specific built-in models. Check the manufacturer’s installation manual before committing to a build.
Q: How much space do I need for a built-in microwave cabinet?
A: Space depends on the microwave model. Typical clearances include 1–2 inches behind and several inches above or to the sides depending on the design. Always follow the unit’s specifications and the cabinet maker’s recommendations.
Q: Do I need a dedicated electrical circuit?
A: Many microwaves can run on a standard 120V outlet, but higher-powered units or kitchen code in your area may require dedicated circuits. If you’re unsure, consult an electrician for safe installation.
Conclusion — Ready to build your custom microwave spot?
Transforming an awkward appliance into a sleek built-in is one of the highest-impact kitchen upgrades you can do. These ideas for built in microwave cabinet projects range from simple retrofit solutions to full custom cabinetry, and many are achievable as DIY weekend projects. If you want design inspiration or step-by-step plans, explore our DIY projects page and browse tips at kitchen upgrades or home design ideas to plan your next move.
Ready to reclaim your counter space and give your kitchen a cleaner look? Start measuring today, pick the idea that fits your style, and share your before-and-after — I’d love to see your project come to life!