Are you staring at a counter full of empty jars and wondering how to turn them into something beautiful and useful? Whether you hoard pasta sauce jars or save every mason jar from a weekend canning session, painting glass jars is one of the fastest, most satisfying DIY home upgrades you can do. In this guide I’ll show you glass jar painting ideas how to — step-by-step techniques, design inspiration, and real-world tips so you can create polished pieces for storage, lighting, and decor.
Why paint glass jars? The benefits of upcycling jars for home decor
Painting glass jars is budget-friendly, eco-conscious, and instantly elevates your interior style. Painted jars can be used as vases, utensil holders, bathroom organizers, candle holders, or even pendant lighting. They’re perfect for small projects that make a big visual impact, especially if you’re into affordable home design ideas or weekend DIY projects.
Materials and tools you’ll need
- Clean glass jars (mason jars, jam jars, or recycled bottles)
- Rubbing alcohol or dish soap for degreasing
- Sandpaper (220–400 grit) or a scouring pad
- Glass primer (optional for spray projects)
- Glass or multi-surface acrylic paint, enamel spray paint, or chalk paint
- Paintbrushes, foam brushes, or sponge daubers
- Painter’s tape and stencils
- Clear sealer (spray varnish or Mod Podge for decoupage)
- Gloves, drop cloth, and workspace ventilation
Prep steps: how to paint glass jars for best results
- Clean thoroughly: remove labels and adhesive; wash with hot soapy water and dry. Wipe surfaces with rubbing alcohol to remove oils.
- Sand very lightly: scuffing with fine sandpaper helps paint adhere to smooth glass.
- Prime when using spray paint: a glass primer or multi-surface primer improves durability.
- Plan your design: sketch ideas and test colors on scrap glass if possible.
- Protect edges: use painter’s tape for crisp lines and clean masking.
glass jar painting ideas how to — 7 creative projects (step-by-step)
1. Ombre painted mason jars (soft, modern look)
Technique: Start with a base color and gradually add white to lighten or use a darker tone to blend. Use a sponge or dry brush to layer paint for a gradient.
Steps: Paint the bottom third of the jar with full-strength paint → dab lighter tones upward → blend where colors meet with a sponge → cure and seal.
2. Chalkboard label jars (organization + style)
Technique: Paint a rectangle or circle with chalkboard paint. Once cured, write labels with chalk or chalk markers. Great for pantry storage and kitchen spice jars.
3. Frosted glass effect (subtle and elegant)
Technique: Use frosted glass spray or mix white acrylic glaze with water for a translucent effect. Mask patterns with tape to create geometric frosted stripes or dots.
4. Stenciled pattern jars (boho or modern patterns)
Technique: Apply a stencil and dab paint with a sponge for crisp motifs—chevrons, florals or holiday icons. Remove stencil carefully and touch up edges.
5. Decoupage and floral wraps (vintage charm)
Technique: Use tissue paper, napkins, or printed paper. Adhere with Mod Podge, smooth wrinkles, then seal with another coat. Great for delicate, layered textures.
6. Metallic dipped jars (glamorous accents)
Technique: Spray or brush a metallic paint on the bottom half for a dipped look. Use painter’s tape for a clean transition. Perfect for candle holders or centerpieces.
7. Seasonal and holiday jars (easy rotating decor)
Technique: Paint pumpkins, snowflakes, autumn leaves, or hearts using small brushes and seasonal colors. Change them out throughout the year for fresh decor.
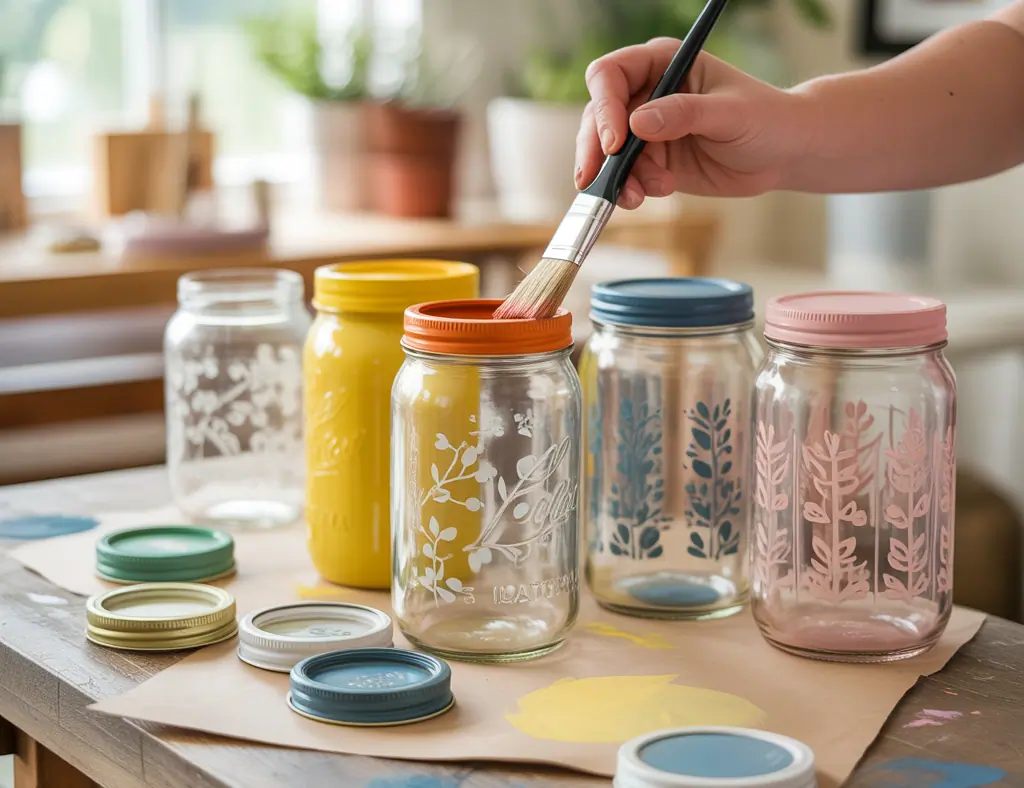
Step-by-step: a basic painted mason jar tutorial
Follow this quick recipe for an all-purpose painted jar:
- Remove label and wash jar; wipe with alcohol and let dry.
- Lightly sand where paint will be applied.
- Apply a thin coat of primer if using spray paint. Let dry per product instructions.
- Brush on two thin coats of acrylic enamel, allowing full drying time between coats. Thin coats prevent drips.
- Seal with a clear spray varnish for outdoor use or frequent handling.
- Cure fully — some paints benefit from air cure or recommended oven cure (follow manufacturer directions).
Durability tips and real-world advice
- Avoid dishwasher use unless paint is specifically dishwasher-safe; hand wash gently instead.
- For jars used as drinkware, paint only the exterior; never paint inside the rim where lips touch.
- Use outdoor-rated sealer for porch or patio pieces to prevent fading from sunlight.
- If paint chips, sand the area, spot prime, and touch up with matching paint.
- Test adhesives and paints on a spare jar before committing to a large batch.
Styling ideas: where to use painted jars in your home
Painted glass jars are versatile styling tools:
- Kitchen: utensil holders, herb planters, or labeled pantry containers — great for kitchen upgrades.
- Bathroom: cotton ball jars, toothbrush holders, or soap dispensers.
- Dining room: candle holders, floral centerpieces, or a grouped vignette on a sideboard.
- Outdoor: use metallic or sealed jars as luminaries on patios or string small fairy lights inside for ambiance.
Frequently Asked Questions
1. What paint works best on glass jars?
Multi-surface acrylics, enamel paints, and spray paints labeled for glass adhere well. For a durable finish, choose paints that specifically state “glass” or “multi-surface” and finish with a clear sealer.
2. How do I remove labels and sticky residue from jars?
Soak jars in hot, soapy water to loosen labels. For stubborn adhesive, rub with vegetable oil, baking soda paste, or use rubbing alcohol; then wash with soap to remove oils before painting.
3. Can I make painted jars dishwasher-safe?
Some glass paints are dishwasher-safe after full cure (check manufacturer instructions). Even then, hand washing is gentler and will prolong the finish. For best results, apply a high-quality dishwasher-safe sealant if the product supports it.
Conclusion — Try these glass jar painting ideas how to and transform your space
Painting glass jars is an inexpensive, creative way to refresh your home and make practical decor. From ombre mason jars to metallic-dipped candle holders, these glass jar painting ideas how to will help you turn rescued jars into beautiful and functional pieces. Pick one project, gather your supplies, and start upcycling today — you’ll be surprised how fast a few painted jars can elevate a room. Ready for more? Explore our other DIY projects and home design ideas for seasonal inspiration.
Call to action: Share a photo of your finished painted jar project or leave a comment below telling which technique you’ll try first — I love seeing reader makeovers!