Ever stared at your cracked, oil-stained garage floor and wondered how to transform it into a clean, functional space without hiring a contractor? Whether you’re dreaming of a polished workshop, a home gym, or just a garage that makes your neighbors jealous, these garage floors cool ideas will spark inspiration and guide you through practical, do-it-yourself upgrades.
Why upgrade your garage floor?
A garage floor does more than hold your car — it sets the tone for the whole space. A smart floor upgrade boosts durability, resists stains, improves safety with anti-slip surfaces, and can even make the area feel like an extension of your home. For many homeowners, a budget-friendly floor refresh is one of the highest-impact DIY projects you can take on.
Garage Floors Cool Ideas: Top options to try
Below are tested solutions for a wide range of budgets, skill levels, and garage uses. Each entry includes pros, cons, and DIY pointers so you can pick the right route.
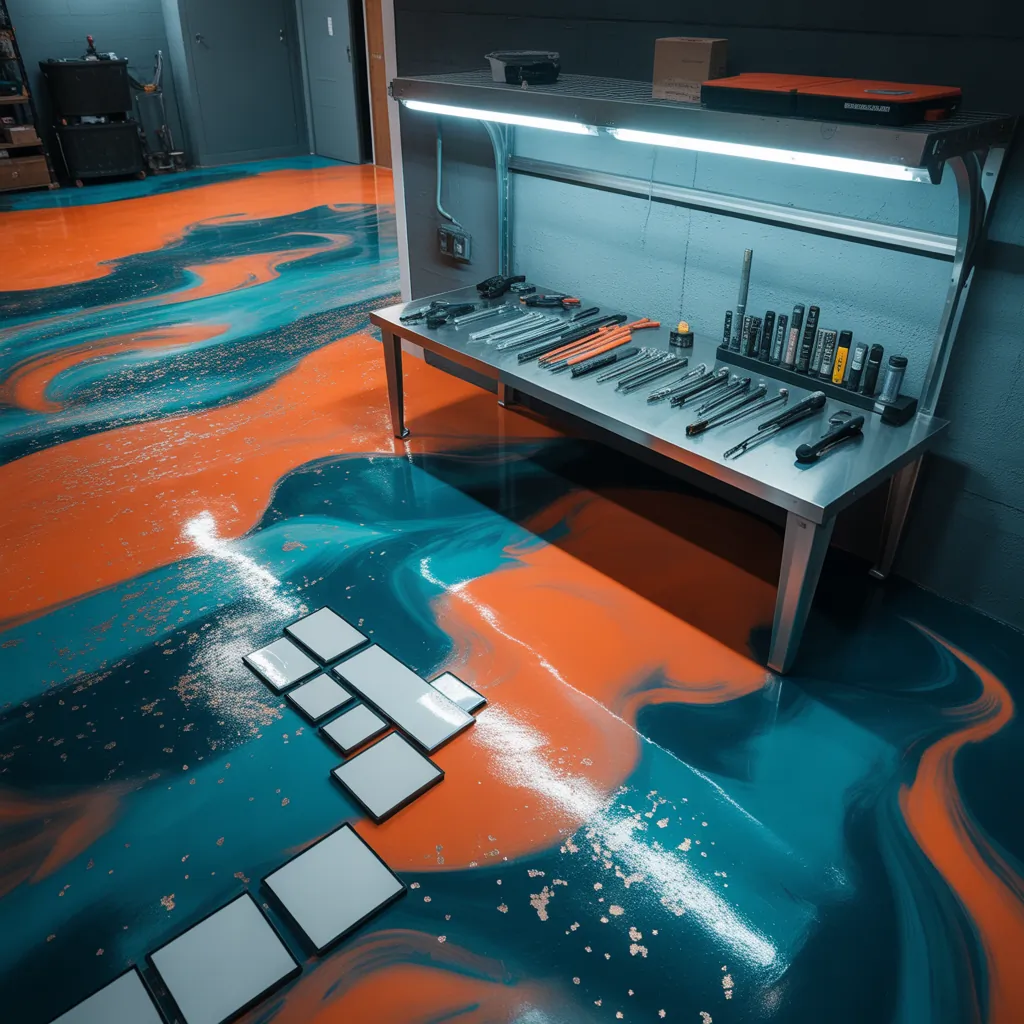
1. Epoxy coatings — professional look, DIY doable
Epoxy is one of the most popular garage floor solutions because it’s durable, chemical-resistant, and available in many colors and finishes (solid, metallic, or flake).
- Pros: Long-lasting, low maintenance, custom finishes
- Cons: Prep-intensive, sensitive to moisture, needs curing time
- DIY basics:
2. Interlocking floor tiles — fast, forgiving, and modular
Interlocking PVC or polypropylene tiles are ideal if you want a quick install and a soft, insulated surface. They come in a variety of colors and textured finishes.
- Pros: Quick installation, replaceable tiles, good for workshops and gyms
- Cons: Can shift if not installed correctly, seams may trap dirt
- DIY tip: Start at the garage center or along a straight edge, use a rubber mallet for snug seams, and trim tiles with a utility knife for edges.
3. Stained or polished concrete — modern, low-profile finish
Staining gives concrete a translucent, variegated color, while polishing creates a glossy, low-maintenance finish. These options are great for a minimalist, modern look.
- Pros: Low profile, easy to clean, hides minor imperfections
- Cons: Limited color options vs. epoxy, polishing often requires equipment
- DIY approach: Stain in small garages is doable with careful prep and multiple thin coats; rent a concrete polisher if you want a high-gloss finish.
4. Flake system — hides imperfections and adds texture
Painted epoxy with color flakes is a forgiving system that camouflages imperfections and adds traction. Great for garages that see heavy use and occasional spills.
- Pros: Attractive, hides chips/cracks, customizable color blends
- Cons: Requires multiple coats and careful timing
- Installation tip: Broadcast flakes into the wet epoxy, sweep off excess after cure, then seal with a clear topcoat for durability.
5. Rubber mats and roll-out flooring — comfort and sound dampening
For gym garages or tool-heavy workshops, rubber matting offers cushion underfoot and protects the concrete.
- Pros: Shock absorption, easy to replace, protects tools and tires
- Cons: Can trap moisture beneath, may smell initially
- Pro tip: Use interlocking rubber tiles with a moisture barrier underneath in damp climates.
6. Decorative stencil paint — budget-friendly personality
If you want a bold look without a major overhaul, high-quality concrete paint and stencils can produce checkerboards, racing stripes, or custom logos.
- Pros: Low cost, fast transformation, endless design options
- Cons: Less durable than epoxy, may need frequent touch-ups
- DIY tip: Choose a durable concrete paint, follow manufacturer prep steps, and finish with a clear sealer for added life.
Practical steps every garage floor project needs
No matter which idea you pick, these universal steps will improve results and longevity:
- Test for moisture: Tape a sheet of plastic to the floor for 24–48 hours; rising condensation means you need a vapor barrier or moisture-tolerant system.
- Degrease and clean: Oil and grease prevent adhesion—use a concrete degreaser and rinse thoroughly.
- Repair cracks and spalls: Use epoxy crack fillers or hydraulic cement for structural repairs.
- Etch or grind: For coatings like epoxy, mechanical grinding or acid etching improves bonding.
- Follow temperature and humidity guidelines: Coatings cure differently depending on conditions—read product specs.
- Plan for ventilation and safety: Wear respirators when working with chemicals and ensure proper airflow while coatings cure.
Design inspiration: ideas to personalize your garage
Think beyond plain gray. Use these design cues to match the floor to your lifestyle:
- Workshop zones: Add painted borders or different tile colors for tool areas, parking, and a small office nook.
- Garage gym: Use darker, shock-absorbing tiles under heavy equipment and a contrasting color for a workout zone.
- Showroom finish: Metallic epoxy or polished concrete with subtle lighting gives a showroom vibe.
- Functional markings: Add parking guides, bike lanes, or storage squares for visual organization.
Real-world advice and maintenance tips
Keep your new garage floor looking great with routine care:
- Sweep regularly and hose off spills quickly.
- Use a mild detergent for deeper cleaning—avoid harsh chemicals on tinted finishes.
- Place mats under drip-prone vehicles or equipment to catch oil and chemicals.
- Reapply topcoats as needed for epoxy and paint systems—every few years depending on traffic.
Frequently Asked Questions
Q: Can I apply epoxy over existing paint or sealer?
A: It depends. Epoxy needs a sound, porous surface to adhere. Old paint or sealer can interfere with adhesion. If you have a painted or sealed floor, strip or sand it back to bare concrete, or use a primer specifically designed for previously coated surfaces.
Q: What’s the easiest garage floor upgrade for beginners?
A: Interlocking tiles or high-quality concrete paint with stencils are the most beginner-friendly. Both require minimal specialized tools and are relatively quick. For a more professional look, consider a flake system that’s DIY-friendly but requires careful timing.
Q: How do I deal with a damp or moisture-prone garage floor?
A: First, test for moisture. If you have high moisture vapor emission, choose moisture-tolerant systems like certain penetrating sealers, polished concrete with a proper densifier, or install a vapor barrier before tiling. Address drainage around the slab to reduce long-term problems.
Conclusion
Ready to transform your space? These garage floors cool ideas give you the inspiration and practical steps to upgrade a utilitarian slab into a durable, stylish extension of your home. Start by assessing your garage’s condition and intended use, then pick a solution that matches your budget and DIY comfort level. Want more step-by-step inspiration? Check out our DIY projects and home design ideas pages for linked guides and project plans. Get started today — your garage has untapped potential.