Have you ever stood in your kitchen with a pile of mismatched vases and a grocery-store bouquet and wondered how to turn them into something that looks like it belonged in a magazine? If you’re tackling a last-minute Mother’s Day project and want to improve your home’s look with personal, crafted touches, these flower arrangements mother day ideas will help you create beautiful, budget-friendly floral centerpieces and bouquets that feel intentional and fresh.
Why DIY Flower Arrangements for Mother’s Day Works (and Why Mom Will Love It)
Handmade floral arrangements are more than flowers — they’re memories. A DIY bouquet shows thoughtfulness, lets you tailor colors to her taste, and can be an easy home improvement touch that elevates a dining table, mantel, or breakfast-in-bed tray. Plus, making your own arrangements saves money and lets you use seasonal blooms, sustainable materials, and creative vases from around the house.
Flower arrangements mother day ideas: Quick DIY centerpieces
Below are practical, step-by-step arrangements that suit different skill levels, budgets, and design styles. Each project includes real-world tips and styling notes so your finished piece looks polished.
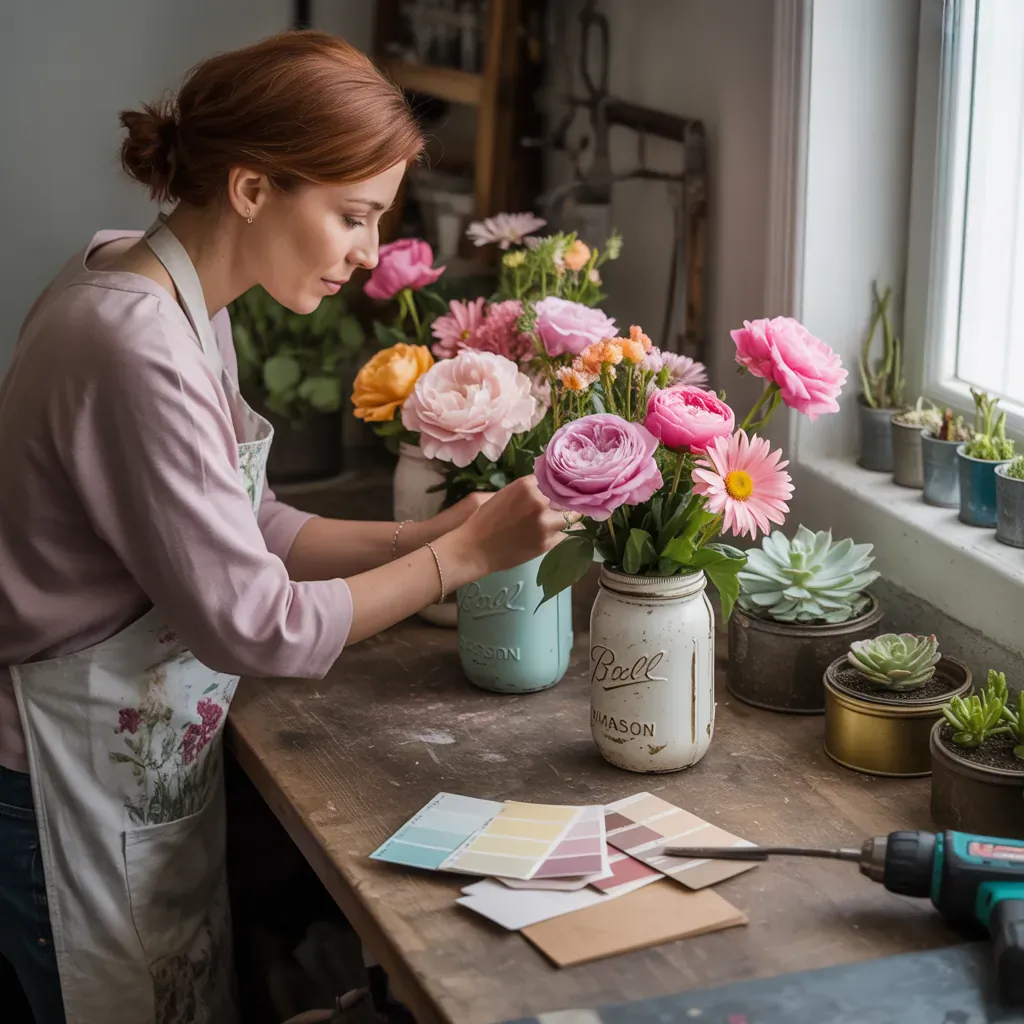
1. Rustic Mason Jar Bouquet (Beginner, 15–20 minutes)
- Materials: 2–3 mason jars, rubber bands, scissors, ribbon, seasonal flowers (daisies, alstroemeria, spray roses), filler greens.
- Steps:
- Design tip: Use three jars in a cluster on a tray for a charming centerpiece that works on tables or windowsills.
2. Elegant Mixed-Flower Arrangement (Intermediate, 30–45 minutes)
- Materials: medium vase, floral scissors, floral tape or chicken wire (as a grid), focal flowers (peonies, roses), secondary blooms (lisianthus, ranunculus), greenery.
- Steps:
- Real-world advice: If you can’t find floral foam, the tape grid stabilizes stems without the waste. Use local, seasonal flowers to cut costs and extend vase life.
3. Minimalist Bud Vases (Advanced-looking, Minimal Effort)
- Materials: several small bud vases or thrifted shot glasses, 1–2 stems per vase (tulips, hyacinths, single rose stems).
- Steps:
- Design inspiration: Use a monochrome palette for a chic, cohesive statement.
Practical DIY Tips for Longer-Lasting Blooms
- Cut stems underwater to prevent air locking and improve water uptake.
- Change water every two days and recut stems to extend life.
- Add a teaspoon of sugar and a drop of bleach to vase water to nourish flowers and reduce bacteria.
- Keep arrangements out of direct sunlight and away from ripening fruit, which emits ethylene gas.
- Use fewer blooms with better spacing for arrangements that look more expensive than they are.
Design Inspiration: Match Arrangements to Her Style
Consider Mom’s personal style and your home’s decor when choosing colors and vessel types:
- Classic & traditional: full, rounded bouquets in porcelain or crystal vases.
- Modern & minimalist: single-type flowers in sleek glass or concrete vessels.
- Rustic & farmhouse: wildflower mixes in mason jars or enamel pitchers.
- Romantic & vintage: soft pastels with lace ribbon and antique compotes.
Step-by-Step: Make a Mother’s Day Breakfast Tray Arrangement
This quick project pairs perfectly with a breakfast-in-bed setup.
- Select a shallow bowl or small pitcher as your container.
- Add a small block of wet floral foam or a tape grid for hold.
- Place 1–2 focal blooms, then surround with filler flowers and a touch of greenery.
- Keep the arrangement low so it doesn’t obstruct conversation or food items on the tray.
Tip: Use scent-free flowers if including breakfast dishes to avoid flavor clashes.
Eco-Friendly and Budget-Friendly Alternatives
Not all beautiful arrangements require fresh flowers. Consider these sustainable options:
- Preserved or dried flowers for keepsake bouquets.
- Greenery-only arrangements using eucalyptus, olive branches, or fern for long life.
- Grow-your-own stems: force bulbs like amaryllis or paperwhites indoors for a seasonal surprise.
Frequently Asked Questions
A1: Daisies, carnations, alstroemeria, tulips, and spray roses are forgiving, affordable, and easy to work with for beginner arrangements. They combine well with greens and hold up in mixed bouquets.
A2: Use filler greens (like rosemary, eucalyptus, or ferns) to add volume, and group smaller blooms tightly in clusters. Choosing flowers with larger heads (peonies, hydrangea) also makes a bouquet appear fuller with fewer stems.
A3: With proper care—clean vase, fresh water changed every two days, recutting stems—most mixed bouquets last 5–10 days. Dried or preserved arrangements can last months or years as keepsakes.
Conclusion: Try These Flower Arrangements Mother Day Ideas This Year
Ready to make something beautiful? These flower arrangements mother day ideas give you practical, step-by-step options for quick centerpieces, elegant bouquets, and sustainable keepsakes. Whether you’re a DIY beginner or a weekend warrior, a personal floral touch is an easy home improvement that brightens the space and Mom’s day.
Want more project inspiration? Check out our DIY projects page for creative tutorials, explore decorating tips in home design ideas, or find ways to pair flowers with a refreshed breakfast nook on our kitchen upgrades page. Share your finished arrangement and inspire others — and if you try one of these tutorials, tag a photo and tell us which idea was your favorite!