Ever stood in a cramped bathroom wondering how to make it feel larger and more modern without tearing down walls? Cue the floating vanity — a sleek, wall-mounted bathroom solution that transforms tight spaces and gives a custom look for a fraction of the cost. In this guide, you’ll find practical floating vanity bathroom ideas, step-by-step DIY tips, and real-world design advice so you can upgrade your bath with confidence.
Why choose a floating vanity?
Floating vanities (also called wall-mounted or suspended vanities) free up floor space, make cleaning easier, and instantly create a modern vibe. They work especially well in small bathrooms, powder rooms, and contemporary master baths. Beyond aesthetics, these vanities allow you to customize storage height, hide plumbing neatly, and pair with under-cabinet lighting for a luxurious effect.
Floating vanity bathroom ideas for every style
Whether you want a DIY-friendly single-sink unit or a double-sink floating bathroom vanity, there are plenty of design directions to consider. Below are ideas organized by style and space to inspire your remodel.
1. Small bathroom floating vanity ideas (space-conscious)
- Choose a narrow wall-mounted cabinet (18–24 inches) with open shelf below for baskets to keep essentials accessible.
- Use a shallow integrated sink or wall-mounted faucet to maximize counter space.
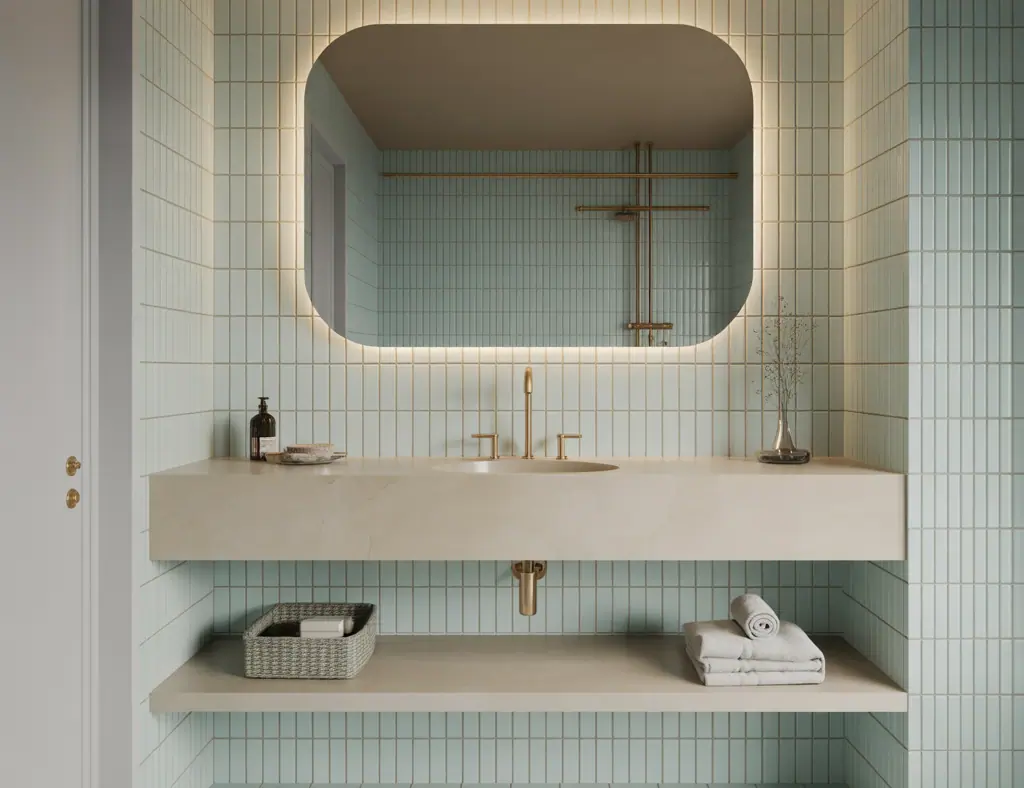
- Install a large mirror that spans the wall — it visually expands the room and boosts light.
2. Modern and minimalist floating vanity ideas
- Go with flat-panel fronts, matte finishes (black, greige, or white), and concealed handles for a streamlined look.
- Pair with a thin solid-surface countertop and undermount sink for clean lines.
- Add LED strip lighting beneath the vanity to create a floating glow.
3. Rustic and industrial suspended vanity ideas
- Use reclaimed wood or a butcher-block-style countertop against matte-black metal brackets for contrast.
- Combine with vessel sinks and exposed piping (carefully sealed) to lean into industrial charm.
4. Double sink floating vanity ideas for shared bathrooms
- Select a longer cabinet (60–72 inches) mounted to a reinforced wall or ledger for weight support.
- Install two shallow sinks to save counter depth and keep plumbing compact.
- Incorporate drawer organizers and open shelving for towels and daily items.
Practical DIY tips: Tools, materials, and installation steps
Installing a floating vanity is a rewarding DIY project if you’re comfortable with carpentry and some plumbing. Below is a condensed step-by-step guide and a list of must-have tools.
Tools and materials
- Stud finder, level, tape measure
- Heavy-duty vanity rail or steel mounting bracket rated for the cabinet weight
- Lag bolts, washers, and appropriate anchors
- Plywood backing (optional but recommended for extra support)
- Caulk, silicone sealant, and plumber’s tape
- Power drill, impact driver, jigsaw (if cutting countertop), and safety gear
Step-by-step installation overview
- Measure and plan: Determine ideal height (typically 32–36″ to the countertop, shorter for children). Mark stud locations with a stud finder and map plumbing access.
- Reinforce the wall: If the wall framing is weak, install a horizontal plywood backing between studs or use a commercial steel rail mounted into multiple studs.
- Install mounting hardware: Secure the vanity rail or bracket level and plumb, using long lag bolts into studs. Double-check alignment — this dictates how straight the cabinet will hang.
- Mount the vanity: Lift the cabinet onto the bracket (have a helper) and secure through predrilled holes. If using a countertop, fit and secure the countertop after the cabinet is attached.
- Connect plumbing: Hook up drain and water supply lines. For complex moves (relocating drains or adding drains for double sinks), consider hiring a plumber.
- Finish and seal: Apply silicone where the vanity meets the wall and around the sink. Install hardware, mirrors, and lighting.
Real-world advice: Always test the weight capacity before filling drawers with heavy items. Use mounting rails rated well above your expected load and consider a professional for stone or heavy countertops.
Design details that make a floating vanity shine
Small details elevate floating vanities from functional to fabulous. Here are ideas to finish the look:
- Backsplashes: Vertical tiles or a full-height tile wall behind the vanity create drama and protect from splashes.
- Sink choices: Integrated sinks for minimalism, vessel sinks for a statement, or trough sinks for family bathrooms.
- Storage solutions: Soft-close drawers, slide-out organizers, and built-in dividers keep countertops clutter-free.
- Lighting: Backlit mirrors or sconces at eye level improve task lighting and can replace bulky fixtures.
- Materials: Waterproof plywood or MDF with marine-grade paint for cabinet boxes, quartz or concrete countertops for durability.
Maintenance and longevity tips
To keep your floating vanity looking great and performing well:
- Wipe spills immediately and avoid excessive water exposure to wood-faced cabinets.
- Check mounting bolts annually for tightness, especially if the vanity is used heavily.
- Use non-abrasive cleaners on countertops and hardware to preserve finishes.
Frequently Asked Questions
Can I install a floating vanity on a plaster or drywall wall?
Yes, but you must anchor into studs or add a plywood backer secured to studs. Drywall alone won’t support the weight of a vanity plus countertop and supplies. Installing a backing or a steel mounting rail ensures a safe installation.
Are floating vanities suitable for rental properties?
Absolutely. Floating vanities can be less permanent than built-in cabinetry and often add perceived value. Use reversible mounting methods where possible and avoid structural modifications that require extensive permitting.
What is the best height for a floating vanity?
Standard vanity height ranges from 32 to 36 inches to the countertop surface. For universal design or taller users, consider 34–36 inches. Always test with a mock-up level to ensure comfort before final installation.
Conclusion: Try one of these floating vanity bathroom ideas today
Floating vanity bathroom ideas offer a powerful way to modernize a bathroom, save floor space, and add custom style — whether you’re tackling a weekend DIY or hiring a pro for a full remodel. Start small with a narrow wall-mounted cabinet or go big with a double floating vanity and dramatic backsplash. If you want project inspiration and step-by-step plans, check out our DIY projects page or browse related home improvements like kitchen upgrades and home design ideas for complementary styles.
Ready to transform your bathroom? Pick a style, gather the right tools, and give floating vanities a try — then share your before-and-after to inspire others!