Ever opened your bathroom door to find it feels cramped, cluttered, or dated, and wondered if a single swap could change everything? Picture knocking out that old pedestal sink and mounting a sleek, wall-mounted piece that gives the room instant breathing room — more floor space, cleaner lines, and smarter storage. If you’re tackling a weekend remodel, a renter-friendly refresh, or a full bathroom renovation, floating vanity bathroom ideas can deliver dramatic results without a complete overhaul.
Why Choose a Floating Vanity?
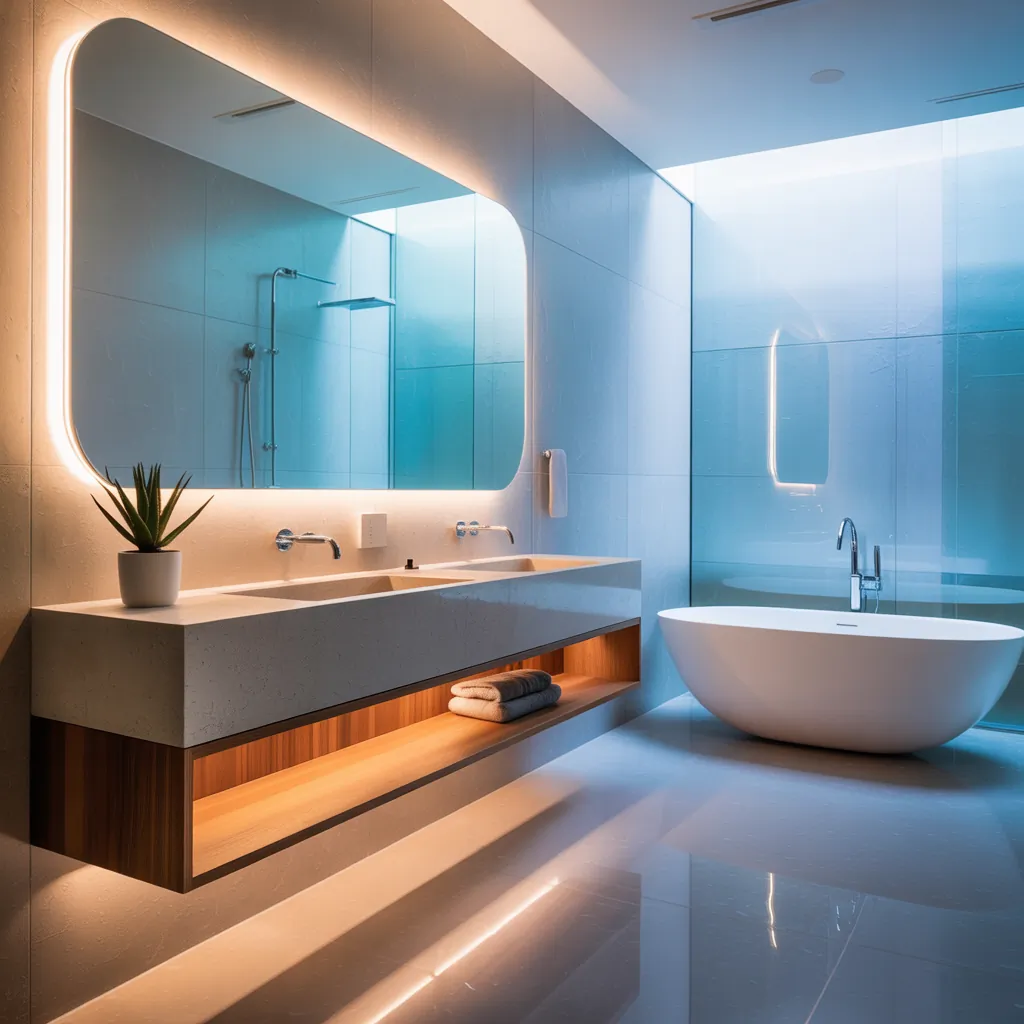
Floating or wall-mounted vanities lift your bathroom visually and physically. They make small baths look larger, simplify cleaning, and create storage opportunities beneath the unit. Whether you prefer mid-century modern, farmhouse, or minimalist designs, a floating vanity can suit every style and budget.
Benefits at a glance
- Opens up floor space for a lighter, airier feel
- Improves accessibility — great for aging-in-place with custom height
- Easier floor cleaning without baseboards or toe-kicks
- Customizable storage: drawers, open shelves, baskets
Design Inspiration: Styles and Materials
Think about how you want the vanity to complement existing finishes. Here are styling directions and material ideas to spark creativity:
Modern minimal
Flat-panel fronts, matte finishes, integrated sinks in white solid surface or quartz. Keep hardware minimal or push-to-open for a seamless look.
Warm wood & farmhouse
Reclaimed wood or butcher block tops paired with shaker-style fronts bring warmth. Seal properly for moisture resistance.
Industrial & mixed materials
Combine a metal frame with a floating wood top, or use concrete countertops for an urban edge.
Small bathroom solutions
Choose a compact floating vanity with a narrow depth, integrated shelf, and vertical storage to maximize every inch. Wall-mounted faucets free counter space and reinforce the floating effect.
Practical DIY Tips: How to Install a Floating Vanity
Many homeowners can install a floating vanity with basic carpentry and plumbing skills. Below is a step-by-step guide for a typical installation. Always confirm local codes and consult a pro for structural or major plumbing changes.
Tools and materials you’ll need
- Stud finder, level, tape measure
- Mounting cleat or heavy-duty wall brackets (rated for weight)
- Plywood backing or 2x blocking inside the wall
- Drill, lag bolts, anchors suitable for your wall type
- Plumbing supplies (P-trap, supply lines) and silicone sealant
Step-by-step installation
- Plan the height: standard is 32–34 inches, but custom heights improve accessibility.
- Locate studs and add a horizontal ledger board or blocking between studs if none present.
- Install heavy-duty brackets or cleat system anchored into studs. Use a level — this is critical.
- Rough-in plumbing so drain and water lines align with the vanity openings.
- Mount the vanity onto the brackets, secure with lag bolts, then connect plumbing.
- Seal edges with silicone and add trim or toe molding if desired. Test for leaks.
Tip: If you can’t anchor into studs, consider a metal wall carrier system rated for vanities — typically used for wall-hung toilets and fixtures.
Storage & Lighting Around Your Floating Vanity
Floating vanities have less built-in floor storage, so plan smartly:
- Use under-vanity baskets or decorative boxes for towels and cleaners.
- Add vertical shelving or a recessed medicine cabinet to reclaim storage without crowding the floor.
- Install LED strip lights beneath the vanity for soft night lighting and to emphasize the floating effect.
Budget-Friendly Upgrades and Quick Refresh Ideas
Not ready for full replacement? Try these affordable floating vanity bathroom ideas to refresh your space:
- Paint existing vanity and add new wall-mount legs for a faux-floating look.
- Swap hardware for modern pulls and a fresh faucet.
- Add a framed mirror or open shelving above to complete the new aesthetic.
Maintenance and Long-Term Considerations
To keep a floating vanity functional and attractive:
- Choose finish and countertop materials rated for moisture resistance.
- Re-seal wood tops annually and maintain silicone joints to prevent water damage.
- Check mounting bolts periodically, especially in high-traffic or humid bathrooms.
Floating Vanity Bathroom Ideas: Real-World Examples
Here are a few real-world approaches homeowners use:
- A wall-mounted 48″ double-sink vanity with shallow drawers for a master bath — pairs with floating shelves.
- A budget DIY: build a plywood box, finish with veneer and install a vessel sink on top for a modern floating look.
- A mid-century makeover: walnut floating vanity with brass hardware and a terrazzo countertop.
Frequently Asked Questions
Yes, but anchoring into studs is essential. For tile or plaster over hollow or thin walls, add blocking inside the wall or use a purpose-built carrier/bracket system rated to hold the vanity and sink weight.
Standard mounting heights range from 32 to 34 inches to the top of the countertop, but you can customize height for comfort, accessibility, or to match existing plumbing. Consider how the mirror and lighting will line up too.
They can be comparable in price. Custom mounting hardware and reinforced wall framing may add cost, but savings come from smaller footprints, simpler base finishes, and the potential for DIY installation. Choosing materials wisely keeps budgets in check.
Conclusion — Ready to Try Floating Vanity Bathroom Ideas?
Floating vanities are one of the most effective design moves for a modern, clutter-free bathroom. Whether you’re doing a full reno or a weekend DIY, the right floating vanity can transform function and style. Start by measuring your space, choosing a mounting method, and picking a look that complements your home. If you’re inspired to tackle more upgrades, check out our DIY projects page for step-by-step guides and visit home design ideas and kitchen upgrades for complementary renovation tips.
Feeling motivated? Grab your tape measure and sketch a plan — then try a small floating vanity update this weekend. Share your progress or questions below; I’d love to help troubleshoot your installation or design choices.