Ever stood in front of your dated fireplace and imagined a fresh, modern look that won’t break the bank? You’re not alone. Whether your mantel is tired, your brick is dark and dated, or you want a focal point for movie nights — subway tile can transform a fireplace from drab to designer. In this post I’ll walk you through inspiring subway tile fireplace ideas, practical DIY tips, and step-by-step guidance so you can tackle a fireplace tile makeover with confidence.
Why Choose Subway Tile for Your Fireplace?
Subway tile is a classic that feels both timeless and contemporary. It’s versatile, affordable, and available in different sizes, finishes, and colors — making it perfect for everything from a cozy cottage hearth to a sleek modern surround. Common long-tail searches like “white subway tile fireplace ideas” and “herringbone subway tile fireplace” point to popular looks that are easy to achieve without custom materials.
Top Fireplace Ideas Subway Tile Layouts
Here are layout and design options to consider for your subway tile fireplace surround:
- Classic horizontal stack: The iconic 3×6 or 2×8 layout — simple, clean, and works with any style.
- Herringbone pattern: Adds movement and texture; use elongated subway tile (e.g., 3×12) for dramatic effect.
- Vertical stack: Modern and tall-looking — great for making the fireplace feel more contemporary.
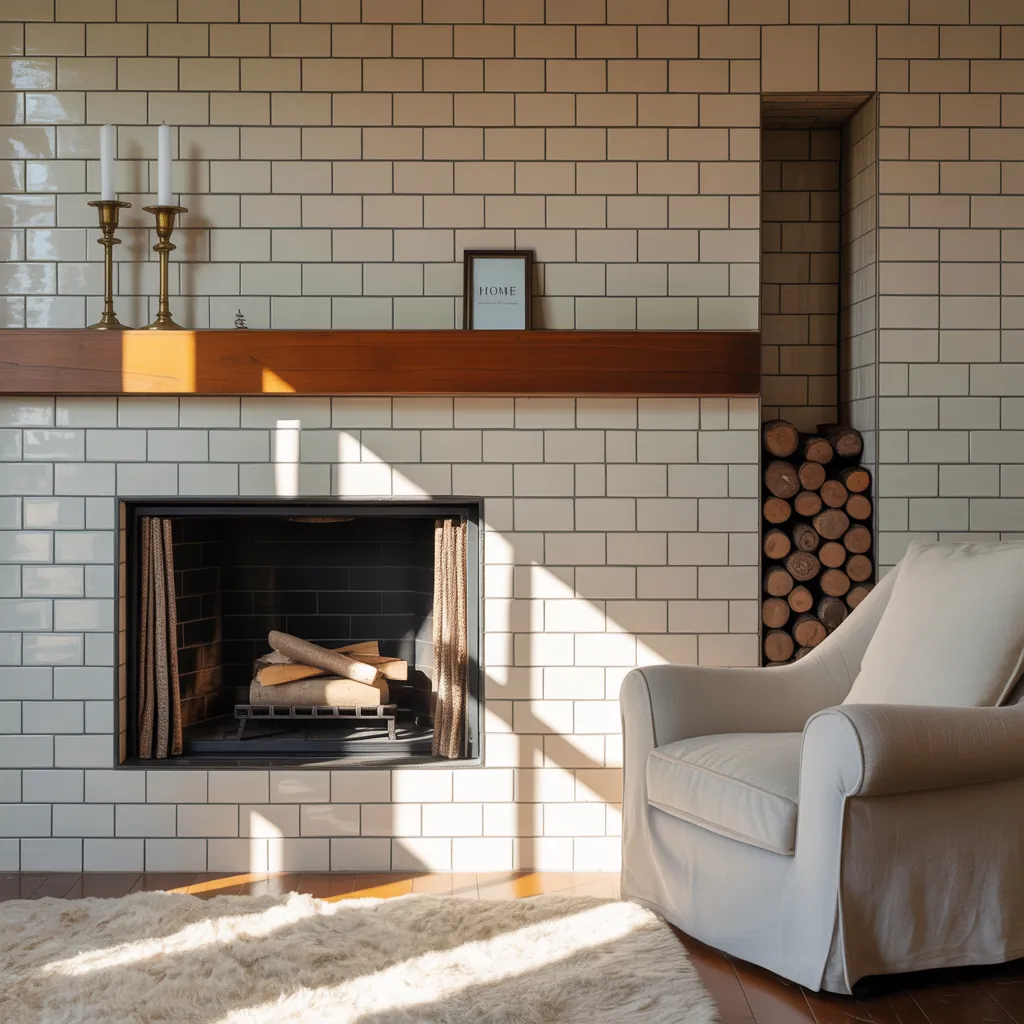
- Stacked bond with contrasting grout: White tile with dark grout for mid-century or industrial vibes.
- Large-format subway tile: 4×12 or 4×16 pieces reduce grout lines and create a streamlined, tile backsplash-like look.
Color, Finish, and Grout Tips
White subway tile is a go-to for a bright, airy focal point. But don’t overlook matte black, navy, or even patterned subway tiles for a bold fireplace statement. Grout color changes the whole feel — match for a seamless look or contrast for a graphic edge. Seal grout to resist soot and grime, especially on wood-burning fireplaces.
DIY Subway Tile Fireplace Makeover: Step-by-Step
This is a practical, beginner-friendly plan for a remodel that focuses on safety and aesthetics.
- Assess the fireplace type: Confirm whether your fireplace is wood-burning, gas, or electric. All tile surrounds must be non-combustible; use cement board or backer board over combustible surfaces and follow local code for clearances.
- Gather materials and tools: Subway tile of your choice, thin-set mortar, cement backer board, tile spacers, grout, grout sealer, tile trim (if desired), wet saw or tile cutter, notched trowel, level, measuring tape, caulk, and safety gear.
- Remove existing facing: Carefully remove mantelboard or masonry veneer. For brick, you can cover it with backer board if removing is too big a job.
- Install cement backer board: Fasten cement board to framing or over masonry with appropriate screws and mortar where needed. Ensure a flat, stable surface for tile.
- Plan tile layout: Dry-lay tiles or use a paper template to center patterns and minimize tiny edge cuts. For herringbone or pattern work, start in the center and work outward.
- Apply thin-set and set tile: Use a notched trowel to spread thin-set. Press tiles in firmly, using spacers to keep consistent grout joints.
- Cut tiles neatly: Use a wet saw for clean cuts around hearths, openings, and trim.
- Grout and seal: After thin-set cures (per manufacturer), grout joints with sanded or unsanded grout as appropriate. Clean grout haze and then apply grout sealer to protect from soot and staining.
- Finish edges and mantel: Use metal tile trim or bullnose tiles for a polished edge. Reinstall or update mantel — consider floating mantels or integrated shelving for a modern look.
Quick DIY Tips & Real-World Advice
- If you’re tiling above a fireplace opening, leave a small, flexible caulk joint where tile meets metal or firebox to allow for thermal expansion.
- Use a high-temperature rated silicone in areas that might experience heat.
- For a fast refresh, paint the existing mantel and seal the grout instead of retile the whole surround.
- Rent a wet saw for a day rather than buying one — it’s the most cost-effective option for a single project.
- Plan for dirt and dust: cover floors and vents, and expect several days of work including curing time.
Design Inspiration: Styles That Work with Subway Tile
Here are styling ideas to pair with your new tile fireplace:
- Modern farmhouse: White subway tile, light gray grout, rustic wood mantel, and shiplap above the mantel.
- Urban loft: Matte black subway tile stacked vertically with metal trim and industrial accents.
- Coastal chic: Pale blue or sea-glass subway tile with white grout and light wood mantel.
- Minimalist contemporary: Large-format subway tile in neutral tones with thin grout lines for a nearly seamless look.
Budget and Timeline Estimates
Costs vary widely by tile choice and whether you DIY. Expect basic ceramic subway tile materials for a standard surround to run $200–$800; premium porcelain or specialty tiles will be higher. Labor adds $500–$2,000+ if you hire professionals. DIY timeline: 2–4 days for prep and tile set plus 24–48 hours for grout cure — longer if demolition is required.
Fireplace Ideas Subway Tile — Maintenance & Longevity
Maintain your subway tile fireplace by wiping soot and dust with a damp cloth, re-sealing grout annually, and inspecting for cracked tiles or grout joints. Well-installed tile can last decades and be updated easily by changing grout or painting the mantel for a different look.
Frequently Asked Questions
Sometimes you can, but it’s generally better to either remove loose brick or apply a cement backer board over the brick to create a flat, secure surface. Use appropriate thin-set and mechanical fasteners. For best results and safety, avoid installing tile over crumbling or unstable masonry.
Grout color depends on the look: match grout to tile for a seamless aesthetic, or choose contrasting grout (e.g., dark gray with white tile) for a bold, graphic style. For fireplaces, darker grout can hide soot but still seal and clean regularly to prevent staining.
Yes, as long as you follow local building codes and use non-combustible substrates (cement backer board, metal flashing where required). Maintain proper clearances from combustible materials and use heat-rated adhesives or sealants where applicable. When in doubt, consult a professional.
Conclusion — Ready to Transform Your Hearth?
Subway tile is one of the most flexible, beautiful, and cost-effective ways to update a fireplace. Whether you want the classic charm of white subway tile fireplace ideas or a bold herringbone statement, the right tile layout, grout choice, and careful installation will give your living room a major design boost. Ready to try it? Start with a simple plan, rent a wet saw if needed, and tackle one wall at a time. For more step-by-step inspiration, check out our DIY projects and browse related tips in our home design ideas section. If you need help or want pro tips for complex installs, consider consulting a local contractor.
Get started today — remove that dated facing, pick your tile, and turn your fireplace into the centerpiece it should be.