Ever stood in your living room and thought, “This space needs personality, but I don’t want to spend a fortune”? You’re not alone. Maybe the sofa looks dull, the throw pillows are generic, or you want a quick weekend project that adds handcrafted charm. Embroidery—hand stitching or machine needlework—can transform plain textiles into focal pieces with minimal cost and a big impact.
Why embroidery belongs in your home improvement toolkit
Embroidery is one of the most accessible crafts for DIY home decorators. Whether you’re doing hand embroidery on a linen tea towel or using machine embroidery to personalize curtains, needlework brings texture, color, and bespoke design to any room. It’s perfect for small-scale updates like cushions, napkins, or wall hoops, and it blends beautifully with modern, farmhouse, or eclectic interiors.
Benefits of adding needlework to your decor
- Cost-effective: fabric and threads are affordable compared to buying new furniture.
- Customizable: choose colors, patterns, and placement that match your palette.
- Therapeutic and rewarding: stitching is a calming hobby with a visible result.
- Durable personalization: embroidery lasts through washing when done correctly.
Getting started: tools, materials, and простые stitch choices
You don’t need a full sewing studio to begin. Here’s a beginner-friendly list of essentials and simple stitches that will get you decorating in a weekend.
Basic supplies
- Embroidery hoop (4–8 inches for pillows or wall art)
- Embroidery needles (sizes 5–10)
- Embroidery floss (6-strand cotton) in 6–8 colors
- Fabric: linen, cotton, or canvas (pre-wash to prevent shrinkage)
- Water-soluble fabric marker or tailor’s chalk
- Scissors and an iron
Easy stitches for home projects
- Backstitch — perfect for outlines and lettering
- Satin stitch — fills shapes smoothly for a polished look
- French knots — great for texture (berries, centers of flowers)
- Chain stitch — decorative lines and botanical stems
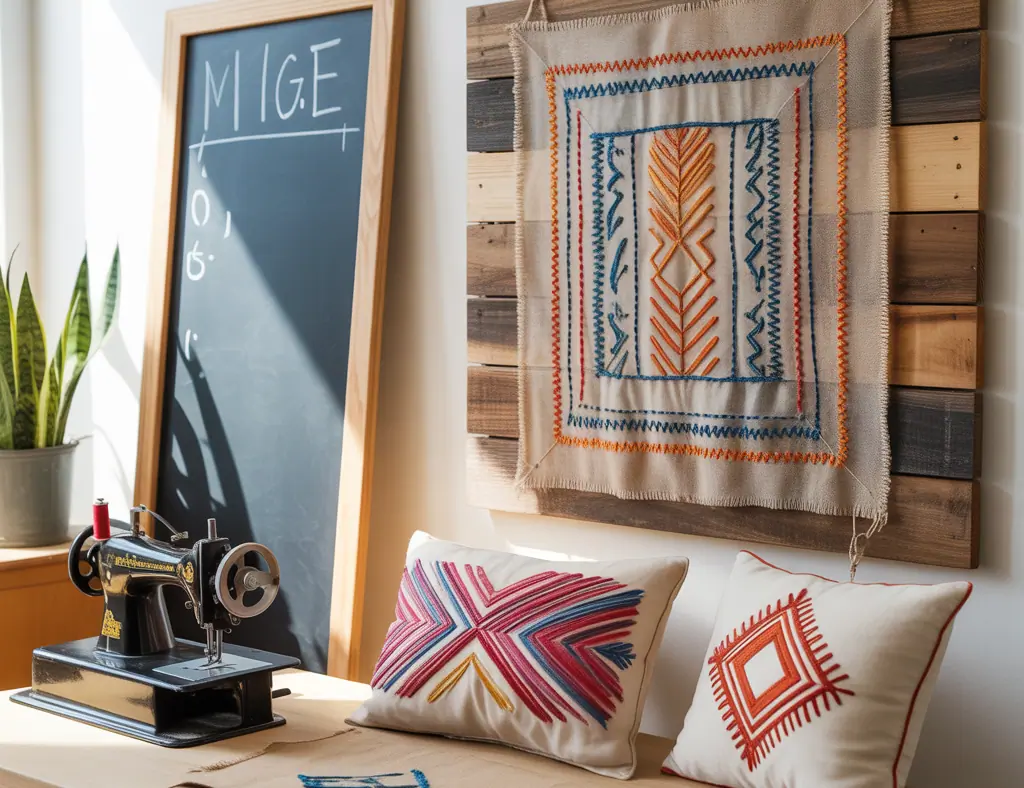
Step-by-step DIY embroidered throw pillow (beginner-friendly)
This is a practical weekend project that upgrades a tired sofa instantly. Use this “DIY embroidered pillow tutorial” as your blueprint.
- Choose your fabric and design: Pick a neutral pillow cover and a simple motif—botanical sprig, geometric lines, or a short quote.
- Transfer the pattern: Sketch directly with a water-soluble marker or trace using transfer paper.
- Hoop and thread: Stretch the fabric in the hoop so it’s taut. Separate embroidery floss strands (use 2–3 strands for delicate lines, 4–6 for bolder fills).
- Stitch the outline: Start with a backstitch for clean lines or a chain stitch for a decorative effect.
- Fill and texture: Use satin stitch for leaves, French knots for flower centers, or a combination for contrast.
- Finish: Remove the hoop, gently rinse any markings, press with an iron on a low heat setting, and insert the pillow form.
Pro tip: If you have a simple home sewing machine with an embroidery module, you can create precise, repeatable designs for multiple pillows or a set of kitchen towels. Machine embroidery designs work well for monograms and symmetrical patterns.
Design inspiration and placement ideas for embroidered accents
Embroidery can enhance every room. Here are inspiring uses and layout ideas that feel stylish and intentional.
- Living room: Mix embroidered throw pillows with textured blankets and a neutral sofa for layered depth.
- Bedroom: Add a hand-stitched lumbar pillow or embroidered duvet trim for a boutique-hotel feel.
- Kitchen: Personalize cotton napkins, tea towels, or an apron with food-themed motifs—perfect for small kitchen upgrades.
- Entryway: Frame an embroidered hoop as wall art for an instant focal point.
Troubleshooting and real-world tips
Small mistakes are part of DIY. Here’s how to handle common issues so your finished pieces look professional.
- Puckering fabric: Use the right hoop tension and a stabilizer behind thin fabrics to avoid distortion.
- Uneven stitches: Keep consistent tension on your thread and practice stitches on scrap fabric before starting the main piece.
- Color bleeding: Pre-wash threads and fabrics when possible, especially with bright or dark dyes.
- Scale and proportion: Measure your pillow cover or curtain panel and choose designs that fit the area—small motifs get lost on large surfaces.
Embroidery for seasonal refreshes and gifting
Use embroidery to make seasonal swaps—holiday-themed napkins, autumnal cushion covers, or spring floral hoop art. Embroidered items also make thoughtful, handcrafted gifts: consider monogrammed tea towels for housewarmings or embroidered baby blankets.
Frequently Asked Questions
1. Is embroidery difficult to learn as a beginner?
No. Basic hand embroidery uses a few simple stitches that you can master in an afternoon. Start with backstitch and satin stitch, and follow a small project like a pillow or hoop art to build confidence.
2. Should I start with hand embroidery or machine embroidery?
Start with hand embroidery if you want a low-cost, low-equipment entry. Choose machine embroidery if you plan to make many identical items, need precise repeatability, or already have a compatible sewing machine. Both methods have unique charms and are useful for home decor projects.
3. What fabrics work best for embroidery for home decor?
Medium-weight cotton, linen, and canvas are great starting points. They hold stitches well and are easy to hoop. For delicate fabrics, use an embroidery stabilizer or back the area with interfacing to prevent puckering.
Conclusion: Start stitching and give your home a handmade lift
Embroidery is an easy, budget-friendly way to refresh your space with custom textiles and handcrafted charm. Whether you try a DIY embroidered pillow, personalize kitchen linens, or create wall hoop art, needlework rewards patience with beautiful, durable results. Ready to pick up a needle and transform a room? Check out more ideas on our DIY projects and explore seasonal touches in our home design ideas. If your next weekend is free, try one simple embroidered accent and see how quickly it elevates your space.
Call to action: Share your first embroidered before-and-after, or browse our DIY projects and kitchen upgrades pages to plan a whole-room refresh—one stitch at a time.
For more ways to save on moving expenses, check out 6 Methods for Reducing Moving Expenses with Removalists.
For more housewarming party ideas, check out Ideas for Housewarming Party.
For more home decor ideas, check out Ideas for Housewarming Party.