Picture this: you’ve just finished painting your kitchen, installed new cabinet hardware, and then you walk in and the old, scuffed refrigerator suddenly sticks out like a sore thumb. Sound familiar? Whether your fridge is outdated, dented, or simply not matching your new aesthetic, there are practical, wallet-friendly ways to refresh it fast. In this post I’ll share smart refrigerator design ideas, step-by-step DIY projects, and organization tips so your fridge becomes an integrated, stylish part of your kitchen — not the design problem.
Why updating your refrigerator makes a big visual impact
Appliances occupy a large visual area in the kitchen. A well-designed refrigerator can pull a room together, help your kitchen look custom, and even increase the perceived value of your space. You don’t always need to replace the unit — many refrigerator makeover options deliver big style for a fraction of the cost of a new appliance.
Design ideas refrigerator owners love
Below are creative approaches that work for rental units, vintage finds, and high-end refrigerators alike. Pick what fits your style, budget, and DIY comfort level.
1. Paint and contact paper: fast and affordable fridge makeover
- Best for: Cosmetic refresh; renters (use removable contact paper).
- Materials: Appliance paint or high-quality contact paper, sandpaper, painter’s tape.
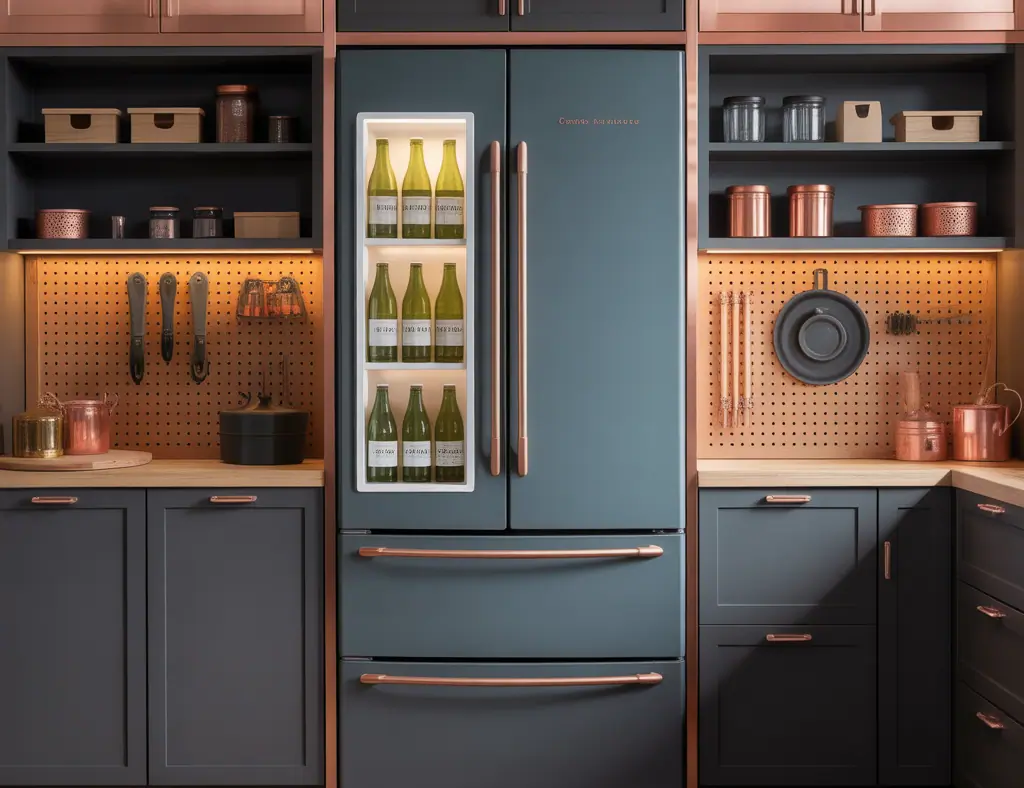
- Why it works: Appliances paint (or vinyl wrap) transforms finishes — matte black, deep navy, or pastel retro colors can completely change the vibe without replacing the unit.
DIY steps — painting a refrigerator
- Unplug the fridge and remove all removable parts (handles, magnets).
- Clean thoroughly with degreaser; lightly sand glossy surfaces to help paint adhere.
- Mask areas with painter’s tape; apply primer if required.
- Apply thin, even coats of appliance paint; allow full cure time per product instructions.
- Reattach hardware and plug the fridge back in once dry.
2. Panel-ready built-in look
Turn a freestanding refrigerator into a paneled, built-in centerpiece by adding cabinet panels and trim. This works best when you or a contractor can install matching cabinet doors or a face panel. Add toe-kick trim and recessed lighting above to finish the seamless look.
3. Magnetic chalkboard or corkboard door
Apply magnetic chalkboard paint or attach a thin cork sheet to the door for a functional command center — great for meal planning, kids’ art, and grocery lists. Use magnetic accessories like spice jars or herb planters for added functionality.
4. Hardware upgrades and trim details
Replacing worn handles with new, modern pulls or brass bar handles is a low-effort, high-impact update. For a rustic look, add wood trim accents on the sides or top of the fridge.
Fridge organization and interior upgrades
Design isn’t only skin deep. A well-organized interior makes your refrigerator feel new and more efficient.
Top organization tips
- Use clear, stackable containers and uniform baskets for visual cohesion.
- Label shelves and containers to make clean-up and meal prep faster.
- Install pull-out bins or a lazy Susan for deep shelves to access items easily.
- Upgrade door seals and replace clogged water filters to improve performance.
Energy-saving maintenance
Clean condenser coils, check door gaskets for leaks, and level the fridge so doors close properly. These small maintenance steps improve energy efficiency and prolong the appliance’s life.
Project ideas by style: find your aesthetic
Modern minimal
- Matte black or stainless contact paper
- Hidden handles or recessed pulls
- Soft LED toe-kick lighting
Farmhouse and rustic
- Distressed wood trim, open shelving on either side
- Vintage-style handles and chalkboard door
- Warm brass or oil-rubbed bronze accents
Retro fun
- Pastel paint color (mint, coral, sunny yellow)
- Chrome accents and rounded edges
- Retro magnets and display items for personality
Step-by-step mini projects for weekend DIYers
Here are three short weekend projects that deliver immediate results.
Project A: Magnetic spice wall on the fridge side
- Buy strong magnetic jars and attach metal discs to their bottoms.
- Arrange jars on the side of the fridge; label each with a small tag.
- Use this for frequently used spices — saves cabinet space and looks tidy.
Project B: Add LED strip lighting inside
- Purchase battery-powered, waterproof LED strips rated for appliances.
- Mount strips under shelves to illuminate darker corners and drawers.
- Use motion-activated options to save batteries and increase convenience.
Project C: Create a farmhouse door insert
- Build a shallow frame to fit the fridge door and attach beadboard or reclaimed wood.
- Paint or stain to match cabinetry; secure with removable velcro strips for renters.
- Add a towel bar or small hooks for extras like oven mitts.
Materials, tools and budget considerations
Most fridge design projects fall into three budget tiers:
- Low-cost ($10–$100): Contact paper, chalkboard paint, magnetic jars, new handles.
- Mid-range ($100–$500): Appliance paint, LED lighting, panel installation, trim work.
- High-end ($500+): Custom cabinetry panels, new built-in fridge, professional installation.
Tools often needed: screwdriver, socket set, sander, paint supplies, level, measuring tape, and adhesive products. Always unplug the fridge and follow safety instructions when working on or around appliances.
Frequently Asked Questions
How can I make my old fridge look new without replacing it?
Small changes like painting or applying stainless contact paper, replacing handles, adding trim to create a paneled look, and installing interior LED lighting can refresh the appearance and functionality without the cost of a new unit.
Is it safe to paint a refrigerator?
Yes — if you use paint formulated for appliances and follow instructions: clean thoroughly, sand glossy surfaces lightly, use a primer when needed, and allow proper curing time. Unplug the appliance and remove parts like handles during painting.
What are budget-friendly fridge organization ideas?
Use clear bins, stackable containers, lazy Susans, and magnetic organizers. Label items and create zones for snacks, dairy, produce, and leftovers to improve usability and reduce food waste.
Conclusion — turn your refrigerator into a design statement
Whether you’re tackling a full kitchen remodel or looking for simple kitchen upgrades, these design ideas refrigerator owners can implement quickly will help you create a cohesive, stylish, and functional kitchen. Start with one small project — a fresh paint job, new handles, or better interior organization — and build from there. Ready to try a DIY fridge makeover? Browse our DIY projects and kitchen upgrades pages for step-by-step guides and more inspiration, and explore our home design ideas to match your new refrigerator style to the rest of your home.
Call to action: Pick one project from above and give it a weekend — then share your before-and-after photos to inspire others. For more detailed plans, visit our DIY projects, kitchen upgrades, and home design ideas pages.