You set up your deer blind last fall, but after a few cold mornings and cramped afternoons you realize it could be so much better. Maybe your blind is drafty, the seating is uncomfortable, or your gear is a disorganized mess that makes quiet entry and exit impossible. If that sounds familiar, these deer blind interior design ideas will help you transform a simple hunting shelter into a cozy, efficient, and scent-minimizing hideaway—without breaking the bank.
Why thoughtful deer blind interior design matters
A good interior layout doesn’t just make your time in the blind more pleasant — it increases success. Comfortable seating and organized gear cuts down movement, better insulation keeps you in the blind longer, and smart camouflage and scent-control reduce detection. Whether you’re renovating an existing blind or building one from scratch, interior design is a small investment that yields big returns.
Deer Blind Interior Design Ideas for Comfort and Function
Below are practical, easy-to-implement ideas to upgrade a hunting blind interior. These cover insulation, seating, storage, scent control, and camouflage—ideal for both permanent elevated stands and portable pop-up blinds.
1. Insulation and temperature control
- DIY foam paneling: Attach rigid foam insulation panels to interior walls and cover with lightweight plywood or fabric. This reduces drafts and cuts noise from external branches.
- Thermal curtains: Hang dark thermal curtains over windows to block chilling winds between sits and for complete darkness during midday naps.
- Portable safe heaters: Use a propane heater rated for enclosed spaces or a 12V electric heater with carbon monoxide detector—always follow safety guidelines.
2. Comfortable seating that reduces movement
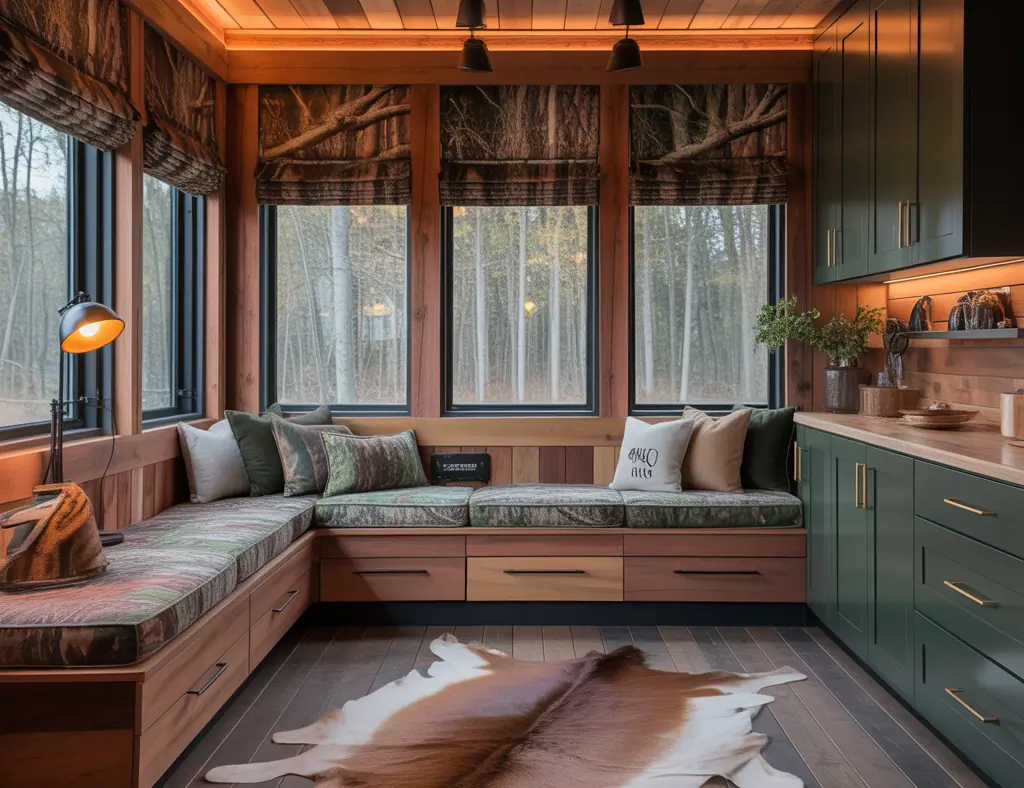
- Built-in bench with storage: Construct a simple two-foot-deep bench along one wall; top with a high-density foam cushion and waterproof cover. Storage underneath keeps gear out of sight and motion-free.
- Swivel stool or seat: A quiet swivel seat lets you pivot without standing. Look for camo-pattern fabric and rubberized feet to minimize noise.
- Layered seating: Use a removable fleece or sheepskin layer for warmth and to mask scent from synthetic fabrics.
3. Smart storage and organization
- Vertical storage racks: Mount PVC or wood brackets to hold rifles, packs, and calls. Keeping gear off the floor reduces rust and odor transfer.
- Compartment boxes: Use sealable plastic bins for scent-free clothing, calls, and food. Label the bins for quick access during critical moments.
- Quick-access pockets: Sew or attach canvas pockets near seating for rangefinders, optics, and licenses to avoid rummaging.
4. Camouflage, concealment, and scent control
- Interior fabrics: Use muted, non-reflective fabrics in greens, browns, and grays. Avoid bright colors and glossy surfaces.
- Scent-minimizing layout: Store food and scented items in sealed containers away from the main sitting area and add activated charcoal packets to storage boxes.
- Window treatments: Use breakaway or adjustable flaps to change the silhouette quickly while maintaining a low profile.
Step-by-step: Upgrade a basic blind in one weekend
Want a quick project plan? Here’s a simple weekend renovation that covers insulation, seating, and storage.
- Day 1 morning — Prep: Remove existing gear and clean interior. Measure walls and windows for materials.
- Day 1 afternoon — Insulate: Cut and fit foam insulation to walls, secure with construction adhesive, and tape seams with foil tape. Cover exposed edges with thin plywood or fabric for a finished look.
- Day 1 evening — Paint or cover: Apply a matte, earth-tone paint or staple camo fabric to the plywood to reduce reflections.
- Day 2 morning — Build seating: Frame a bench box with 2x4s and plywood. Attach a hinged lid for storage access. Add foam cushion and a removable cover.
- Day 2 afternoon — Organize and finish: Mount racks for gear, install pockets and hooks, place scent-proof bins, and test seating and sightlines.
- Test run: Spend a short evening or morning sit to evaluate thermal comfort and noise levels; tweak as needed.
Design inspiration: styles and themes
Choose a style to guide material and color choices:
- Classic camo: Full camo fabrics, burlap accents, and matte finishes for a traditional hunting feel.
- Minimalist scent-free: Neutral fabrics, sealed storage, and minimal surfaces to reduce odor traps and clutter.
- Rustic cabin: Warm wood paneling, leather seating, and wool layers for a cozy, lodge-like blind interior.
Practical tips from real hunters
- Test scent control strategies: what works in one climate may fail in another—trial runs are essential.
- Keep a small trash bag and remove waste after each sit to avoid lingering odors.
- Keep movement minimal by placing frequently used items within arm’s reach and using quiet fasteners like velcro instead of snaps.
Deer Blind Interior Design Ideas FAQ
Q1: What materials are best for insulating a hunting blind?
A1: Rigid foam insulation (XPS or polystyrene) is lightweight, easy to cut, and effective. Cover it with thin plywood or camo fabric to protect it and reduce glare. For a budget option, reflective bubble insulation works well when combined with a thermal layer.
Q2: How can I control scent inside a deer blind?
A2: Start with sealed storage for clothes and food, use activated charcoal or odor-absorbing packets, and avoid synthetic perfumes. Wash scent-critical clothing with scent-free detergent and store in airtight bags. Ventilation is important—install a small, quiet vent to reduce stale air without compromising concealment.
Q3: Are heaters safe to use in enclosed blinds?
A3: Portable heaters can be safe if they’re designed for enclosed spaces and are used with a carbon monoxide detector. Electric 12V heaters or battery-powered heating pads are lower-risk alternatives. Always follow manufacturer safety instructions and ensure proper ventilation.
Conclusion: Make your blind a better place to sit
Investing a little time and DIY effort into your deer blind interior design ideas will pay off with longer, more comfortable sits and fewer missed opportunities. Focus on insulation, quiet comfortable seating, smart storage, and scent control—then tailor those elements to your hunting style and local climate. Ready to get started? Try a weekend upgrade and document the changes so you can refine your layout next season.
If you enjoyed these ideas, check out more projects and inspiration on our DIY projects page and explore similar home comfort tips on our home design ideas and kitchen upgrades pages. Share your before-and-after photos and tips in the comments—let’s build better blinds together!