Ever stood at the bottom of your stairs and thought, “This space could be so much better”? Maybe the stairwell feels bland, the runner is worn, or the whole area looks forgotten. Whether you’re tackling a full home refresh or a weekend DIY, decorating a staircase is one of the highest-impact, budget-friendly projects you can do. In this post I’ll walk you through practical, stylish decor ideas for staircase spaces—step-by-step tips, material suggestions, and inspiring ways to personalize the heart of your home.
Why Decorating the Staircase Makes a Big Difference
Stairs connect floors and set the tone for your interior. A thoughtfully decorated stairway improves curb appeal, adds personality, and can even boost resale value. From smart storage under the stairs to gallery walls and modern stair runners, small changes deliver a big visual payoff. These stairwell design tips are aimed at homeowners and DIYers of all skill levels.
Quick Inspiration: 8 Decor Ideas for Staircase That Wow
- Gallery wall up the stairs — arrange family photos, art prints, or a mix of frames for a vertical focal point.
- Painted risers — use bold color, stripes, or geometric patterns on stair risers for an instant update.
- Stair runner swap — replace an old runner with a natural-fiber or patterned runner for texture and safety.
- Under-stair storage — add built-in drawers or open shelving for shoes, books, or a mini mudroom.
- Accent handrail or balusters — paint the railing or swap balusters for a dramatic modern look.
- Riser tiles or decals — adhesive tiles and decals are a quick way to create a tiled-look riser without grout.
- Lighting upgrade — install LED step lights, picture lights, or a statement chandelier for safety and style.
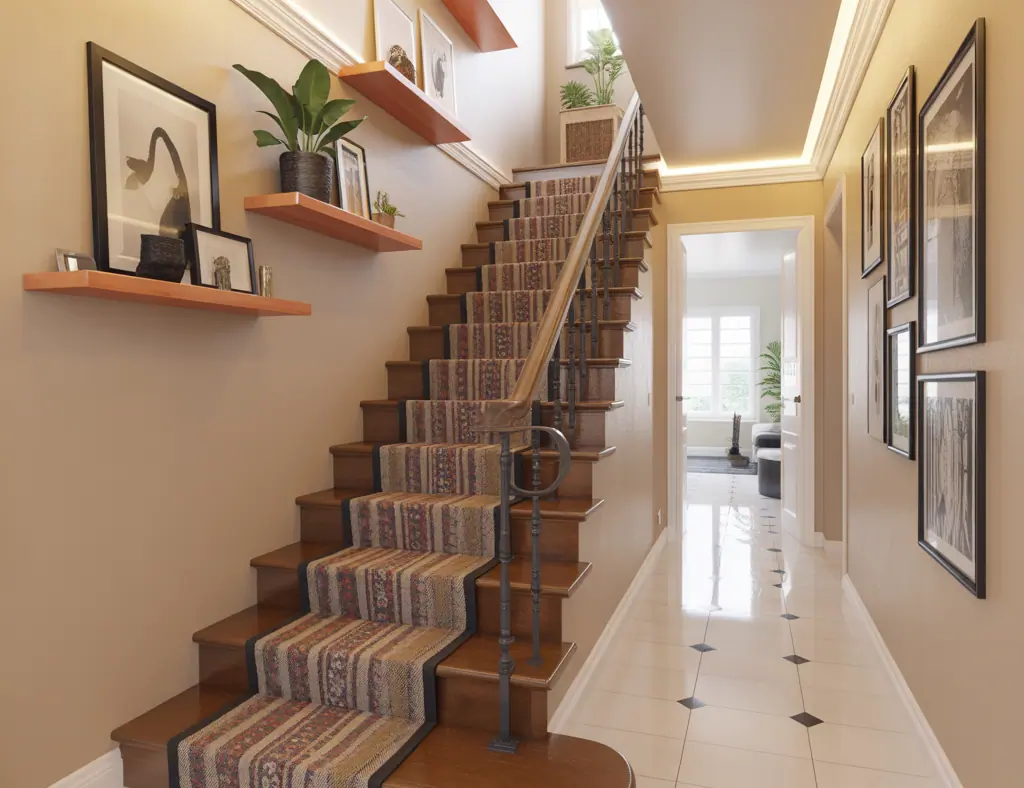
- Greenery and shelves — add floating shelves on the landing for plants, books, and display items.
Step-by-Step DIY Staircase Makeover
Here’s a straightforward project plan for a mid-range staircase refresh that combines paint, a runner, and a gallery wall. Time: 2–4 days. Skill: beginner–intermediate.
Materials & Tools
- Paint (stair tread paint and semi-gloss for risers)
- Painters tape, drop cloths, rollers, angled brush
- Runner (pre-cut or custom), tape measure, stair rods (optional)
- Picture frames, hanging hardware, level
- Sandpaper, wood filler (for worn treads)
Step 1 — Prep and Safety
- Clear the stairs and protect surrounding floors with drop cloths.
- Inspect treads for loose boards; tighten screws and fill holes with wood filler.
- Sand rough spots lightly and vacuum dust.
Step 2 — Paint Risers and Treads
- Use painter’s tape to protect the tread edges if painting risers a different color.
- Apply two coats of semi-gloss paint to risers for easy cleaning; allow proper drying between coats.
- For treads, consider a durable, slip-resistant stair paint or a stain + sealant for natural wood.
Step 3 — Install the Runner
- Measure carefully—length and width matter for symmetry and safe overhang.
- Secure with stair tacks, staples, or a no-slip underlay; consider stair rods for a classic look.
- Trim excess and tuck edges for a neat finish.
Step 4 — Create a Gallery Wall
- Lay frames on the floor first to arrange composition.
- Use a paper template to map spacing on the wall, then hang from the bottom up.
- Mix frame sizes and include a variety of art, mirrors, or vintage finds for interest.
Decorating Options by Style
Modern Minimalist
- Neutral color palette, thin black metal handrail, and a low-pattern runner.
- One large piece of vertical artwork instead of many frames.
Cozy Cottage
- Painted white risers, reclaimed wood treads, woven runner, and plants on floating shelves.
- Add vintage picture frames for a homely gallery wall.
Bold & Eclectic
- Color-blocked risers, patterned tiles, mixed media art, and pendant lights.
- Use removable wallpaper for an easy change in the future.
Practical Tips & Safety Considerations
- Always prioritize slip resistance—choose runners or paint with a non-slip additive in high-traffic homes.
- Keep handrail heights to code and secure balusters firmly if you’re doing structural changes.
- When using power tools or doing electrical lighting upgrades, consult a pro if you’re unsure.
- For narrow stairs, vertical patterns on risers can make the space feel taller; horizontal can make it feel wider.
Small Staircase Ideas & Space-Saving Solutions
In tight homes or apartments, maximize visual space and function:
- Install shallow floating shelves on the landing for keys and décor.
- Use open cubbies under the stairs for shoes or basket storage.
- Choose lighter paint colors and reflective frames to open the stairwell visually.
Decor Ideas for Staircase: Final Design Checklist
- Decide on a focal point (gallery wall, runner, lighting).
- Choose materials that match traffic and budget (durable runner, washable paint).
- Plan layout and measure carefully before buying decor items.
- Schedule work in stages—prep one weekend, paint the next, install final accents later.
Frequently Asked Questions
1. How do I choose the right runner for my stairs?
Measure width between banister and wall, leaving 2–4″ on each side for exposed wood if desired. Choose a durable fiber like wool or a synthetic blend for high traffic. For safety, add a non-slip underlay and consider a low-pile pattern if you have pets or seniors at home.
2. Can I paint stair risers myself, and what paint should I use?
Yes. Use a semi-gloss or high-gloss latex enamel on risers for easy cleaning and durability. For treads, use a floor or stair-specific paint that includes a non-slip finish, or stain and seal wood treads for natural beauty and resilience.
3. What’s an affordable way to create a gallery wall on a stairway?
Start with printable art or family photos in thrifted frames painted to match your palette. Lay out frames on the floor, create paper templates, and hang from the bottom up to keep spacing even. Removable adhesive hooks make it renter-friendly.
Conclusion — Take One Step Today
Decor ideas for staircase don’t have to be overwhelming. Start with one small change—a fresh runner, painted risers, or a new light fixture—and build from there. These simple DIY upgrades can transform your home’s flow, personality, and functionality. Ready to try a project? Browse our DIY projects for detailed tutorials, or get inspiration from our home design ideas and kitchen upgrades pages to coordinate styles throughout your house. Share your before-and-after—I’d love to see your stairs shine!
For more decor ideas that can transform your home, check out our Decor Ideas Bread Bowl post.