Ever stared at the gap between your countertop and the wall and thought, “This needs help”? Whether you’re repainting, installing new counters, or tackling a weekend DIY, the right countertop backsplash concept can transform a tired kitchen into a showstopper. In this article I’ll walk you through design inspiration, practical step-by-step installation tips, and budget-friendly ideas so you can confidently upgrade your space.
Why a Countertop Backsplash Concept Matters
A well-designed backsplash does more than look good — it protects your walls from splashes, hides seams, and ties your kitchen materials together. Choosing the right concept affects durability, cleaning ease, and the overall style of your kitchen, from farmhouse charm to modern minimalism. Thoughtful planning prevents awkward seams and costly mistakes during a remodel or DIY upgrade.
Countertop Backsplash Concept: Design Principles
Start with these baseline design rules before picking materials or patterns:
- Match scale to room size: small tiles and intricate mosaics suit compact kitchens; large-format slabs work better in open-plan spaces.
- Consider height: standard backsplash height is 4 inches, but 18–24 inches or full-height to the cabinets is trending for protection and drama.
- Contrast vs. continuity: decide whether you want the backsplash to blend with the countertop (continuous quartz or slab) or to contrast (colored subway tile, metal panels).
- Think maintenance: glossy ceramic and stainless steel are easy to wipe; textured grout requires more upkeep.
Materials and Styles: Pick the Right Option
Tile Options
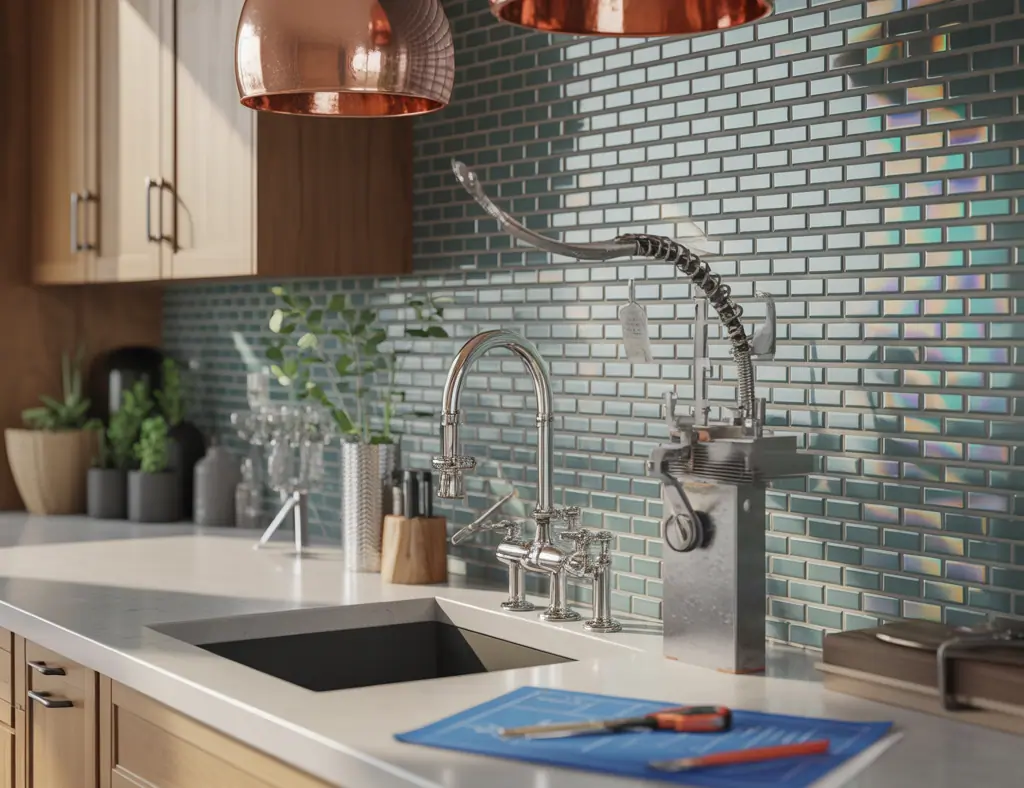
Ceramic, porcelain, and glass tiles are classic choices. Subway tile is timeless; herringbone adds motion; mosaic tiles deliver color and sparkle. For long-lasting performance, use porcelain in high-moisture areas and low-porosity glass where you want a sleek look.
Slab and Full-Height Backsplashes
Using the same material as your countertop — quartz, granite, or marble — creates a seamless, upscale appearance. A full-height slab behind the stove makes cleaning easier and offers a minimalist feel.
Alternative Choices
Peel-and-stick tiles are great for renters and quick updates. Stainless steel and sheet metal fit industrial kitchens and are heat resistant behind ranges. Reclaimed wood or beadboard bring warmth but need sealing near wet areas.
Practical DIY Tips: Tools, Prep, and Materials
Before you begin, gather tools: tile cutter or wet saw (for ceramic/porcelain), notched trowel, adhesive or thinset, grout float, sponge, level, tape measure, caulk gun, and a respirator for cutting. Here are practical tips to avoid common pitfalls:
- Always measure twice — miscuts are costly. Measure the length and height of each backsplash section and account for outlets and corners.
- Use a level and chalk line to establish your first row; a crooked bottom row ruins symmetry.
- Prime or seal drywall behind tile if it’s not moisture-resistant.
- Pre-fit tiles around outlets and corners to reduce last-minute cutting stress.
- Grout color impacts appearance — darker grout hides stains; light grout brightens the space.
Step-by-Step: How to Install a Simple Tile Backsplash
- Prepare the wall: Remove existing backsplash, clean the surface, repair holes, and let dry.
- Mark lines: Snap a chalk line for the bottom row and vertical center line for symmetry.
- Mix adhesive or thinset as directed.
- Apply adhesive with a notched trowel in small sections so it doesn’t skin over.
- Set tiles, using spacers for consistent grout lines. Check alignment frequently with a level.
- Allow adhesive to cure (usually 24 hours).
- Mix and apply grout with a grout float, pressing into joints. Wipe excess with a damp sponge.
- Seal grout if recommended. Caulk the joint where the countertop meets the backsplash for a water-tight seal.
Design Inspiration: Ideas That Work in Real Homes
- Farmhouse Chic: White subway tile with contrasting dark grout, open shelving, and a single full-height slab behind the stove.
- Modern Minimal: Matte large-format porcelain in a neutral tone with invisible grout lines and a countertop-matching slab backsplash.
- Color Pop: Glass mosaic or jewel-toned tiles behind a neutral counter for a focal wall that’s easy to clean.
- Budget Upgrade: Peel-and-stick patterned tiles applied above laminate countertops for an instant refresh.
- Small Kitchen Strategy: Extend the backsplash to the ceiling near the stove to create visual height and prevent splatter on painted walls.
Real-World Advice: Budgeting and Timeline
Set a realistic budget: tile and adhesive constitute most of the cost; countertops and labor (if hiring) can dominate. For a DIY weekend project, allow 2–3 days for tile installation (prep, setting, and grouting). If working around appliances or waiting on materials, pad your timeline for deliveries and curing times.
If you want more project ideas and inspiration, check out our DIY projects and home design ideas pages.
Maintenance Tips: Keep Your Backsplash Looking New
- Wipe spills daily with a damp cloth to avoid staining grout.
- Use non-abrasive cleaners for tiles and stainless steel; avoid harsh acids on stone backsplashes.
- Reseal natural stone and grout every 1–2 years, or as recommended.
- Repair chips or cracked grout promptly to prevent water damage behind the backsplash.
Frequently Asked Questions
How high should a countertop backsplash be?
Standard height is 4 inches, but common choices range from 4 inches to full-height (to cabinets or ceiling). For behind stoves and sinks, 18–24 inches is popular for protection and easier cleaning.
Can I install a backsplash myself if I’m a beginner?
Yes. Peel-and-stick tiles are beginner-friendly and require minimal tools. For ceramic or porcelain tile, start with a small, non-critical area, gather the right tools, and follow step-by-step instructions. Allow time for practice cuts and patience with alignment.
What is a low-maintenance backsplash material?
Glass, glazed ceramic, and stainless steel are among the easiest to clean. For a seamless look that’s also low maintenance, a full-height quartz or granite slab is durable and simple to wipe down.
Conclusion: Start Your Countertop Backsplash Concept Today
Whether you want a quick weekend refresh or a full kitchen remodel, the right countertop backsplash concept can update style, protect walls, and boost your home’s value. Pick a material that fits your lifestyle, follow basic installation steps, and don’t be afraid to try a DIY approach on a small scale first. Ready to get started? Explore more kitchen upgrades and our step-by-step DIY projects to plan your next weekend transformation.
Share your ideas or questions below — I’d love to help you design a backsplash that fits your budget and style.