Have you ever stood in a room and thought the walls look great but something about the space still feels unfinished? Maybe the bulk of your home improvement budget went into paint and furniture, and the ceiling was the last thing on the list. If that sounds familiar, these ceiling decoration ideas 2 will help you close the gap between “nice” and “wow” — without breaking the bank.
Why focus on your ceiling? The surprising impact of a well-designed overhead
The ceiling is often called the fifth wall for a reason: it influences perceived height, light, and the overall mood of a room. With smart ceiling design — from painted accents to faux beams and creative lighting — you can make a small room feel taller, add warmth to an open-plan area, or create dramatic focal points in living rooms and bedrooms.
Quick planning checklist before you start any DIY ceiling makeover
- Measure ceiling height and square footage.
- Consider structural limits — load-bearing restrictions for heavy fixtures or beams.
- Decide on lighting changes and whether wiring upgrades are required.
- Choose a style: modern, rustic, farmhouse, minimalist, or ornate.
- Set a budget and timeline (weekend projects vs. multi-week renovations).
Top ceiling decoration ideas 2 — practical & stylish projects
1. Fresh paint or a dramatic ceiling color
Painting a ceiling is one of the quickest ways to change a room’s character. Light colors keep ceilings airy; deep shades add coziness and drama. For a subtle lift, paint the ceiling a shade lighter than the walls; for impact, choose an accent color that contrasts with trim. Use a roller with an extension pole and a steady coat to avoid streaks.
2. Add crown molding or decorative plaster trim
Crown molding elevates a room instantly. For DIYers, polystyrene or MDF moldings are lightweight and easier to install than hardwood. Measure carefully, cut 45-degree miters with a miter saw or use a coping saw for inside corners, and secure with construction adhesive and finishing nails.
3. Faux wood beams for rustic charm
Faux beams (hollow polyurethane or lightweight pine) create a rustic look without heavy structural work. They’re anchored to ceiling joists or installed on blocking. For a streamlined project:
- Plan layout and spacing (consider beam width and room scale).
- Locate ceiling joists and mark them.
- Install blocking or use heavy-duty anchors.
- Secure beams and finish with stain or paint.
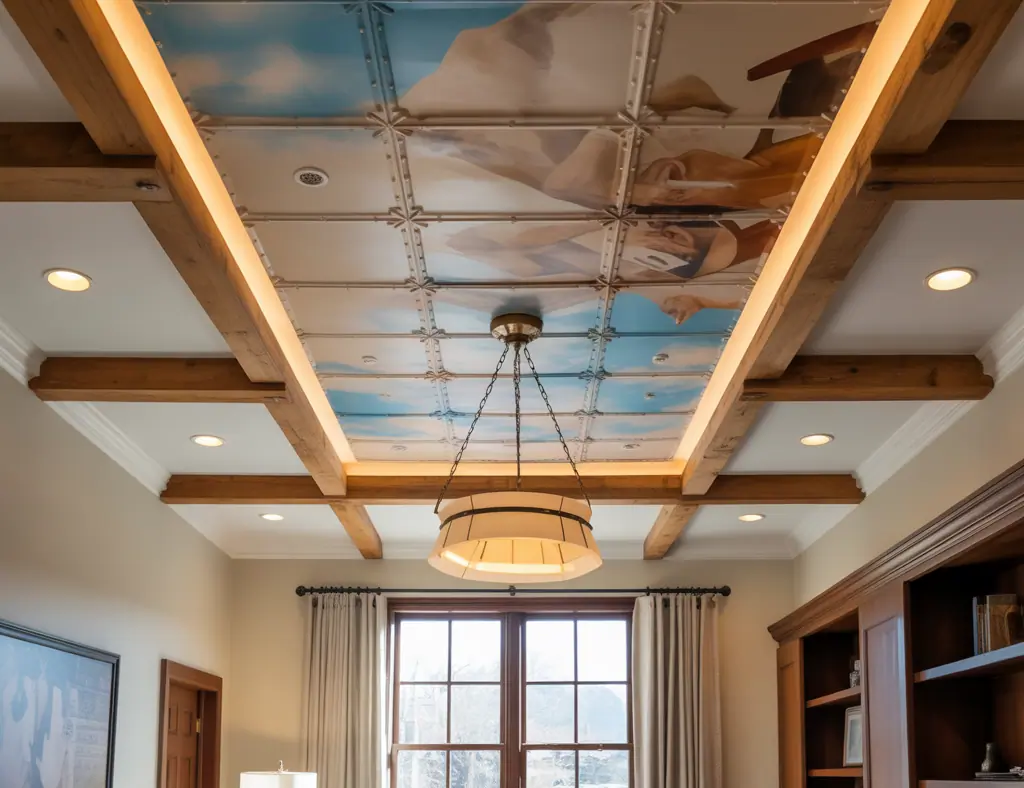
4. Coffered or tray ceiling effects using lightweight materials
Create depth using furring strips and drywall or pre-made coffered panels. Tray ceilings can be mimicked with layered crown molding and recessed lighting, giving a luxurious feel without major construction.
5. Wallpaper and ceiling stencils — patterns that pop
Wallpaper on the ceiling adds texture and pattern; peel-and-stick options make the job cleaner for renters. Stencils are budget-friendly and allow you to craft borders or full-scale patterns. Choose paint suitable for ceilings and use a small roller for stencil work to avoid bleed-through.
6. Fabric drapes and canopies for soft effect
Lightweight fabric panels or mosquito-net-style canopies soften a bedroom and hide imperfections. Secure fabric to a ceiling-mounted ring or to small hooks — ideal for boho bedrooms and nursery spaces.
7. Beadboard and shiplap for cottage or coastal style
Beadboard and shiplap ceilings are classic and forgiving. Use tongue-and-groove planks or shiplap-style panels; install perpendicular to ceiling joists, nail to joists, then caulk seams and paint.
Lighting upgrades that complete your ceiling design
Lighting transforms ceiling treatments. Consider pairing these ideas with:
- Recessed LED lighting for modern, even illumination.
- Pendant lights over dining areas for focal points.
- LED strip lighting in tray ceilings or coffers for soft, indirect glow.
Step-by-step DIY project: Paint + trim ceiling upgrade (weekend-friendly)
- Protect floors and furniture with drop cloths; remove light fixtures or cover them.
- Clean the ceiling surface and repair cracks with joint compound; sand smooth.
- Prime patched areas with a ceiling primer to ensure even paint absorption.
- Install lightweight crown molding using adhesive and brad nails; miter corners precisely.
- Caulk seams and nail holes, sand lightly, and apply painter’s tape on walls.
- Paint the ceiling with a roller (use two coats if needed) and paint or stain the molding.
- Reinstall fixtures and enjoy the refreshed space.
Budget, timeline, and skill level guide
Costs vary: painting can be as low as $50 for supplies; molding or beadboard projects range $200–$800; faux beams or coffered panels can go higher. Timeline: a painted ceiling takes a weekend; molding and wallpaper can take several days. Skill level: painting and light trim are beginner-friendly; electrical work or heavy carpentry may need a professional.
Design inspiration: matching ceiling styles to rooms
- Living room: faux beams or coffered ceilings with layered lighting.
- Bedroom: painted accent ceilings or fabric canopy for cozy intimacy.
- Kitchen: beadboard, shiplap, or painted tin tiles for a vintage look (ensure proper ventilation).
- Bathroom: moisture-resistant paint and PVC panels or beadboard to prevent mold.
Practical tips from experienced DIYers
- Always mark joists and studs before hanging heavy elements.
- Use a high-quality ceiling paint to reduce drips and roller marks.
- Test paint colors on a 2×2 foot patch — ceilings look different under artificial light.
- When in doubt about wiring or load-bearing concerns, consult a licensed professional.
Frequently Asked Questions
1. How much does a ceiling makeover usually cost?
Costs depend on materials and scope: painting is cheapest ($50–$200), lightweight trim or panels are mid-range ($200–$1,000), and structural changes or custom beams can cost several thousand dollars. Plan a contingency of 10–20% for unexpected repairs.
2. Can I install decorative ceiling treatments in a low-ceiling room?
Yes — choose low-profile options like paint, light crown molding, or horizontal shiplap. Steer clear of heavy beams and deep coffers that reduce perceived height. Light colors and recessed lighting help maintain an open feel.
3. Are ceiling wallpaper and stencils suitable for renters?
Peel-and-stick wallpaper is renter-friendly and removable without damage. Stencils are also reversible if you paint over them before moving out. Always check your lease and take photos to document the original condition.
Ready to try your own ceiling makeover?
Ceiling decoration ideas 2 are about creativity and small choices that make a big difference. Start with one weekend project — a painted ceiling or simple crown molding — and watch how it transforms your space. If you need step-by-step project ideas or inspiration for other rooms, check out our DIY projects, kitchen upgrades, and home design ideas pages for more guides and tips.
If you enjoyed these ideas, grab a notepad, pick one project, and commit a weekend to it — then come back and share your before-and-after photos to inspire others.