Have you ever pulled your car into the carport and cringed at oil stains, cracked concrete, or a muddy mess after rain? Upgrading a carport floor is one of those high-impact home improvement projects that can be affordable, practical, and surprisingly fun as a DIY weekend project. Whether you’re aiming for low-maintenance durability, a nicer look for outdoor storage, or a garage-like finish for working on projects, these carport floor covering ideas will help you choose and install the right surface for your space.
Quick planning checklist before you start
- Assess the existing surface: concrete slab, compacted soil, or pavers.
- Decide primary use: parking only, workshop, storage, or mixed use.
- Consider climate and drainage—freeze/thaw cycles and water runoff matter.
- Set a budget and timeline: some options cure in a day, others require days to weeks.
- Gather basic tools: pressure washer, concrete patch, level, utility knife, and safety gear.
Carport floor covering ideas
Below are practical, real-world options—from budget-friendly to upgraded finishes—each with pros, cons, and DIY tips.
1. Epoxy and outdoor concrete coatings
Best for: sealed concrete that looks finished and resists oil and stains.
- Pros: seamless, easy to clean, wide color choices, long-lasting with proper prep.
- Cons: needs good surface prep; can be slippery when wet unless add texture.
- DIY tips: mechanically etch or acid-etch concrete, fill cracks with a concrete patch, use a primer, and apply the epoxy when temps are within product range. Add anti-slip aggregate to the topcoat for traction.
- Real-world advice: ensure ventilation and avoid application before rain; expect 24–72 hours cure time.
2. Interlocking garage tiles (PVC or polypropylene)
Best for: quick install, easy replacement, and workshop zones.
- Pros: snap-together installation, resistant to oils, customizable layouts and colors.
- Cons: edge transitions need trim; some cheaper tiles can shift with heavy loads.
- DIY steps: clean slab, lay a starter perimeter, interlock tiles across the area, cut tiles to fit edges with a utility knife.
- Design tip: use checkerboard or border patterns to create a professional look.
3. Pavers or decorative concrete pavers
Best for: an attractive, durable surface with good drainage.
- Pros: attractive, strong under vehicle loads, easy to repair by replacing individual pavers.
- Cons: higher install effort; base prep is critical for preventing shifting.
- DIY pointers: excavate and compact base, add 3–4 inches of crushed stone and a sand screed, lay pavers in a chosen pattern, and compact with a plate compactor. Use polymeric sand for joint stabilization.
4. Gravel or permeable paving
Best for: low-cost, natural look, and excellent drainage.
- Pros: inexpensive, fast to install, easy to replenish, permeable for stormwater management.
- Cons: can scatter over time, needs edging, may not be ideal for heavy workshop use.
- Tip: install geotextile fabric under gravel to reduce mixing with soil and add steel/plastic edging to keep gravel contained.
5. Rubber tiles and mats
Best for: comfort underfoot for workshop areas and non-slip surfaces.
- Pros: soft, oil-resistant, easy to replace, great for anti-fatigue zones near workbenches.
- Cons: not all rubber options are rated for vehicle loads; use vehicle-rated interlocking rubber if you plan to park on them.
- DIY approach: choose heavy-duty tiles, level the base, and use adhesive or interlock system per manufacturer instructions.
6. Stained or sealed concrete
Best for: budget-friendly aesthetic upgrade that keeps concrete character.
- Pros: inexpensive, enhances look, protects surface from stains.
- Cons: limited surface protection compared to epoxy; requires resealing every few years.
- Installation: deep clean and degrease, apply stain or dye, let dry, then apply a high-quality concrete sealer.
Step-by-step: Two practical DIY projects
A. Install interlocking tiles (weekend project)
- Measure and order tiles with 10% overage for cuts.
- Clean surface thoroughly and repair major cracks.
- Start at the carport entrance and snap tiles together row by row.
- Trim outer tiles with a utility knife and install edge trim for a finished look.
- Optional: anchor perimeter tiles if product recommends for vehicle loads.
B. Apply an outdoor epoxy coating (2–3 days)
- Pressure-wash and degrease the concrete; patch cracks and level spalled areas.
- Etch the concrete or grind to ensure mechanical bond; vacuum and wipe clean.
- Apply a primer coat, then mix and roll on epoxy base coat per manufacturer ratios.
- Broadcast decorative flakes if desired; after base cures, apply clear topcoat with anti-slip additive.
- Wait full cure before parking—follow product cure times closely.
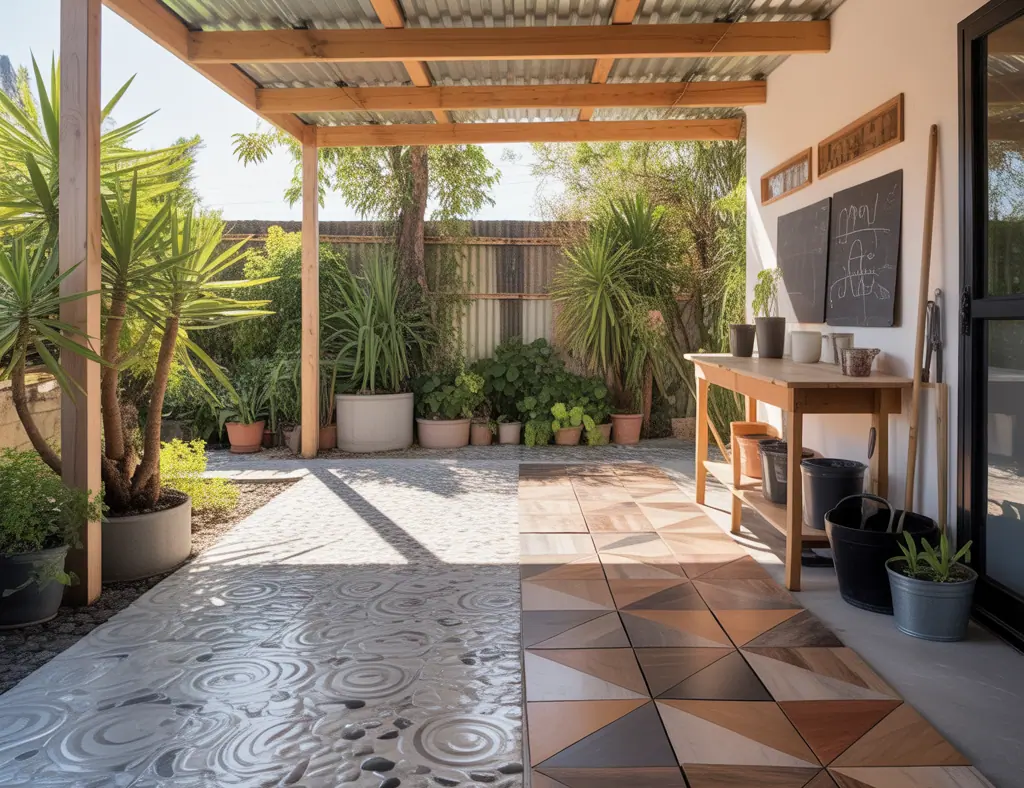
Design inspiration and placement tips
- Create separate zones: a parking zone using durable tiles or epoxy and a workshop zone with rubber mats or pavers.
- Use borders and contrast colors to define edges and improve visual appeal.
- Combine materials: paver driveway that meets an epoxy carport creates a premium look and smoother transition.
- Consider lighting and storage: a well-lit carport with wall-mounted storage keeps floors clear and showcases the new surface.
Maintenance and durability tips
- Regularly sweep and hose the surface—don’t let oil build up; use an enzyme cleaner for stubborn stains.
- Re-seal concrete surfaces every 2–5 years depending on traffic and climate.
- If you use gravel, plan for periodic raking and top-up; install proper edging to reduce migration.
- For any coating, repair chips early to prevent water intrusion and freeze damage.
Frequently Asked Questions
1. What is the best budget-friendly carport floor covering?
For tight budgets, compacted gravel with a geotextile base or a simple concrete sealer and stain are cost-effective. Gravel is very inexpensive to install and drains well; staining and sealing an existing concrete slab gives an upgraded look for a modest cost.
2. Can I use indoor garage flooring materials in a carport exposed to weather?
Some garage tiles and epoxy systems are formulated for outdoor use, but many indoor-only products won’t hold up to UV, temperature swings, or moisture. Choose products specifically rated for outdoor or semi-covered areas and confirm temperature and moisture application limits.
3. How do I prevent a carport floor from becoming slippery when wet?
Add an anti-slip additive to coatings, choose textured tiles, or use rubber mats in high-traffic areas. For epoxy, broadcast fine silica grit or anti-skid beads into the topcoat. Good drainage and slope also reduce standing water that causes slippery conditions.
Conclusion
Choosing the right carport floor covering ideas depends on your budget, the intended use of the space, and local climate. From durable epoxy coatings and interlocking tiles to permeable gravel and attractive pavers, there’s a solution that can transform your carport into a cleaner, safer, and more attractive area. Ready to tackle this project? Start by assessing your slab, picking one of the DIY plans above, and ordering materials—then share your before-and-after photos or questions in the comments. For more step-by-step inspiration, check out our DIY projects and browse related home design ideas for complementary upgrades.