Have you ever opened your garage door to an ugly, cracked concrete slab and wondered if your carport could be more than just a place to park? Whether you’re turning a carport into a covered patio, workshop, or an upgraded parking spot, the right floor covering transforms the space. In this guide you’ll find practical, stylish, and DIY-friendly carport floor covering ideas that suit every budget—plus step-by-step tips to get the job done right.
Why the Right Floor Covering Matters
Carport floors face heavy use, exposure to weather, and occasional spills. Choosing a proper surface boosts durability, safety, curb appeal, and usability. The right material can improve traction in wet conditions, protect concrete from oil stains, and create a comfortable outdoor living extension. Before you pick a material, consider drainage, local climate, intended use, and how much maintenance you want to commit to.
Carport Floor Covering Ideas
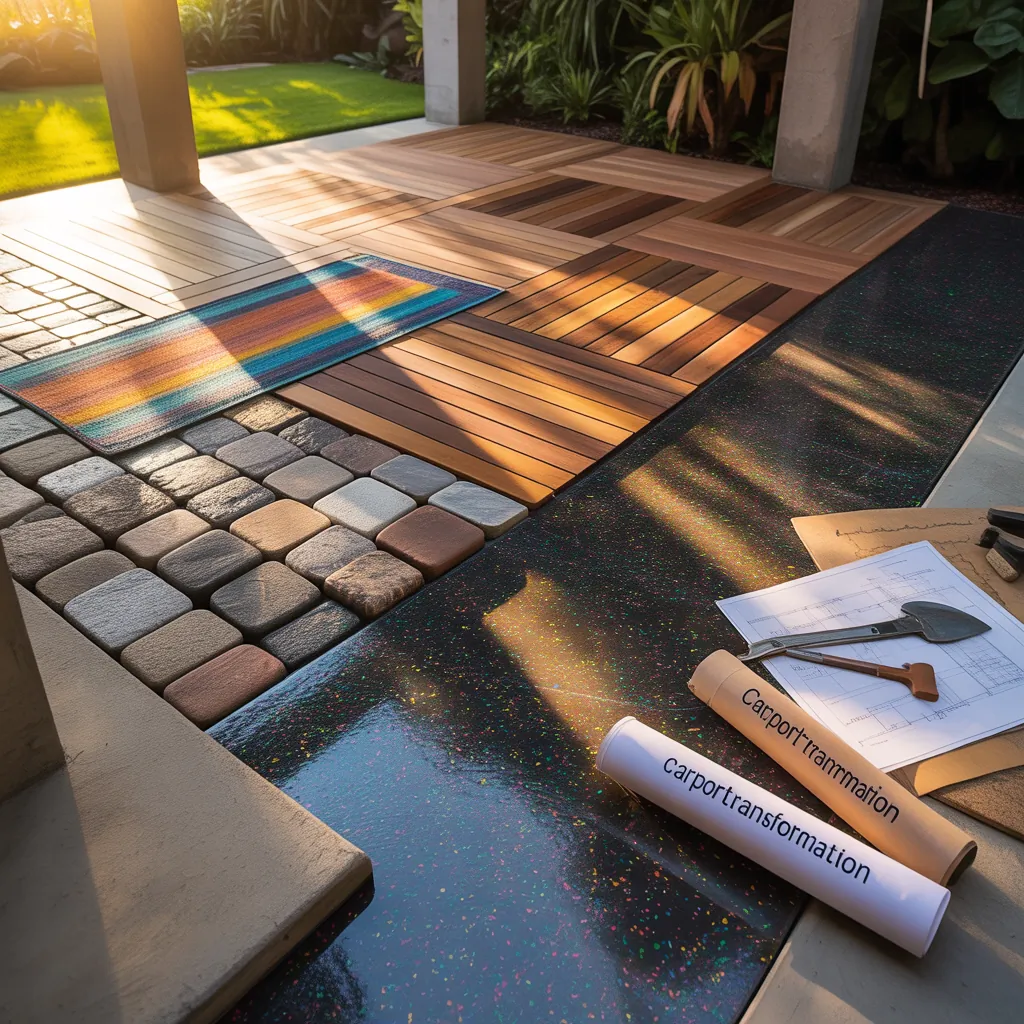
Below are practical options—each includes pros, cons, difficulty level, and design tips so you can match style with function.
Epoxy and Polyaspartic Coatings
- Pros: Seamless, chemical-resistant, glossy finish, long-lasting.
- Cons: Requires proper surface prep; hot surface can be slippery; higher cost for professional-grade systems.
- DIY difficulty: Medium (for small jobs) to high (for large areas requiring fast-setting products).
- Design tip: Use color flakes or anti-slip additive; pick neutral gray or Terra Cotta for a modern look.
Interlocking Floor Tiles (Rubber, PVC, or PP)
- Pros: Fast install, modular, replaceable, comfortable underfoot, good drainage.
- Cons: Can trap dirt under tiles if not installed with spacer gaps; some types fade in UV.
- DIY difficulty: Low. Great for weekend projects.
- Design tip: Create checkerboard patterns or a perimeter border with contrasting colors.
Pavers or Concrete Pavers
- Pros: Attractive, excellent drainage, durable, easy to replace individual pavers.
- Cons: More labor intensive; requires proper base compaction.
- DIY difficulty: Medium to high depending on area and edging requirements.
- Design tip: Use sand-set or mortar-set pavers in herringbone or basketweave for visual interest.
Stamped Concrete Overlay
- Pros: Gives decorative finishes like stone, slate, or brick look on concrete.
- Cons: Professional finish recommended for longevity; can crack if underlying slab is unstable.
- DIY difficulty: High for quality results.
- Design tip: Add acrylic sealers and UV-stable dyes to keep color vibrant.
Gravel or Decomposed Granite
- Pros: Budget-friendly, good drainage, rustic look.
- Cons: Shifts under tire traffic, requires edging to contain material.
- DIY difficulty: Low to medium.
- Design tip: Use weed fabric beneath and a compacted base to minimize settling.
Outdoor Rugs and Decking
- Pros: Instant style boost; rugs add warmth; composite decking creates a raised platform.
- Cons: Rugs need cleaning; decking raises the floor height and may need framing.
- DIY difficulty: Low for rugs, medium for decking.
- Design tip: Combine a durable outdoor rug with string lights and potted plants to convert carport into an entertaining area.
Budget-Friendly vs. High-End Carport Flooring
Budget-Friendly Options
- Painted concrete with weatherproof porch paint
- Interlocking plastic tiles
- Gravel with compacted base
Higher-End Upgrades
- Polyaspartic or high-build epoxy systems
- Professional stamped concrete overlay
- Custom paver installations
Practical DIY Tips & Step-by-Step Installations
DIY: Installing Interlocking Floor Tiles (Quick Weekend Project)
- Measure the area and buy 5–10% extra tiles for cuts and mistakes.
- Clean the concrete surface thoroughly—pressure wash if needed and let dry.
- Start from one corner and snap tiles together, working row by row.
- Use a utility knife or jigsaw with a fine blade for edge cuts.
- Leave small expansion gaps on the perimeter if recommended by the manufacturer.
- Finish with ramp edges or trim to prevent catching on tires or feet.
DIY: Basic Epoxy-Coating Steps (Small Carport)
- Repair cracks and spalls with concrete patch and allow to cure.
- Etch the concrete using a commercial etcher or acid wash (follow safety instructions).
- Thoroughly clean and remove all dust, oil, and grease.
- Apply a concrete primer or moisture barrier if required by the product.
- Mix epoxy per manufacturer directions and roll on a base coat. Broadcast decorative flakes if desired.
- After curing, apply a clear topcoat with anti-slip additive for traction.
Site-Specific Considerations: Drainage, Slope, and Climate
Before you begin any carport floor makeover, check grade and drainage—water pooling will damage many finishes. Maintain slight slope away from the house. In cold climates choose freeze-thaw tolerant systems; in hot, pick UV-stable materials. If the carport will be used as a workshop, prioritize chemical resistance and easy-clean surfaces. For multi-use outdoor living spaces, consider comfort and appearance—composite decking or tile often works best.
Maintenance and Longevity
- Seal porous surfaces annually to protect against stains and freeze-thaw cycles.
- Sweep and hose down interlocking tiles to avoid debris build-up underneath.
- Touch up paint or epoxy chips quickly to prevent larger delamination.
- For pavers, re-sweep joint sand and recompact if settling occurs.
Design Inspiration
Think beyond plain gray. Use borders, inlay patterns, or color flakes to delineate parking areas from living zones. Pair a darker floor with light-colored furniture and strategic lighting to make the carport feel like an outdoor room. For a modern look, go with monochrome epoxy; for farmhouse charm, use brick pavers or flagstone-style stamped concrete.
Frequently Asked Questions
Interlocking tiles or composite decking are excellent for dual-purpose carports because they’re comfortable, attractive, and easy to install. If you need heavy vehicle resistance, consider a reinforced epoxy system or pavers for a balance of durability and aesthetics.
With proper surface prep and quality products, epoxy can last 5–15 years. Polyaspartic topcoats extend life and cure faster. Longevity depends on vehicle traffic, climate, and maintenance.
Yes, you can install a paver overlay using thin brick pavers or an interlocking paver system designed for overlays, but the existing slab must be stable. For full-depth pavers, you’ll typically need to remove the concrete or build a separate compacted base.
Conclusion
Choosing the right carport floor covering ideas can dramatically upgrade your home’s function and curb appeal—whether you want an affordable DIY fix or a high-end durable finish. Start by assessing drainage, budget, and how you’ll use the space. For hands-on weekenders, interlocking tiles or epoxy are fantastic starting points; for long-term investment, consider stamped concrete or pavers. Ready to transform your carport? Explore our DIY projects and home design ideas for more step-by-step tutorials and inspiration, or check out kitchen upgrades for another room-refresh mood board. Try one of these carport floor covering ideas this weekend and share your before-and-after photos to inspire others!