Ever stood in your backyard with a cracked lawn chair and a vision of summer BBQs, but stared down the price tag of professional landscaping? If you want to create a comfortable outdoor living area without draining your savings, a budget friendly backyard concrete patio might be the simplest, longest-lasting solution. As a DIY home improvement blogger, I’ll walk you through practical, wallet-conscious methods to turn that patch of dirt into an inviting outdoor room.
Why Choose a Concrete Patio for a Tight Budget?
Concrete is one of the most cost-effective, durable materials for patios. It pours easily, resists weeds, and requires minimal maintenance. With a few DIY techniques and inexpensive finishing tricks — like broom finishes, staining, or simple stamping — you can get the look of expensive materials (pavers, stone, or tile) without the high labor costs.
Benefits at a glance
- Low material cost per square foot compared to pavers or natural stone
- Long lifespan and minimal upkeep
- Can be customized with color, texture, or patterns
- Great for layering: concrete slab can be a base for tiles, decks, or outdoor kitchens later
Planning Your Budget Friendly Backyard Concrete Patio
Good planning saves money. Start by deciding on size, location, and purpose: dining area, firepit zone, or a quiet lounge. Smaller, well-placed patios cost less and feel cozy. Sketch a layout and measure accurately to calculate material needs — concrete sold by the cubic yard, gravel and sand by the ton, and form lumber by linear feet.
Materials and rough cost-saving checklist
- Concrete (ready-mix delivery or mix-your-own bags) — compare unit prices
- Gravel and crushed rock for subbase
- Form boards (2×6 or 2×8), stakes, and screws
- Wire mesh or rebar for reinforcement
- Concrete finishing tools: screed board, float, edger, broom
- Concrete sealer or stain for finishing touches
DIY Step-by-Step: Build a Concrete Patio on a Budget
Below is a straightforward method suitable for most homeowners. If your slab will be larger than about 300 sq ft or on poor soil, consider consulting a pro.
Step 1 — Mark and Excavate
Outline the patio with stakes and string. Excavate the area 6–8 inches below final grade for a typical 4-inch concrete slab with a 4-inch compacted base. Save topsoil for garden beds.
Step 2 — Compact and Level the Base
Spread 3–4 inches of crushed rock or gravel and compact it using a plate compactor. A level, stable base prevents future settling and cracks.
Step 3 — Build Forms and Add Reinforcement
Install straight, sturdy forms using 2x boards and stakes. Place wire mesh or a grid of rebar lifted on small concrete or plastic chairs so the reinforcement sits in the middle of the slab.
Step 4 — Pour, Screed, and Float
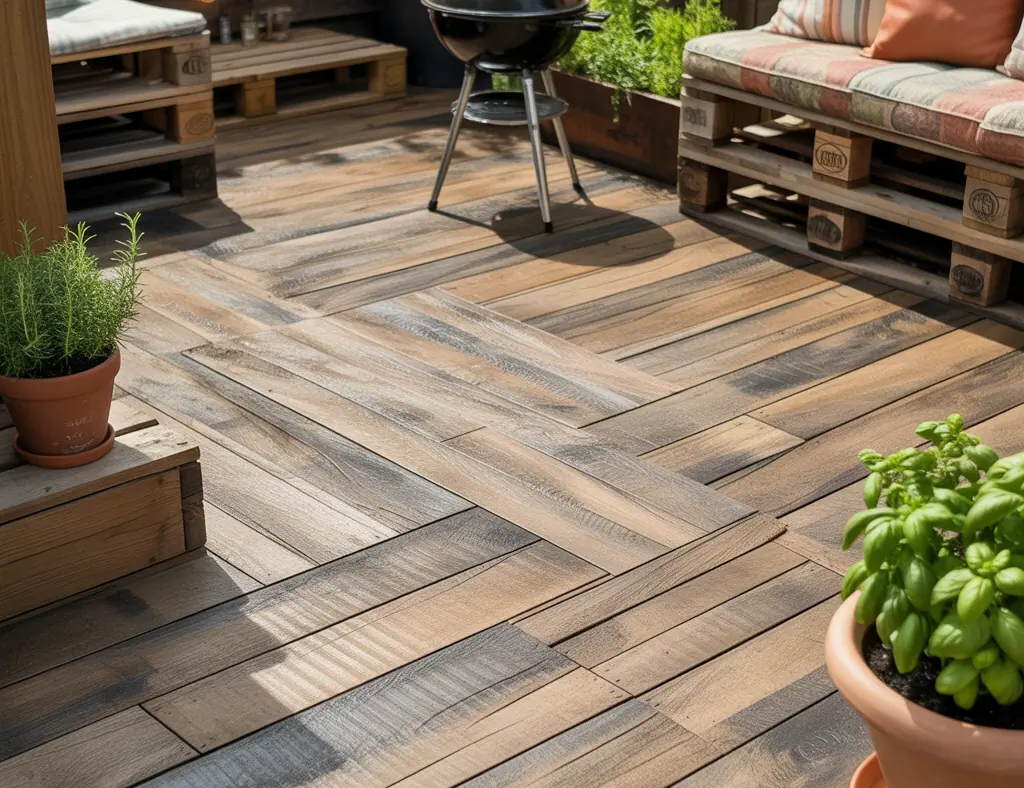
For small patios, renting a concrete mixer and buying mix bags can be cheaper than ready-mix delivery. Pour concrete, use a straight edge to screed the slab level, then float and trowel for a smooth finish. If you prefer texture, finish with a broom for slip resistance.
Step 5 — Cure and Seal
Keep the concrete moist for 3–7 days to cure properly. Apply a sealer after 28 days to protect the surface and enhance color if you used stain.
Design Inspiration: Make it Look High-End for Less
Transform plain concrete into a beautiful backyard focal point with budget-conscious design tricks.
Color and Texture
- Acid staining or integral color adds rich tones. A little goes a long way.
- Broom-finish concrete offers a subtle texture and non-slip surface for poolside patios.
- Use inexpensive stamping mats to create the look of pavers or slate — apply during the setting phase.
Divide and Frame
- Create control joints in patterns (grid, diagonal, or modular) to mimic stone or tile seams and to control cracking.
- Border the slab with a contrasting color or a simple row of pavers for a custom look.
Layering and Furnishing
- Add an area rug, string lights, planters, and low-cost outdoor furniture to make the space feel finished.
- Consider a low-cost pergola kit or shade sail for structure without breaking the bank.
Cost-Saving Tips from Real Projects
- Mix your own batch for small patios using 60–80 lb concrete bags — cheaper than delivery if under 1–2 cubic yards.
- Rent tools (concrete mixer, plate compactor) instead of buying. Many rental centers have daily rates that save money.
- Recruit friends or family for the pour day — labor is the biggest expense you can reduce.
- Plan the shape to minimize complex curves; straight edges are faster and less wasteful.
- Buy slightly more material than calculated — shortages cause costly delays.
Common Mistakes to Avoid
- Skipping proper base compaction — leads to cracking and settling.
- Pouring in extreme heat or cold without proper curing methods.
- Not allowing adequate drainage — slope slab away from house at 1/8”–1/4” per foot.
Budget Friendly Backyard Concrete Patio: Design Ideas and Upgrades
Once your slab is in place, consider phased upgrades so you can spread costs over time: add decorative staining one season, build a DIY fire pit the next, or install built-in seating later. Small, strategic upgrades can dramatically increase enjoyment and property value.
Frequently Asked Questions
How much does a DIY concrete patio cost per square foot?
Costs vary by region and materials, but a typical DIY concrete slab can run between $3 to $8 per square foot for materials alone. Ready-mix and professional labor increase that price, so doing the work yourself and choosing simple finishes keeps costs on the lower end.
Can I pour a concrete patio myself without prior experience?
Yes, for small patios most homeowners can manage a DIY pour with careful planning, rented tools, and a helping pair of hands. Start with a simple rectangle, follow step-by-step instructions, and consider a professional for very large or complex slabs.
How do I prevent my concrete patio from cracking?
Prevent cracking by preparing a stable base with well-compacted gravel, adding reinforcement (mesh or rebar), creating control joints spaced appropriately, and curing the concrete properly by keeping it moist during the first week after the pour.
Conclusion — Start Your Budget Friendly Backyard Concrete Patio Today
A budget friendly backyard concrete patio is one of the smartest DIY investments you can make: affordable, durable, and highly customizable. With careful planning, the right tools, and a few hands to help on pour day, you can create an outdoor living space that looks great and lasts for years. Ready to get started? Explore our DIY projects and home design ideas for complementary inspiration, or check related kitchen upgrades if you’re making broader home improvements. Share your plans or ask questions below — I’d love to help you build something great.
Call to action: Grab a sketchpad, measure your space, and try calculating materials today — then jump into your first DIY concrete patio project with confidence!
For more tips on budget-friendly home improvements, check out our guide on Reducing Moving Expenses with Removalists.