Have you ever stood in your garage surrounded by craft paints, leftover pallet wood, and a last-minute party guest list and wondered how to turn that pile of supplies into something stunning? If you’re planning a party and need a centerpiece that’s personal, budget-friendly, and totally DIY-able, birthday board ideas can be the perfect solution. Whether you’re creating a milestone memory board for a 50th, a playful welcome sign for a kid’s party, or a photo timeline for a graduation bash, this guide gives you practical, stylish, and achievable ideas to make your party pop.
Why Choose a Birthday Board?
Birthday boards are versatile, cost-effective, and packed with personality. They serve as photo backdrops, guest-signature stations, gift tables’ focal points, or interactive activities. With a little planning, you can match your board to any theme—rustic, modern, boho, or glam—while keeping tools and materials simple.
Top Birthday Board Ideas (With DIY Steps)
1. Photo Memory Timeline Board
Perfect for milestone birthdays (30th, 40th, 50th), this board displays life highlights in chronological order.
- Materials: foam core or plywood, printed photos, double-sided tape, numbered kraft tags, fairy lights.
- Steps:
- Tip: Use removable mounting squares to preserve photo quality for keepsakes.
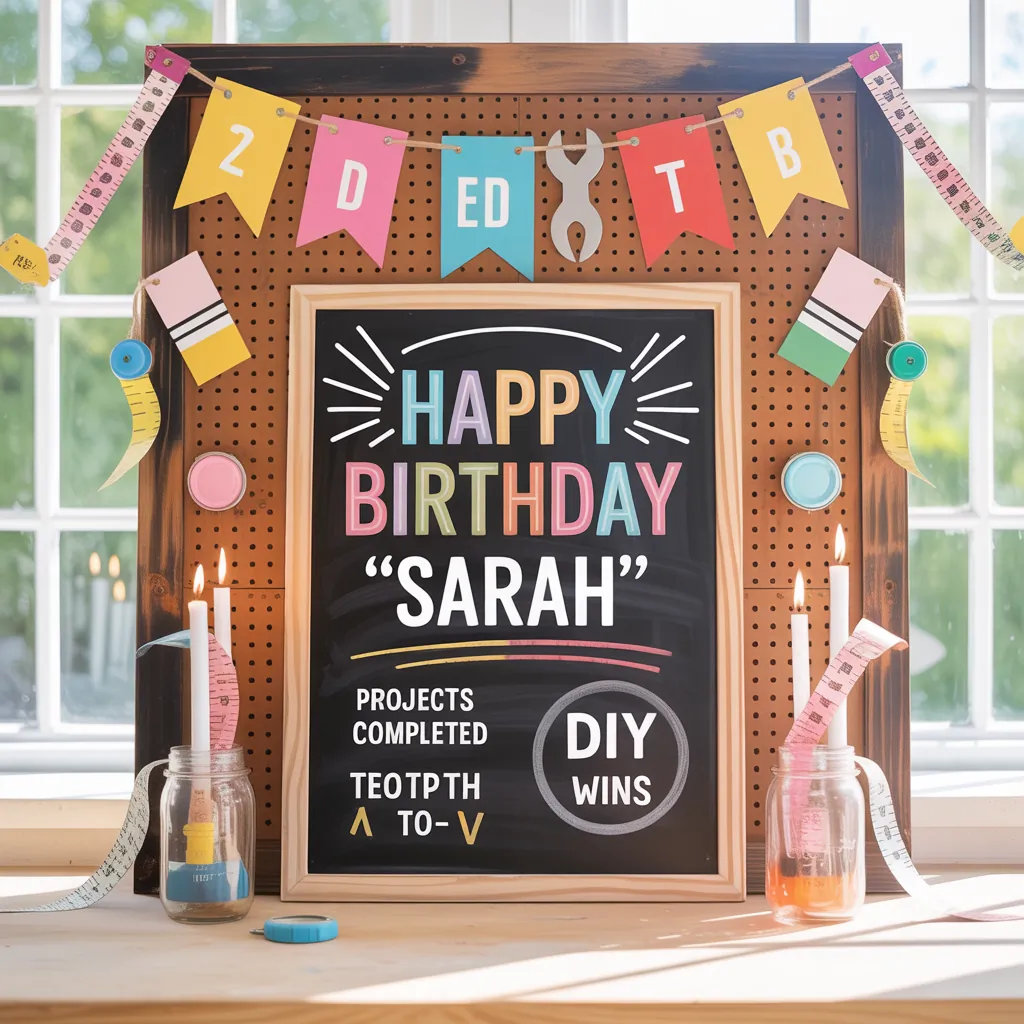
2. Chalkboard Sign for Interactive Messages
Chalkboards are great for changing messages and on-the-day announcements.
- Materials: framed chalkboard or painted plywood with chalkboard paint, liquid chalk markers.
- Steps:
- Tip: Wipe clean with a damp cloth to reuse for future parties.
3. Floral & Greenery Welcome Board
For spring and garden parties, a floral board sets an elegant tone.
- Materials: foam board, faux or fresh greenery, hot glue, floral tape, lettering decals.
- Steps:
- Tip: Choose UV-resistant faux florals if the celebration is outdoors to avoid fading.
4. Neon & Acrylic Modern Sign
For a contemporary look, combine clear acrylic with LED neon tape.
- Materials: clear acrylic sheet, neon LED strip or flexible neon rope, hardware for mounting.
- Steps:
- Tip: Keep wiring discreet by hiding battery packs behind décor or within a table display.
Design Inspiration & Themes
Match your board to party themes with these quick ideas:
- Rustic: Reclaimed wood panels, burlap accents, mason jar lights.
- Glam: Gold foil lettering, sequin backdrops, velvet ribbons.
- Kids’ Party: Bright colors, cartoon cutouts, sticker stations for personalization.
- Minimalist: Clean sans-serif fonts, monochrome color palette, sparse greenery.
Practical Tips for Smooth DIY Execution
Small planning wins make big differences on party day. Here are real-world tips that pros use:
- Measure twice: Decide board location first to choose a size that fits both the space and the crowd flow.
- Light it well: Use uplighting, fairy lights, or spotlights so the board photographs well from any angle.
- Make it sturdy: If using plywood, sand and seal edges to avoid splinters; use strong hanging hardware rated for the board’s weight.
- Weatherproof for outdoors: Seal wood with clear exterior polyurethane and secure paper or photos with laminating sheets or clear acetate.
- Plan timeline: Build the board 1–2 days ahead so paint and glue fully cure and you can make last-minute tweaks.
Step-by-Step: Build a Budget-Friendly Birthday Message Board
This 6-step mini project is perfect for beginners:
- Choose board base: Foam core for under $10, plywood for more durable keepsakes.
- Paint the base with two coats of your background color; let dry overnight.
- Lay out your design on paper and transfer using carbon paper or light pencil marks.
- Apply lettering with paint pens or vinyl decals for crisp edges.
- Add embellishments: ribbon, paper flowers, or string lights.
- Mount on an easel or attach sawtooth hangers for wall display.
Reusability & Storage
Make your birthday board a lasting piece. Consider modular elements that can be swapped (vinyl names, seasonal florals) and store boards flat in a dry place. For large plywood boards, wrap in a moving blanket and secure with tape to prevent dings.
Birthday Board Ideas for Different Occasions
Whether it’s a kid’s first birthday or a golden anniversary, adapt these approaches:
- Kids: Use washable paints and plastic frames. Add interactive pockets with small prizes.
- Adults: Focus on typography, photo collages, and elegant finishes like metallic foils.
- Surprise parties: Create a decoy sign and swap it out with the main board right before the reveal.
Frequently Asked Questions
Choose one premium element—like vinyl lettering or a quality photo print—and keep the rest simple. A well-chosen font, clean layout, and good lighting can make inexpensive materials look high-end.
Use exterior-grade plywood or PVC board, waterproof paints, and sealants. Opt for faux florals and battery-operated lights to avoid weather damage, and secure the board with sandbags or stakes if wind is a concern.
Start designing 2–3 weeks ahead. Build the physical board 1–2 days before the event to allow paint and adhesives to cure, and to have time for any touch-ups.
Conclusion: Make Your Birthday Board the Heart of Your Party
Birthday board ideas can transform a simple gathering into a memorable celebration. From DIY photo timelines to chic acrylic neon signs, there’s a project for every skill level and budget. Pick a theme, gather a few basic tools, and give yourself time to test layouts—then watch your creation become a conversation starter. Ready to get building? Explore more DIY projects for crafting tips, or browse home design ideas and kitchen upgrades to match your party’s aesthetic across the whole house.
Try one of these birthday board ideas this weekend—take a photo, share your results, and inspire others to DIY their next celebration!