Have you ever stared at a blank wall and pictured something with more personality—maybe a classic chair rail, board-and-batten texture, or elegant raised panels—but felt unsure where to start? Whether you’re refreshing a dated hallway or attempting your first DIY upgrade, picking the best wainscoting trim can transform a room from ordinary to magazine-worthy. This guide walks you through the best materials, styles, and step-by-step tips so you can confidently tackle a wainscoting project.
Why Wainscoting Trim Makes a Big Impact
Wainscoting does more than protect walls; it adds proportion, depth, and architectural detail that elevates your home’s look. From farmhouse board-and-batten to refined shaker panels, the right trim defines a space and can increase perceived value. Use wainscoting trim to create a durable low wall surface in high-traffic areas like entryways, dining rooms, and children’s rooms, or to add moisture-resistant cladding in bathrooms.
Choosing the Best Wainscoting Trim for Your Home
Picking the best wainscoting trim depends on style, budget, and the room’s needs. Below are the most common options with pros, cons, and ideal uses.
MDF (Medium-Density Fiberboard)
- Pros: Affordable, smooth surface, easy to paint, consistent dimensions.
- Cons: Vulnerable to moisture—avoid in bathrooms unless sealed properly.
- Best for: Budget-friendly interior projects like hallways or dining rooms.
Pine and Poplar
- Pros: Real wood grain, easy to stain or paint, durable.
- Cons: More expensive than MDF; pine may dent more easily.
- Best for: Historic homes and areas where a wood finish is desired.
PVC and Composite Trim
- Pros: Water-resistant, rot-proof, good for humid spaces.
- Cons: Limited paint adhesion without priming; can look synthetic up close.
- Best for: Bathrooms, basements, and exterior wainscoting projects.
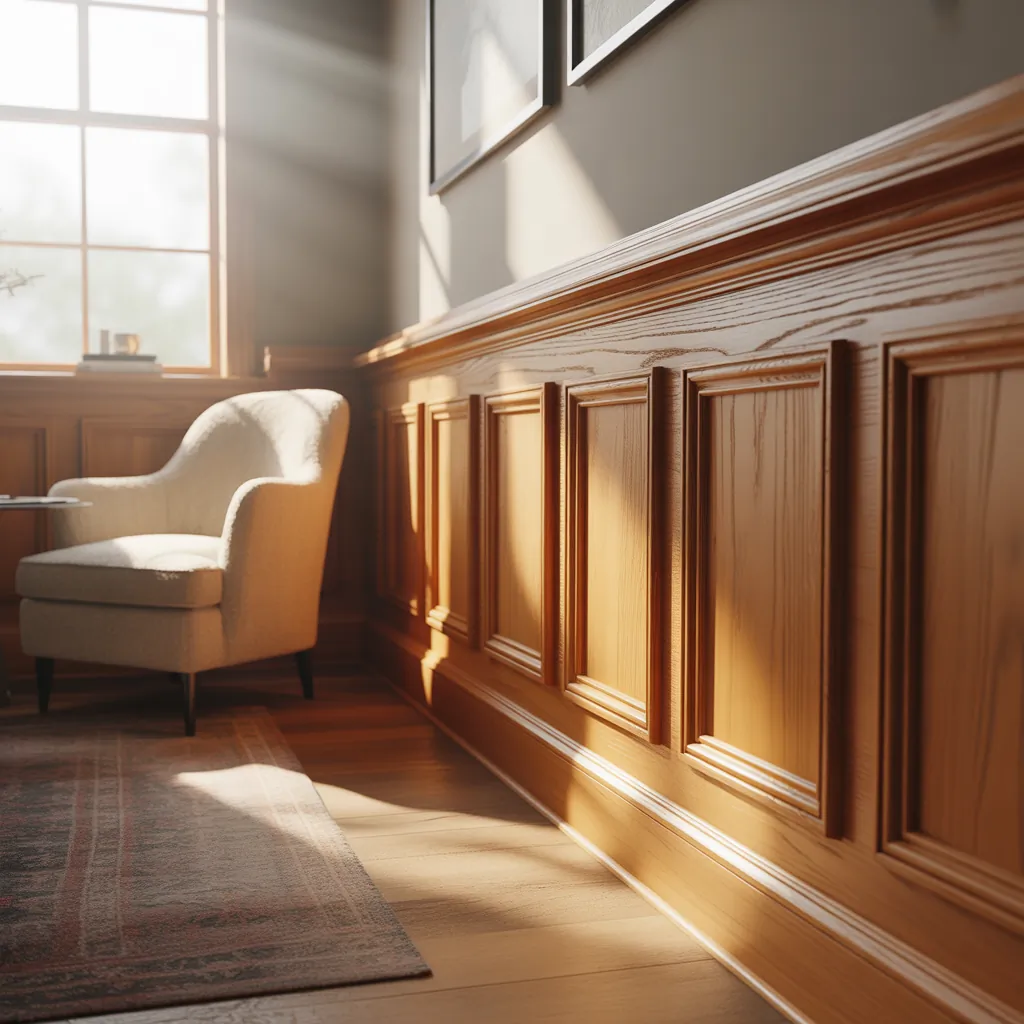
Solid Hardwood (Oak, Maple)
- Pros: Luxurious finish, very durable, great for staining.
- Cons: Higher cost; requires skilled installation for a flawless look.
- Best for: Formal rooms and high-end finishes.
Popular Wainscoting Styles and When to Use Them
Different trim profiles create distinct looks. Consider these style choices and where they shine:
- Beadboard — Casual, cottage-style; great for kitchens and bathrooms. Look for “beadboard wainscoting trim” for panel choices.
- Shaker — Clean lines and modern farmhouse vibe; excellent in living rooms and bedrooms.
- Raised Panel — Traditional and formal; perfect for dining rooms and studies.
- Board and Batten — Vertical interest and texture; ideal for accent walls and stairwells.
Measure, Plan, and Prep: Step-by-Step Installation Tips
Before cutting any trim, planning is the most important step. Follow this practical plan for a clean DIY install:
- Measure the walls. Determine perimeter length and decide how tall the wainscoting will be—common heights are 32″, 36″, or 42″.
- Sketch a layout. Draw the wall on graph paper and mark studs, doors, and outlets so you know where attachment points will be.
- Choose materials. Select trim based on room conditions (use PVC in moisture-prone areas) and style preference.
- Cut and dry-fit. Cut boards with a miter saw and dry-fit pieces to confirm gaps and alignment. Use a level—wainscoting must be perfectly horizontal.
- Attach to studs. Use finishing nails or a brad nailer to secure trim into studs. Apply construction adhesive for extra hold on MDF or PVC.
- Caulk and fill. Fill nail holes with wood filler or spackle, and caulk seams for a seamless look before painting.
- Prime and paint. Prime MDF and PVC, then apply two coats of semi-gloss paint for easy cleaning and durability.
DIY Tips from the Pros
- Always start at the lowest point on uneven floors and scribe trim if necessary to avoid gaps.
- Use a chalk line to snap reference lines for consistent height around corners and doorways.
- When mitering corners, cut slightly long and trim back for a tight joint—wood shrinks differently than MDF.
- For a custom look, combine styles: a beadboard lower section with a shaker cap rail adds texture and modern appeal.
Design Inspiration: Where to Use Wainscoting Trim
Wainscoting works in virtually every room. Here are real-world ideas to spark your project:
- Entryway: Board-and-batten at chest height makes an inviting first impression and protects walls from scuffs.
- Kitchen: Beadboard backsplash wainscoting adds charm and is simple to clean—pair with crisp white paint for a classic look.
- Dining room: Raised panel wainscoting painted two tones gives a formal, layered aesthetic.
- Bathroom: PVC or moisture-resistant MDF beadboard offers a coastal feel without the worry of swelling.
Cost and Time Estimates
Expect to pay $2–$10 per linear foot for materials depending on the choice (MDF on the low end, hardwood on the high end). DIY installation typically takes a weekend for a single room if you have basic tools (miter saw, brad nailer, level). Hiring a professional will add labor costs but ensures perfect joints and finishes.
Frequently Asked Questions
1. What is the best wainscoting trim for bathrooms?
For bathrooms, choose PVC or moisture-resistant composite trim to prevent warping from humidity. Prime and paint any visible seams and use mildew-resistant paint for best results.
2. Can I install wainscoting myself with basic tools?
Yes. A weekend DIYer can install wainscoting using a miter saw, brad nailer, level, and caulk gun. Start with a small wall to build confidence, and follow careful measuring and dry-fitting steps.
3. How high should wainscoting be?
Common heights are 32″, 36″, or 42″. Choose based on ceiling height and furniture scale—you want the top rail to sit roughly just below a chair back in dining areas or at a natural midpoint in hallways.
Conclusion — Take Action on the Best Wainscoting Trim for Your Home
Choosing the best wainscoting trim comes down to matching material, style, and function to your room. Whether you pick budget-friendly MDF, classic pine, or moisture-resistant PVC, a well-planned install will elevate your space. Ready to start? Sketch your wall, pick a style, and tackle a small section this weekend. For more project ideas and step-by-step inspiration, explore our DIY projects, check wainscoting uses in your next kitchen upgrades, or get styling tips from our home design ideas page. Share your photos when you’re finished — we’d love to see your transformation!