Have you ever stood at your curb and wished the front yard felt a little more intentional — more inviting, less flat? Maybe you’ve struggled with poor drainage, a sloped lot, or a boring strip of grass that never seems to thrive. Building a berm is one of the most effective and budget-friendly ways to add dimension, solve erosion issues, and dramatically improve curb appeal. In this post I’ll walk you through practical, hands-on berm ideas for the front yard that any DIY homeowner can apply.
Why choose a berm for your front yard?
Berms are raised earthen mounds that create visual interest, redirect water, and provide better growing conditions for plants. They’re perfect for:
- Hiding utilities or a failing foundation view
- Improving drainage and preventing erosion
- Creating focal points with shrubs, ornamental grasses, or rock features
- Adding layers and height to a flat landscape for greater curb appeal
Design principles: planning your berm
Before grabbing a shovel, spend some time planning. Good berm design balances form and function.
Site assessment
- Note sun exposure, wind, and how water runs across the property.
- Check local codes and utility lines (call before you dig).
- Decide on scale: gentle mounds work best in small front yards; larger berms suit bigger lots.
Shape and slope
Use soft, flowing curves rather than straight lines. A safe slope is typically 3:1 (three feet horizontal for every one foot vertical) to prevent erosion and make maintenance easier.
Berm ideas front yard: creative designs to try
Here are several styles and themes to inspire your project, from low-maintenance to show-stopping.
1. Low-maintenance native plant berm
Use local shrubs, perennials, and ornamental grasses to create a sustainable, drought-tolerant berm. Native plants reduce watering needs and support pollinators.
- Plants: native grasses, lavender, coneflowers, small native shrubs
- Finish: river rock or coarse mulch to prevent soil washout
2. Rock-and-plant hybrid berm
Combine boulders and cascading groundcovers for a naturalistic look. Rocks act as focal anchors and slow water flow.
3. Tiered berm with seating or retaining elements
Create terraces for planting and include a low retaining wall or seating bench at the top for an inviting entrance feature.
4. Wildflower meadow berm
Perfect for large front yards — seed with a wildflower mix for seasonal color, improved biodiversity, and a softer maintenance routine.
Step-by-step DIY berm construction
Here’s a practical workflow you can follow on a weekend or over a few weekends depending on size:
- Mark the area: Use spray paint or string to outline the berm footprint and slope.
- Excavate slightly: Remove sod in the berm zone to reduce future sinkage and improve rooting.
- Add quality soil: Bring in topsoil or a mix of topsoil and compost. Build the mound gradually in 4–6 inch layers, compacting lightly as you go.
- Shape and grade: Form gentle curves and slopes; make sure the berm diverts water away from structures and towards planned drainage.
- Install erosion control: Use jute matting or straw on steeper faces for the first season until plants establish.
- Plant strategically: Place larger shrubs near the top, medium perennials mid-slope, and groundcovers at the base.
- Mulch and edge: Apply a 2–3 inch layer of mulch; install edging (stone, timber, or steel) to define the berm and keep mulch in place.
- Irrigate: Install drip irrigation or soaker hoses to help new plants establish.
Materials and tools checklist
- Shovel, rake, wheelbarrow, tamper or plate compactor
- Quality topsoil and compost
- Mulch, erosion-control matting
- Plants: shrubs, perennials, grasses
- Edging material and landscape fabric (optional)
Planting tips and maintenance
Successful berm landscaping depends on smart plant selection and maintenance:
- Group plants by water needs to simplify irrigation.
- Use deep-mulch zones and drip irrigation for water efficiency.
- Prune shrubs selectively to keep forms tidy and prevent crowns from sitting in mulch.
- Check for settling in the first year and top up soil as needed.
- Use winter-interest plants (evergreens, ornamental grasses) so the berm looks good year-round.
Real-world advice from experienced DIYers
Pro tips that save time and money:
- Salvage soil from small backyard excavations to save on topsoil costs.
- Source rocks and boulders locally; they’re heavy and expensive to ship.
- Build berms in sections if budget or time is limited — you can phase plantings over seasons.
- Consider hiring machinery for large berms; a mini-excavator speeds grading dramatically.
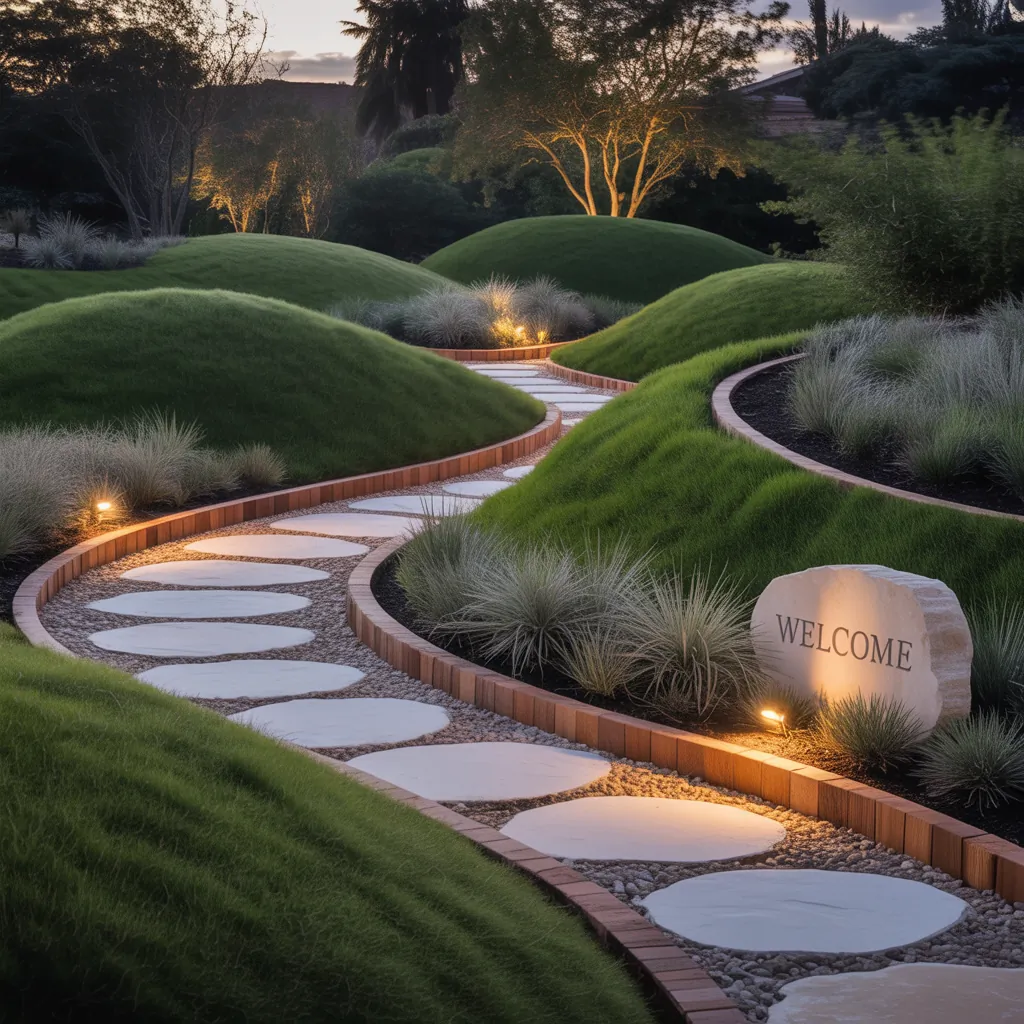
Lighting and finishing touches
Low-voltage path lights, uplights for specimen plants, and a stone path or stepping stones can make your berm readable at night and add instant charm.
Frequently Asked Questions
Expect most settling in the first 6–12 months. Compacting layers during installation limits excessive settling. Check and top up soil after heavy rains or the first freezing cycle.
Yes. In small spaces, create low, gently sloped berms to add height without overwhelming the yard. Use compact shrubs and narrow ornamental grasses to maintain scale.
Groundcovers (like creeping thyme or sedum), native grasses with deep fibrous roots, and spreading shrubs stabilize slopes. Use a mix of deep-rooted and surface-rooting plants for best results.
Conclusion: Start transforming your curb appeal with a berm
A well-designed berm can turn a flat, uninspiring front yard into a layered, welcoming landscape that improves drainage, minimizes erosion, and boosts curb appeal. Whether you choose native plantings, a rock-and-plant hybrid, or a tiered seating berm, these berm ideas front yard homeowners love are achievable with planning and basic DIY skills. Ready to try this project? Gather your plans, check utilities, and start small — then expand as you grow more confident. If you want more project ideas, explore our DIY projects and home design ideas for step-by-step inspiration.
Call to action: Share a photo of your berm or tell us what design you’re planning — get tips and feedback from other DIYers in the comments below!