Have you ever stood in your bedroom surrounded by mismatched paint chips and thought, “What if I just went all in?” Maybe you’re tired of beige walls that disappear into the background, or you want a restful cocoon that actually feels intentional. A bedroom color drench — painting walls, ceiling, trim, and even furniture in a single color family — can instantly change the mood, scale, and style of your room. In this post I’ll walk you through practical DIY tips, step-by-step ideas, and design inspiration so you can confidently drench your bedroom with color and get professional-looking results.
What is a bedroom color drench (and why it works)
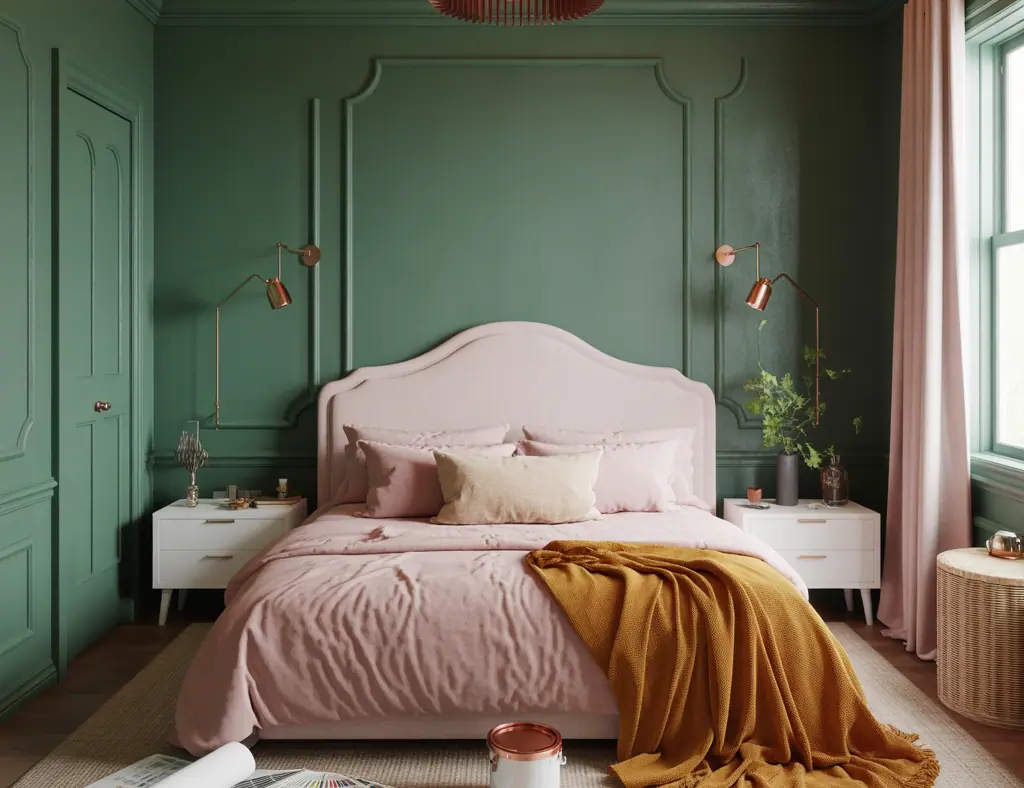
A bedroom color drench is a design technique where one color — or closely related tonal shades — is applied across the room: walls, ceiling, trim, doors, and sometimes large furniture. This monochromatic approach creates a seamless, enveloping effect that can make a small room feel bigger, a large room feel cozier, and a neutral space feel intentionally styled.
Benefits of a full-room color wash
- Unified, calm aesthetic that reduces visual clutter.
- Makes architectural details pop when done with contrast or blend when fully drenched.
- Quick visual refresh with a single paint choice and less debating about matching decor.
- Great for renters (temporary) or homeowners seeking a bold one-day transformation.
How to choose the right color for a bedroom color drench
Color choice defines the vibe. For bedrooms, prioritize colors that promote rest and reflect how you want to feel:
- Cool blues and greens for calm, restorative spaces.
- Warm greys and muted blushes for cozy sophistication.
- Deep jewel tones (teal, plum, forest green) for drama and depth.
Long-tail keyword tip: search sample swatches under natural light and consider “how to drench a bedroom with color” by testing sample pots on large poster boards before committing.
Step-by-step DIY: How to drench your bedroom with color
Follow this practical plan for a smooth bedroom paint transformation. Plan for a weekend project if you’re working alone, or a day and a half with one helper.
Materials and tools
- Quality interior paint (eggshell or matte for walls; satin for trim)
- Primer (stain-blocking or tinted if going dark)
- Rollers, brushes, angled sash brush, trim brush
- Drop cloths, painter’s tape, putty knife, spackle
- Sandpaper, ladder, paint trays
Preparation (1–3 hours)
- Clear the room or move furniture to center and cover with drop cloths.
- Remove outlet covers and light switch plates.
- Fill holes, sand smoothly, and wipe away dust.
- Tape edges for crisp lines if you plan to keep some elements unpainted.
Painting process (4–8 hours depending on size)
- Prime any patched or raw surfaces; for dark colors, use tinted primer.
- Paint the ceiling first if you plan to drench it — using the same color across ceiling and walls makes the room feel wrapped.
- Cut in along edges, then roll large wall areas in W strokes for even coverage.
- Paint trim and doors last — consider painting them the same shade for a full drench or a 10–20% darker/lighter tone for subtle contrast.
- Allow full drying time; apply a second coat if necessary.
Finishing touches
- Reinstall hardware and switch plates painted to match (or brass for intentional contrast).
- Layer textiles: curtains, bedding, and rugs in complementary tones and textures.
- Adjust lighting — warmer bulbs for richer colors, dimmers to set mood.
Design inspiration: monochrome vs tonal drench
There are two main approaches:
Monochrome drench
Use the exact same color and sheen across surfaces for a minimalist, gallery-like effect. Works great with crisp furniture and metallic accents.
Tonal drench
Choose a single hue and vary the value: lighter ceiling, mid-tone walls, darker trim or furniture. This adds depth while maintaining cohesiveness — ideal for bedrooms that need a layered, cozy feel.
Practical real-world advice and budget tips
- Buy sample pots and paint large swatches on foam boards — move them around at different times of day to see how light affects the color.
- Dark colors hide fewer imperfections; more prep may be required. If on a budget, pick a mid-tone that’s forgiving.
- Use washable or scrubbable paint for bedrooms where kids or pets might be present.
- If you’re renting, use peelable temporary paint products or paint removable panels you can reinstall when you move.
Lighting and texture: completing the bedroom color drench
Color is influenced by light and texture. To get the most from a room-wide color wash:
- Layer ambient, task, and accent lighting to control the mood.
- Add texture through pillows, throws, woven rugs, and natural wood to prevent a flat look.
- Introduce reflective surfaces — a mirror or metallic lamp — to break up heavy tones without losing the drenched aesthetic.
Before you start: checklist
- Order enough paint: calculate coverage plus 10% extra for touch-ups.
- Buy proper tools — better rollers and brushes make painting faster and cleaner.
- Schedule a day when you can open windows for ventilation and let paint cure overnight.
- Decide if you’ll paint furniture: sanding and primer may be needed for durable finish.
Frequently Asked Questions
1. Will a bedroom color drench make my small room feel smaller?
Not necessarily. A cohesive color can actually make small spaces feel larger by eliminating visual breaks. Choose a lighter value of your chosen hue and paint the ceiling the same or slightly lighter to enhance the sense of space.
2. Can I drench only part of the bedroom (like an accent wall) and still get a similar effect?
Yes. A tonal or partial drench — painting the bed wall and trim in a deeper shade while keeping other walls lighter — creates drama without committing to the entire room. This is a great starter option if you’re hesitant.
3. What sheen should I use for a fully drenched bedroom?
For walls, matte or eggshell provides a cozy, soft look and hides imperfections. Use satin for trim and doors to make details slightly more durable and reflective. If going for a modern gallery look, a uniform low-sheen can be striking.
Wrap-up: take the plunge with a bedroom color drench
If you’re ready for a quick, high-impact makeover, a bedroom color drench can be one of the most transformative DIY projects you’ll try. Pick a color that reflects how you want to feel, follow the prep and painting steps above, and layer in lighting and texture for a finished room that feels like a sanctuary. Ready to get started? Gather your sample pots, clear a weekend, and turn your sleep space into a thoughtfully drenched retreat.
Want more project ideas and step-by-step guides? Check out our DIY projects, browse inspiring home design ideas, or plan complementary updates like a dresser repaint or lighting refresh from our kitchen upgrades (many principles cross over between rooms).
Call to action: Try a small swatch this weekend — or snap a before photo and share your progress to commit to the transform. Your bedroom color drench awaits.