Have you ever squeezed past a swinging bathroom door while carrying laundry, or wished your small bathroom had more usable floor space? If so, the bathroom barn door concept might be the transformation you’ve been dreaming about. Whether you love farmhouse charm or modern minimalism, a sliding barn door can instantly free up space and create a statement feature — and many homeowners can install one themselves with a weekend and some elbow grease.
Why Choose a Bathroom Barn Door?
Sliding barn doors are more than a trend. They offer:
- Space-saving design for tight hallways and compact bathrooms
- Customizable aesthetics — from rustic wood to sleek glass
- Quick visual upgrade that can complement any home design ideas
- Relatively simple installation compared to building or re-framing a doorway
Design Inspiration: Styles & Materials
Think beyond the classic barnboard. Consider these styles:
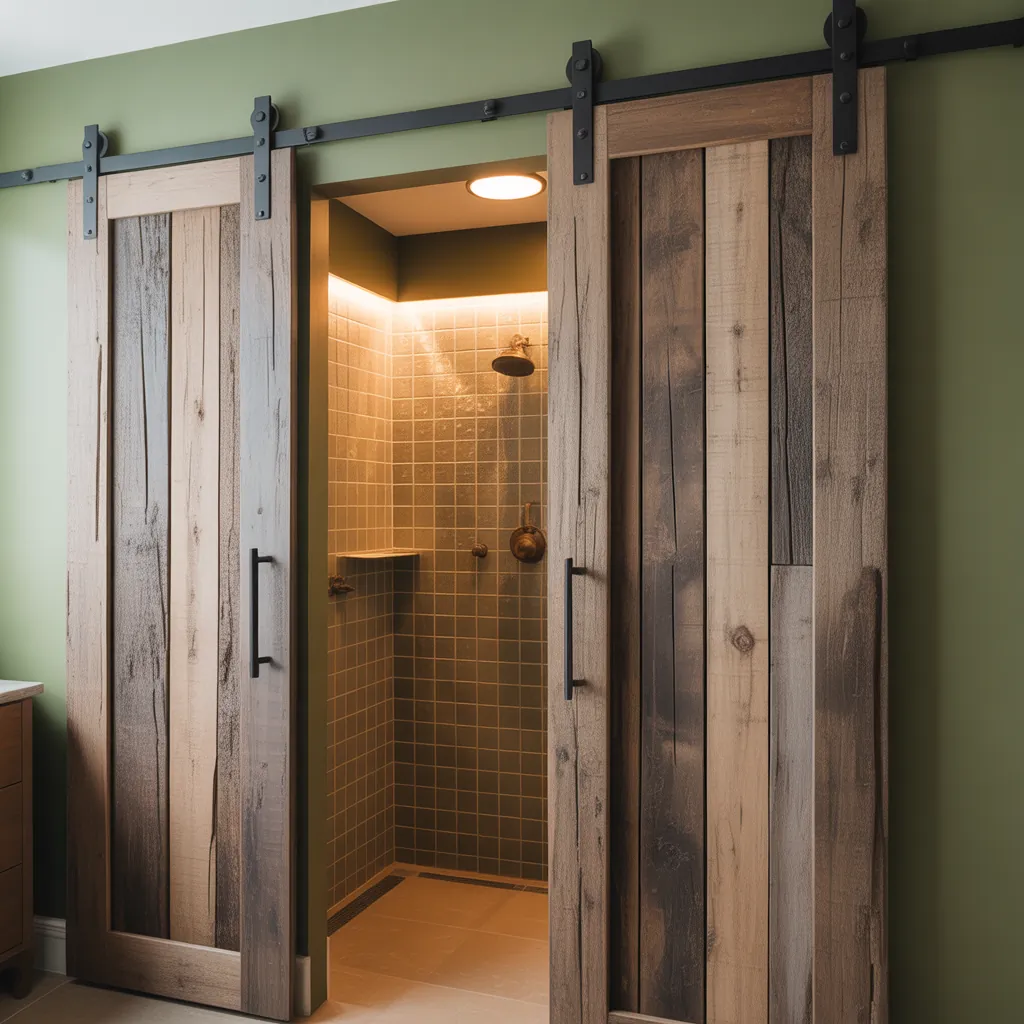
- Rustic wood — reclaimed wood or distressed planks for farmhouse charm.
- Modern flush — smooth plywood or MDF with a painted finish for contemporary spaces.
- Frosted glass panel — maintains privacy while letting light through.
- Shiplap or tongue-and-groove — adds texture and architectural interest.
For bathrooms, choose moisture-resistant materials and finishes: exterior-grade paint, marine varnish, or engineered wood to prevent warping in humid conditions.
Planning & Prep: What to Consider Before You Start
Good planning prevents costly mistakes. Before buying a track or door slab, evaluate:
- Wall space: A barn door requires enough clear wall length beside the doorway to slide open fully.
- Rough opening size: Door width should be wider than the opening (typically 1–2 inches extra on each side) to ensure privacy and coverage.
- Floor clearance: Decide on a floor guide or floating configuration to prevent swinging.
- Privacy & sealing: Think about light gaps and sound transmission — add seals or a magnetic latch if needed.
- Local codes: For second-exit bathrooms or accessibility requirements, confirm any code restrictions, especially in rental units.
DIY Step-by-Step: Install a Sliding Barn Door for Bathroom
Below is a practical weekend project timeline for a single door install.
Materials & Tools
- Barn door slab (pre-made or DIY)
- Barn door hardware kit (track, rollers, stops, floor guide)
- Stud finder, level, tape measure, pencil
- Drill, drill bits, lag bolts, screwdriver
- Shims, wood screws, wood filler, paint or finish
- Optional: soft-close kit, privacy latch, weather stripping
Installation Steps
- Measure the opening height and width. Add overlap so the door covers the jamb entirely when closed.
- Find and mark studs above the doorway for secure track mounting. Barn door tracks must be fastened to studs or a solid header board.
- If wall studs don’t line up with your track, install a horizontal plywood header attached to studs to distribute load.
- Mount the track level and securely. Test with rollers attached to the door before final tightening.
- Attach rollers to the top of the door per manufacturer instructions and hang the door on the track.
- Install door stops, floor guide, and any soft-close or dampening hardware. Add a privacy latch if needed.
- Finish edges with trim or overlapping jamb covers, and apply paint or sealant appropriate for bathroom humidity.
Practical Tips for Bathroom Use
Real-world considerations make the difference between a pretty door and a functional upgrade.
- Use a frosted glass or wider overlap for shared bathrooms to maximize privacy.
- Add a magnetic or hook latch at the leading edge to keep the door from rattling in drafts.
- Choose stainless-steel or powder-coated hardware to resist corrosion in humid environments.
- Place towel bars on the back of the door only if the door’s weight and hardware allow it — too much weight can strain the rollers.
- For wet rooms or showers, avoid raw wood; opt for waterproof materials and proper seals.
Cost & Time Estimates
Costs vary by materials and hardware quality. Expect to spend:
- Budget range: $150–$400 for a simple prehung slab and basic hardware.
- Mid-range: $400–$900 for solid wood, better hardware, and soft-close features.
- High-end: $900+ for custom glass or designer hardware.
Most DIYers can complete a standard installation in one weekend (6–10 hours), while custom doors or tricky walls may require a second day.
Bathroom Barn Door Concept: Best Practices for Small Spaces
If you’re working with a narrow hallway or tiny bathroom, these space-saving hacks amplify the benefits of a sliding door:
- Install a recessed pocket track if you can open the wall — true space saver but more labor-intensive.
- Use a bi-parting barn door (two panels that slide to opposite walls) for very wide openings.
- Combine with pocket shelving in the wall opposite the sliding door for storage without blocking swing space.
Frequently Asked Questions
Yes—barn doors can be made private with wider overlap, frosted glass panels, door seals, or magnetic latches. For household bathrooms shared by multiple people, consider soft-close hardware and extra seals to improve sound and light control.
Yes. If mounting into tile, use a plywood header routed into studs behind the tile to avoid drilling many tile anchors. Alternatively, fasten the track into the studs above the tile if accessible. Always use proper masonry or tile anchors if you must penetrate tile.
Performance depends on materials and finish. Use engineered wood, marine-grade sealants, or painted MDF rather than raw softwoods. Choose corrosion-resistant hardware (stainless or powder-coated) and add ventilation to the bathroom to reduce long-term humidity exposure.
Final Thoughts & Next Steps
The bathroom barn door concept is a smart combination of function and style — perfect for homeowners who want to solve space issues and add character without a full remodel. With careful planning, the right materials, and the proper hardware, you can complete this project over a weekend and enjoy a fresh, practical upgrade.
Ready to try it? Start by measuring your opening and browsing hardware options, then check our DIY projects page for tool guides and step-by-step tutorials. If you enjoyed these ideas, explore related inspiration on our home design ideas page or browse kitchen upgrades for more sliding-door concepts.
Call to action: Share your barn door plan in the comments or upload a before-and-after photo to show your transformation — we’d love to see your take on the bathroom barn door concept!