You’re midway through redoing the playroom for a little dancer’s birthday: paint swatches on the wall, a homemade tutu garland draped across the mantel, and a stack of craft supplies on the kitchen island. The last piece of the puzzle? A show-stopping centerpiece that ties the whole ballet-themed room together — enter the ballerina cake concept. Whether you’re a DIY-savvy home improver or a first-time baker, this guide gives practical, design-forward advice to bake, decorate, and display a cake that doubles as party décor.
Why the Ballerina Cake Concept Works in Home Parties
A ballet-inspired cake is more than dessert — it’s a focal point that complements your room styling, color palette, and homemade decorations. A well-designed tutu cake enhances the party vibe and can be an economical alternative to expensive professional cake designs. Plus, learning a few cake-decorating skills adds to your DIY toolkit for future celebrations and home entertaining.
Design Inspiration and Color Palette Tips
- Choose a soft palette: blush pink, ballet slipper pink, ivory, and gold accents for a classic look.
- For a modern twist, try dusty blue or lavender with rose gold details.
- Match textures in the room: satin ribbon on the cake stand to echo curtains or cushions.
Essential Tools and Materials for a DIY Ballerina Cake
Before you start, assemble these essentials so your decorating session flows smoothly:
- Round cake pans (6”, 8”), offset spatula, and turntable
- Stand mixer or hand mixer; piping bags and a few piping tips (petal, star, round)
- Fondant roller, smoothers, and edible glue (for fondant decorations)
- Food coloring gels, edible glitter/pearls, and a small ballerina topper or sugar paste figure
- Dowels or cake supports for multi-tier stability
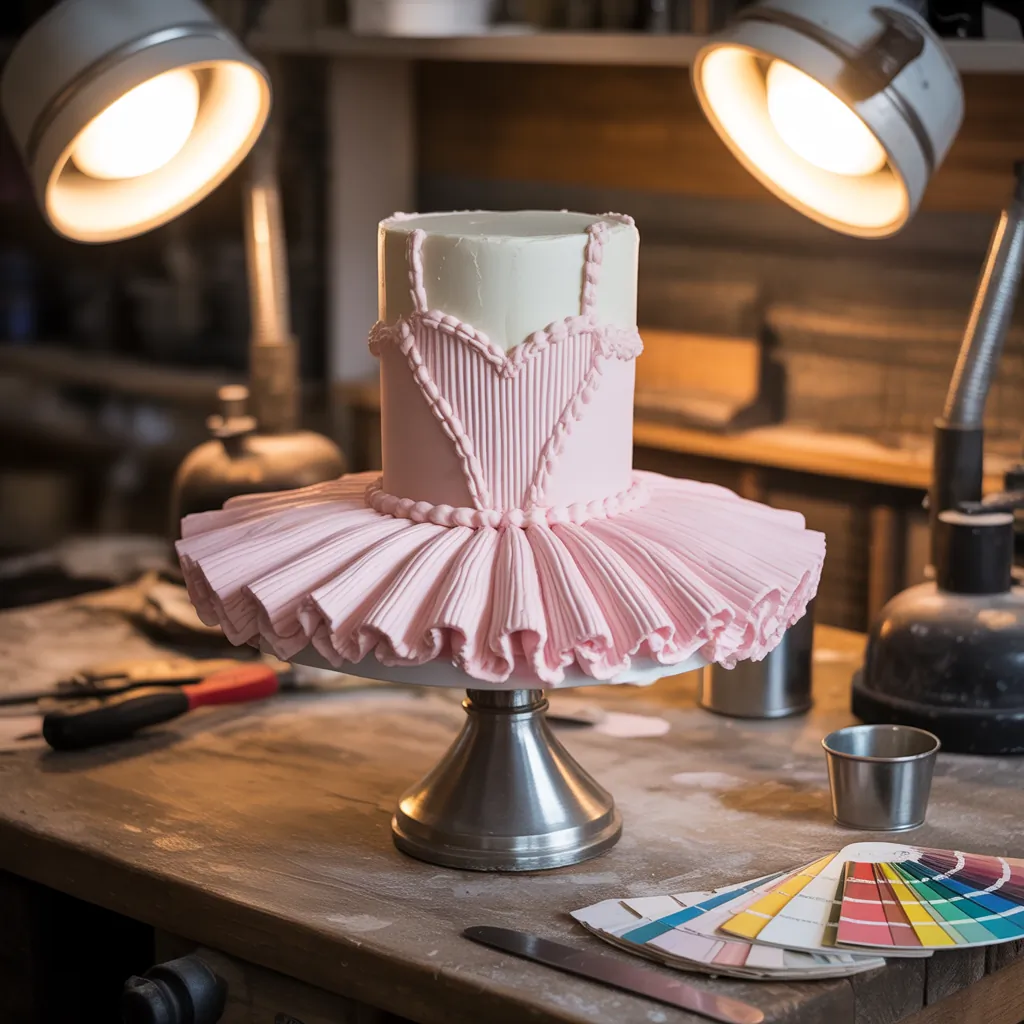
Ballerina Cake Concept: Step-by-Step DIY Tutu Cake
Follow this simple, reliable process to make a ballerina cake that looks professional without a pro price tag.
Step 1 — Bake and Cool
- Choose your favorite cake recipe (vanilla, almond, or strawberry complement ballet themes well).
- Bake in two or three even layers. Cool completely before stacking to avoid sliding or sagging.
Step 2 — Level, Fill, and Crumb Coat
- Level each layer with a serrated knife for even stacking.
- Spread buttercream between layers for a secure fill.
- Apply a thin crumb coat and chill for 20–30 minutes to set.
Step 3 — Create the Tutu Effect
There are two popular approaches:
- Buttercream Ruffles: Use a petal piping tip and short, overlapping petals circling the cake from bottom to top. Vary the shade of pink for depth.
- Fondant Tutu: Roll fondant thinly, cut into strips, pleat or gather, and attach in tiers with edible glue for a realistic fabric look.
Step 4 — Add the Ballerina Topper and Details
Place a small ballerina figurine on the top or design an edible fondant figure. Add finishing touches like sugar pearls, ribbon around the base, and a sprinkle of edible glitter to catch the party lights.
Practical Display and Home Styling Tips
The way you present a ballerina birthday cake can transform your space. Treat the cake table as a mini installation:
- Backdrop: Use a simple fabric or paper fan wall in complementary colors to make the cake pop.
- Lighting: Soft string lights or a spotlight over the cake table highlight details and add warmth.
- Height: Place the cake on a DIY cake stand or stacked risers to lift it above other treats.
- Coordinate props: Ballet slippers, tulle, and framed photos of dance recitals make cohesive decor.
Quick DIY Cake Stand
Create a custom cake riser with a wooden round, spray paint (matching the palette), and a thrifted candlestick glued underneath. Seal with food-safe varnish on the top surface.
Real-World Advice: Budgeting, Timing, and Backup Plans
Being realistic saves stress. Here’s how to plan smart:
- Budget: Homemade ingredients and fondant are cost-effective; however, specialty toppers or sugar flowers add up. Consider a half-DIY approach — buy a simple topper if sculpting seems daunting.
- Timing: Allocate at least one full day for baking and decorating. Make decorations a day ahead where possible.
- Backup: Bake an extra small cake or cupcakes as a safety net in case of baking mishaps.
- Food safety: Keep perishable fillings refrigerated and avoid leaving the cake in direct sun during outdoor parties.
Styling the Kitchen and Party Space for Baking Success
Small kitchen upgrades make baking easier and more enjoyable. Consider adding a countertop organizer for piping tips, a magnetic recipe board for step-by-step instructions, or a small rolling cart to serve as a dedicated decorating station. For larger changes, check our kitchen upgrades page for ideas to create a permanent baking zone.
Frequently Asked Questions
Moderate difficulty. Basic cake baking and buttercream skills are enough for a simple tutu cake. Using fondant or creating a detailed sugar ballerina requires more practice, but you can simplify by using pre-made toppers or cake decorations.
Chill the cake until firm, place it on a non-slip mat inside a cake box, and drive on a flat surface with minimal stops. For multi-tier cakes, transport tiers separately and assemble on-site if possible.
Absolutely. Coordinate the cake with DIY backdrops, handmade bunting, and a dessert table display. Link your cake colors and textures to the room’s decor for a cohesive, professional look. For more project ideas, explore our DIY projects and home design ideas sections.
Conclusion — Make the Ballerina Cake Concept Yours
The ballerina cake concept is a perfect blend of home-centered creativity and practical DIY. With modest tools, a clear plan, and a few styling tricks, you can create a ballet-themed cake that elevates your party décor and showcases your home improvement spirit. Try the tutu piping technique or a fondant skirt, stage the cake on a handcrafted stand, and enjoy the applause when guests see the centerpiece. Ready to try it? Gather your tools, browse our DIY projects for step-by-step tutorials, and check kitchen upgrades for small changes that make big baking differences. Then share your ballerina cake success — your next home celebration starts here.
Call to action: Want detailed templates for tutu piping or a printable shopping list? Sign up for the newsletter or explore our DIY projects and home design ideas pages to get started today.