Ever stood in front of your crisp white cabinets and asked, “What backsplash will bring this kitchen to life?” You’re not alone. Whether you’re renovating on a weekend budget or planning a full kitchen makeover, the right backsplash can transform white cabinetry from bland to breathtaking. This guide gives real-world, DIY-friendly backsplash ideas for white cabinet kitchen layouts—complete with step-by-step tips, design inspiration, and practical advice you can apply today.
Why the right backsplash matters in a white kitchen
White cabinets create a bright, timeless canvas, but they also demand balance. The backsplash is where personality, texture, and function meet: it protects walls from splashes and stains while defining the kitchen’s style. Choose the wrong material or color and the space can feel sterile; choose well and you’ll achieve warmth, contrast, or seamless elegance depending on your goals.
Top backsplash ideas for white cabinet kitchen
1. Classic subway tile – timeless and affordable
White or light gray subway tile is a foolproof way to complement white cabinetry. Laid in a traditional brick pattern or on-point (herringbone), subway tile adds texture without stealing the show. Use contrasting grout (dark gray) for a modern graphic look or matching grout for a seamless, minimal vibe.
2. Marble or quartz slab – luxe, low-maintenance continuity
Full-slab marble or marble-look quartz creates a continuous, high-end backsplash that pairs beautifully with white cabinets. Quartz offers stain resistance and lower maintenance than natural stone—ideal if you want an upscale look without extra upkeep.
3. Patterned and encaustic tiles – bold focal points
Geometric or Moroccan-inspired tiles inject color and personality. Use patterned tiles behind the stove as a focal splash, and keep the rest simple to avoid visual overload. This approach works especially well in farmhouse or eclectic kitchens.
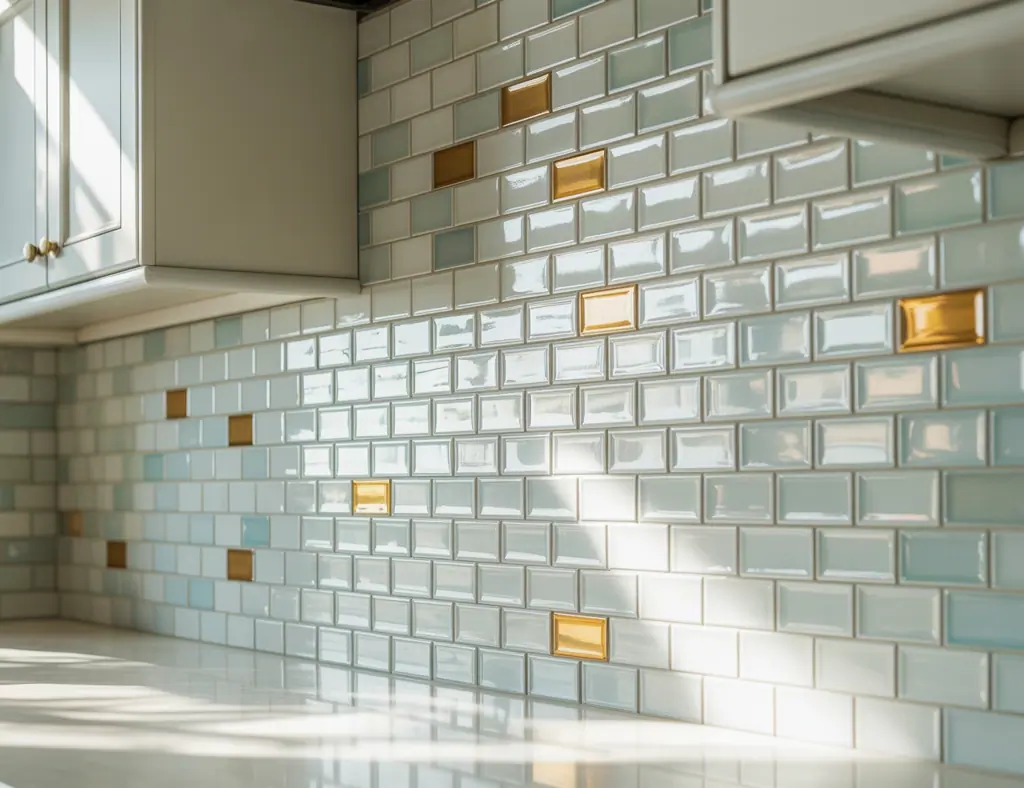
4. Glass and mosaic tile – light-catching and modern
Glass tiles bounce light and introduce subtle color. Mosaic backsplashes can be used in an accent band or across the entire wall for a contemporary, shimmering effect.
5. Metal and stainless steel – industrial and easy to clean
Stainless steel panels or copper tiles create an industrial, professional-kitchen feel. They’re heat-resistant and wipe-clean—perfect behind stoves or near prep sinks.
6. Painted shiplap or beadboard – budget-friendly charm
For a cozy, cottage-style kitchen, painted shiplap or beadboard is an inexpensive alternative to tile. Use a durable semi-gloss paint for easy cleaning.
7. Peel-and-stick tiles – fast DIY refresh
Peel-and-stick tiles have improved drastically; many look like ceramic or natural stone and install in an afternoon. They’re great for renters or budget-minded homeowners who want a quick update without mortar or grout.
DIY step-by-step: Installing a subway tile backsplash
Subway tile is a great starter project for homeowners comfortable with basic tools.
- Materials: 3×6 subway tiles, thin-set mortar, tile spacers, grout, grout float, wet saw (or tile cutter), notched trowel, sponge, caulk.
- Prep: Remove outlet covers, clean and smooth the wall, and mark a level baseline using a laser or chalk line.
- Apply thin-set: Spread mortar with a notched trowel on a small section (work in rows).
- Set tiles: Press tiles into mortar with spacers for even joints. Cut tiles to fit edges with a wet saw or cutter.
- Grout: After mortar cures per manufacturer’s instructions, remove spacers and apply grout with a float. Wipe excess with a damp sponge.
- Finish: Once grout cures, apply silicone caulk at the countertop and under cabinets for a water-tight seal. Reinstall outlet covers.
Time estimate: 1–3 days depending on backsplash area and drying times. Difficulty: Moderate.
DIY step-by-step: Installing peel-and-stick backsplash
Quick, mess-free, and ideal for a weekend project.
- Materials: Peel-and-stick tiles, utility knife or straight edge, measuring tape, level, cleaning supplies.
- Prep: Clean grease and dirt from wall. A dry, smooth surface ensures adhesion.
- Measure & plan: Mark midpoints and lay out tiles without removing backing to visualize pattern.
- Install: Peel backing and press each tile firmly, starting from the center or a lower corner. Use a roller or hard cloth to smooth seams.
- Finish: Trim edges with a sharp utility knife. Seal edges near the sink/stove with caulk if desired.
Time estimate: 4–8 hours. Difficulty: Easy.
Practical tips & real-world advice
- Contrast vs. blend: If you want drama, choose a bold color or dark grout. For a clean, modern feel, select a subtle tone or continuous slab that blends with white cabinetry.
- Consider maintenance: Natural stone needs sealing; grout color affects visible staining. Pick materials suited to your cooking habits.
- Coordinate with countertops and hardware: Tie in metal finishes (brass, chrome) or pick a backsplash material that complements your counters for a cohesive look.
- Lighting matters: Under-cabinet lighting enhances textured or glass backsplashes—test sample tiles under your kitchen lighting before committing.
- Start small: If you’re unsure, install a sample backsplash behind the stove or sink as a test before covering the entire wall.
Budget-friendly ideas
If cost is a concern, consider painted tile, beadboard, or high-quality peel-and-stick options. Reusing materials (e.g., salvaged tiles or a stainless steel panel) can also reduce expenses while adding unique character.
Frequently Asked Questions
Q: What backsplash color looks best with white cabinets?
A: It depends on your goal. For contrast and definition, choose darker grout or a colored tile. For a minimalist or airy look, stick with white or soft neutrals. Think about counter color, flooring, and lighting to make the final choice.
Q: Can I install a backsplash myself behind white cabinets?
A: Yes. Peel-and-stick tiles and subway tile installations are common DIY projects. Simple tasks like measuring, leveling, cutting, and grouting are manageable for most homeowners with basic tools. For full-slab stone or complex mosaic work, consider hiring a pro.
Q: How do I protect the backsplash near the stove and sink?
A: Use heat-resistant materials (tile, stainless steel, stone) behind stoves and apply silicone caulk at seams near counters and sinks for water resistance. For porous stones, sealants will prevent staining from splashes and oils.
Conclusion — Make your white cabinet kitchen shine
Choosing the right backsplash ideas for white cabinet kitchen spaces can elevate both form and function. Whether you pick classic subway tile, a full quartz slab, patterned encaustic, or a quick peel-and-stick solution, there’s an option to match your style and DIY skill level. Start with a small sample area, measure carefully, and don’t forget lighting and grout color—those details make a big difference.
Ready to start your backsplash project? Browse our DIY projects for step-by-step tutorials, explore kitchen upgrades ideas for complementary improvements, or get inspired with more home design ideas. Share your before-and-after photos and tackle that weekend makeover—you’ve got this!
For more copper backsplash ideas, check out our Copper Backsplash Kitchen article.
For more copper backsplash ideas, check out our Copper Backsplash Kitchen article.
For more copper backsplash kitchen ideas, check out this guide.
For more copper backsplash ideas, check out our guide on Copper Backsplash Kitchen.
For more copper backsplash ideas, check out our Copper Backsplash Kitchen article.