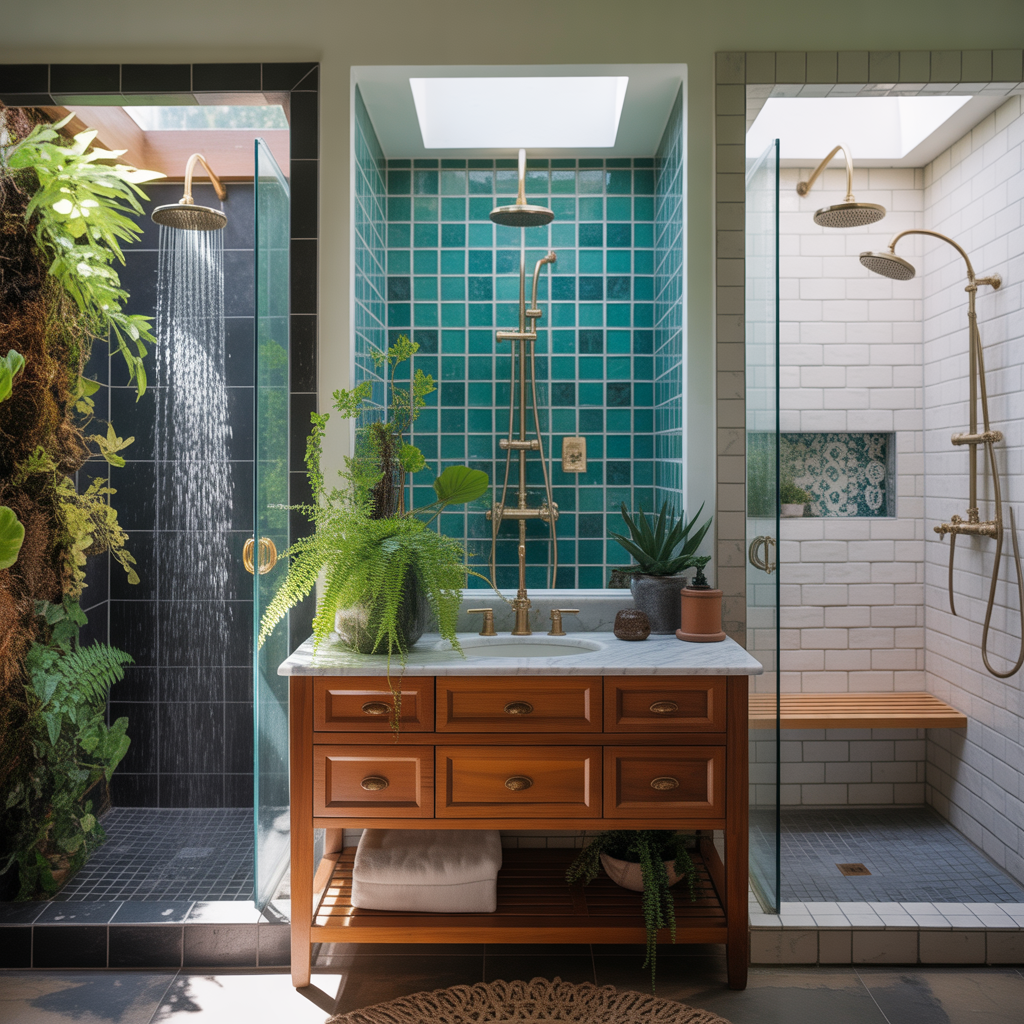
Ever stood in a tiny bathroom, towel in hand, wondering how to make that cramped 3×5 shower feel like a spa instead of a storage closet? You’re not alone. Small bathroom shower remodels are one of the most common DIY challenges—especially when you want to maximize comfort, storage, and style without knocking down walls. In this guide, you’ll find practical 3×5 showers ideas, step-by-step DIY tips, and real-world design inspiration to transform a compact shower into a beautiful, functional centerpiece.
Why Choose a 3×5 Shower?
For many homes, a 3×5 shower (three feet by five feet) is the perfect balance between space economy and usability. It’s large enough to include a built-in bench, a niche for toiletries, or a glass enclosure, yet compact enough to keep costs and renovation time down. Whether you’re tackling a small bathroom renovation, updating a rental property, or creating a master bath in a tiny home, a thoughtful 3×5 shower layout can greatly improve daily comfort and home value.
Design Principles for Compact Showers
Maximize Perceived Space
- Use large-format, light-colored tiles to reduce visual clutter and make the shower feel larger.
- Install frameless glass doors or a clear glass panel instead of an opaque curtain or frosted glass to keep sightlines open.
- Choose recessed niches and slimline shelves to free up elbow room.
Prioritize Functionality
- Consider a handheld showerhead with an adjustable slide bar—perfect for rinsing, cleaning, and accessibility.
- Opt for a linear drain along one wall to allow a single slope and less tile waste.
- Plan storage at shoulder height; avoid low, protruding shelving that cuts into standing space.
Smart Door and Layout Choices
- Sliding or bypass doors work well where swing clearance is limited.
- Neo-angle corner showers create a more open feel in tiny bathrooms.
- Curbless (zero-threshold) entries add accessibility and a high-end look but require careful floor slope planning.
3×5 Showers Ideas
Below are practical and creative solutions tailored for a 3×5 shower footprint. Each idea includes quick DIY tips and what to consider before starting.
-
Glass-Enclosed Alcove with Bench
Install a laminated bench along the 5-foot wall and a frameless glass door to open the space. DIY tip: use a preformed shower pan for quick, waterproof base installation and add a tile-faced bench for a custom look.
-
Neo-Angle Corner Shower
Use the corner of the bathroom to free up floor space. A neo-angle unit gives room for movement. DIY tip: choose a prefabricated neo-angle base to reduce plumbing slope work.
-
Curbless Walk-In Conversion
Create a seamless flow with a zero-threshold entry and a single glass panel. DIY tip: plan floor slope carefully (2% recommended) and consider a linear drain to simplify tiling.
-
Walk-In with Dual Niche and Built-In Seat
Add two recessed niches (one low for shampoo, one high for conditioner) and a fold-down seat. DIY tip: build niche boxes with waterproof backer board and fully seal with a liquid membrane.
-
Tile Accent Wall and Mosaic Floor
Use a bold tile in one area to add visual interest without overwhelming the small space. DIY tip: balance with neutral walls and use 2×2 or mosaic tiles on the floor for slip resistance and better slope control.
Step-by-Step DIY Plan to Remodel a 3×5 Shower
Follow these steps for a smooth renovation—whether you’re doing a full demo or a cosmetic update.
- Measure and Plan: Measure the exact dimensions, door swing, and plumbing locations. Sketch a layout and choose a drain type (center vs. linear).
- Permits & Prep: Check local codes—electrical and plumbing changes often need permits. Turn off water and power before demo.
- Demolition: Remove old fixtures, tiles, and the pan carefully. Protect other bathroom areas with plastic sheeting.
- Rough-In Plumbing: Relocate or adjust drain and valve positions. Install proper waterproofing flange for the pan or full floor membrane for curbless designs.
- Waterproofing: Apply a bonded waterproofing membrane (liquid or sheet) to walls and floor. This is non-negotiable for long-term performance.
- Tiling: Start tile at the floor and work up. Use smaller tiles on the floor to achieve the required slope. Grout with a mildew-resistant formula.
- Install Fixtures & Glass: Mount valve trim, handheld/showerhead, and glass door. Shim and seal glass with silicone to prevent leaks.
- Finish & Clean: Caulk perimeter joints, install accessories (grab bars, niches), and cure for the recommended time before use.
Budgeting and Materials — What to Buy
- Preformed shower pan: $150–$600 (saves on labor)
- Tile (ceramic/porcelain): $2–$6 per sq ft; natural stone is pricier
- Waterproof membrane: $30–$120
- Frameless glass panel/door: $300–$1200
- Fixtures (valve + showerhead): $150–$800
DIY cost-saving tips: reuse existing plumbing locations to avoid rough-in costs, opt for prefabricated pans where appropriate, and buy tiles during sales or clearance. If you’re unsure about plumbing or electrical work, hire a pro for those steps to avoid costly mistakes.
Frequently Asked Questions
Yes. A 5-foot run allows for a 12–18″ deep bench along the long wall without compromising standing space. Consider a fold-down seat if you need more floor clearance.
It’s possible but trickier. Curbless showers require precise floor slopes and often adjustments to the subfloor. In older homes, using a linear drain and working with a carpenter/plumber experienced in curbless installations is recommended.
Smaller tiles (2×2 or mosaics) are easier for creating the slope required for drainage and provide better traction. For walls, larger format tiles can make the space feel bigger.
Conclusion
With the right plan, a 3×5 shower can be both stylish and supremely functional. From frameless glass enclosures to curbless walk-ins and clever storage niches, these 3×5 showers ideas will help you maximize every inch of your bathroom. Ready to start your small bathroom remodel? Check out our DIY projects and home design ideas for more step-by-step guides and inspiration, or explore kitchen upgrades if you’re planning a broader renovation. Grab your tape measure, sketch a plan, and take the first step toward a shower you’ll love.
Call to action: Download a simple 3×5 shower checklist, pull together materials, and begin with a weekend demo—or bookmark this page and visit our DIY projects and home design ideas sections for more tips before you start.


