Have you ever stared at a blank backyard fence or blank wall and wondered how to turn it into a stunning focal point for a big day? Whether you’re planning an intimate backyard ceremony or a styled elopement, building a beautiful ceremony focal point doesn’t have to mean hiring expensive rentals. As a home improvement and DIY blogger, I’ve transformed countless bland spaces into show-stopping setups with simple materials, a little elbow grease, and a budget-friendly plan. If you’re searching for ideas for wedding arch that feel personal, affordable, and easy to build, you’re in the right place.
Why choose a DIY wedding arch?
Making your own wedding arch gives you control over style, size, and budget. Plus, building it yourself adds sentimental value—guests love a handmade touch. DIY wedding arches also let you customize for venue constraints (indoor ceremony, beach, or sloped backyard) and reuse materials for home decor after the wedding.
Wedding arch ideas to match any style
Below are ideas to spark your creativity—each includes practical tips and variations so you can adapt the design to your skill level and venue.
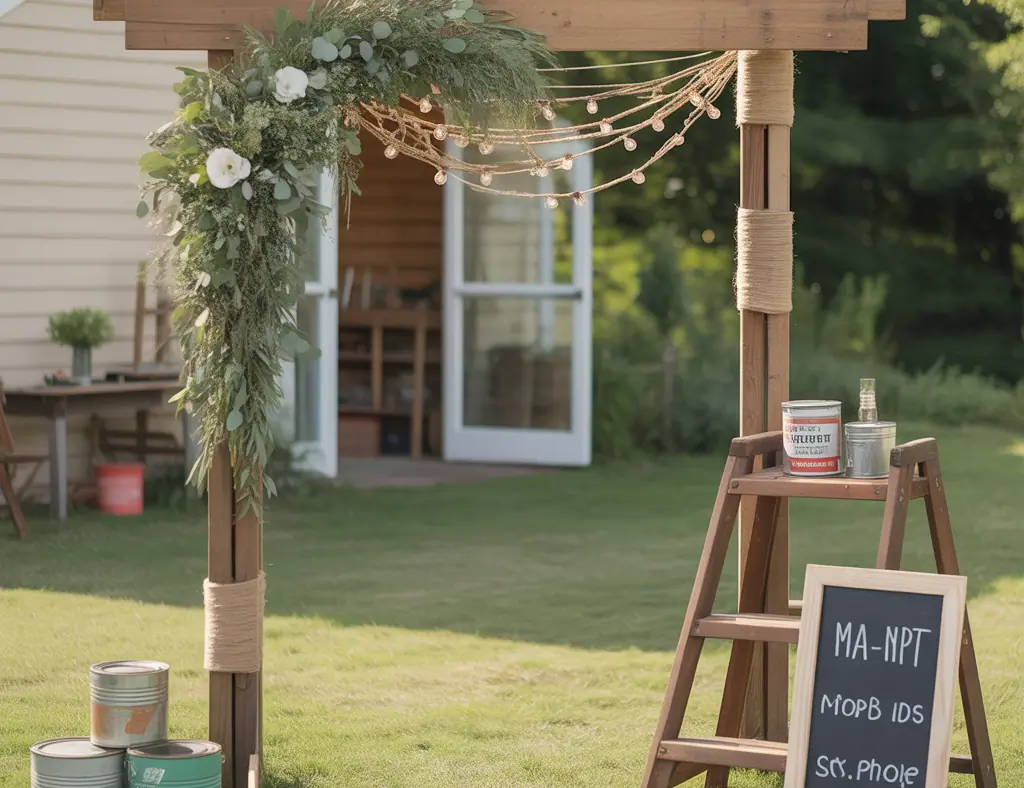
1. Rustic wooden wedding arch
Materials: 2×3 or 4×4 lumber, screws, wood glue, sandpaper, stain/paint. This is perfect for backyard or barn weddings.
- Tip: Use pocket-hole screws for strong joints and hidden fasteners.
- Decor ideas: Drape light gauzy fabric and add eucalyptus garlands with cascading blooms.
- Budget hack: Source reclaimed pallet wood for character and a lower cost.
2. Copper pipe hoop arch (modern & boho)
Materials: 1/2″ or 3/4″ copper pipe, elbow fittings, pipe cutter, base plate or cement-filled planter for stability.
- Why it works: Copper is lightweight and gives a sleek, minimalist look—great for a circular arch backdrop or half-moon design.
- Tip: Use floral wire and hot glue to secure flowers; wrap base in moss for a natural finish.
3. Floral hoop or wreath arch (small-space ceremony)
Materials: Metal or wooden hoop, floral foam tape, greenery, fresh or silk flowers.
- Good for intimate ceremonies, elopements, or as a photographic backdrop.
- Design tip: Create an asymmetrical flower cluster for a modern look.
4. Greenery garland drape over an existing frame or doorway
Turn a pergola, arbor, or doorframe into a wedding arch with long garlands of greenery. Perfect when you want a temporary but lush aesthetic.
Materials, tools, and where to source them
Common materials: lumber, copper/steel piping, metal hoops, heavy-duty PVC, fabric (sheer chiffon, muslin), zip ties, floral wire, screws and anchors.
Essential tools: drill, miter saw or handsaw, pipe cutter, level, measuring tape, hot glue gun.
Save money by renting power tools, buying secondhand hardware, and using faux flowers for long setups or indoor ceremonies where freshness isn’t necessary.
Step-by-step: Build a simple wooden wedding arch
This classic build is strong, versatile, and beginner-friendly.
- Measure the ceremony space and choose final arch dimensions (typical: 8′ tall x 7′ wide for outdoor use).
- Cut two vertical posts and two crossbeams from 4x4s or 2x4s (for lighter builds).
- Assemble a rectangular frame using screws and corner brackets; reinforce with wood glue.
- For stability, add angled braces to the back or set posts into heavy concrete bases or in-ground sleeves.
- Sand and finish with stain or paint; allow to cure fully before decorating.
- Attach fabric, greenery, and florals with zip ties or floral wire. Anchor decor points to screws or eye hooks for secure hanging.
Real-world tip: If you need to move the arch, build in detachable joints using carriage bolts so it disassembles easily for transport.
Design inspiration by theme
Rustic & barn wedding arch ideas
Use raw wood, mason jars with candles, burlap, and wildflower bouquets. Let imperfections show for charm.
Modern minimalist arch ideas
Think geometric frames, monochrome florals, and metal hoops. Keep lines clean and decorations restrained.
Beach & tropical wedding arch ideas
Use driftwood, lightweight fabrics, pampas grass, and shells. Prioritize stability (sand anchors or concrete blocks) to withstand wind.
Practical tips for setup, safety, and transport
- Always anchor freestanding arches—stakes, sandbags, or concrete bases are non-negotiable outdoors.
- Check venue restrictions: indoor venues might require rubber feet or weight-based anchoring instead of spikes.
- Test your arch’s stability with a friend leaning on it before the event.
- For windy locations, replace large fabric panels with narrow draping or heavier textiles that won’t billow.
- Document assembly with photos and labels for hardware—helps when you need to rebuild the arch for photos or transport it home.
Budgeting and rental vs. buy decisions
If you plan to reuse the arch as garden decor or a photo backdrop after the wedding, investing in quality materials makes sense. If the arch is single-use, consider renting a metal frame and adding your own floral touches. Compare rental fees to DIY material costs—sometimes building is more economical and rewarding.
Ideas for wedding arch FAQs
1. How do I choose the right size for my wedding arch?
Consider the ceremony location, number of people in the wedding party, and photography angles. A standard outdoor arch is roughly 7–8 feet tall and 6–8 feet wide; reduce scale for indoor spaces or micro weddings.
2. Can I use fresh flowers on a DIY arch?
Yes—secure fresh flowers in foam or water tubes, and assemble them as late as possible to preserve freshness. For hot climates, choose hardy blooms like ranunculus, protea, or succulents, and store arrangements in cool temps until setup.
3. How long does it take to build a wedding arch?
Depends on complexity: a simple arch can be constructed in a few hours; a heavily decorated or custom-shaped arch may take a day or two including staining/paint drying and floral work. Plan extra time for trial setup and adjustments.
Conclusion: Bring your wedding vision to life with creative ideas for wedding arch
From a copper hoop draped in soft florals to a heavy-duty wooden arbor dressed in greenery, these ideas for wedding arch give you a starting point for styling a ceremony space that reflects your taste and budget. Start with one design that fits your venue, gather materials, and do a trial setup to refine proportions and stability. If you enjoy hands-on projects, this is the perfect opportunity to add a personal, DIY touch to your big day.
Ready to build? Check out more hands-on guides in our DIY projects section, or browse styling tips in home design ideas. If you’re refreshing your reception or getting crafty in the kitchen afterwards, see our kitchen upgrades for post-wedding home projects. Share your arch photos or questions—I’d love to help you plan a setup that’s beautiful and buildable.