Ever stood in a modest 10×10 bathroom and wondered how to make it feel like a spa without blowing your budget? Whether you inherited a cramped layout from a previous owner or you’re planning a DIY remodel, turning a 100-square-foot bathroom into a functional, stylish space is one of the most satisfying home improvement projects you can tackle.
Why a 10×10 bathroom is the sweet spot for DIYers
A 10×10 bathroom offers a rare balance: enough room for a full tub or spacious walk-in shower, room for double vanities if planned well, plus storage—yet it’s small enough that a determined homeowner can manage much of the work themselves. With smart planning and a few space-saving tricks, you can create a compact bathroom design that feels open, modern, and practical.
10×10 bathroom layout inspiration: four layout ideas that work
Below are tested layout concepts for a 10×10 bathroom. Each option includes practical measurements and design notes so you can visualize and DIY the changes.
1. Classic tub along the long wall (60″ tub)
- Placement: Tub runs along one 10-foot wall; toilet and vanity opposite or adjacent.
- Best for: Households that want a traditional bath option.
- Dimensions to allow: 60″ tub, 24–30″ vanity, 30″ clearance in front of fixtures.
- Design tip: Use a full-height tile surround and a glass shower screen to keep the room airy.
2. Walk-in shower + single or double vanity
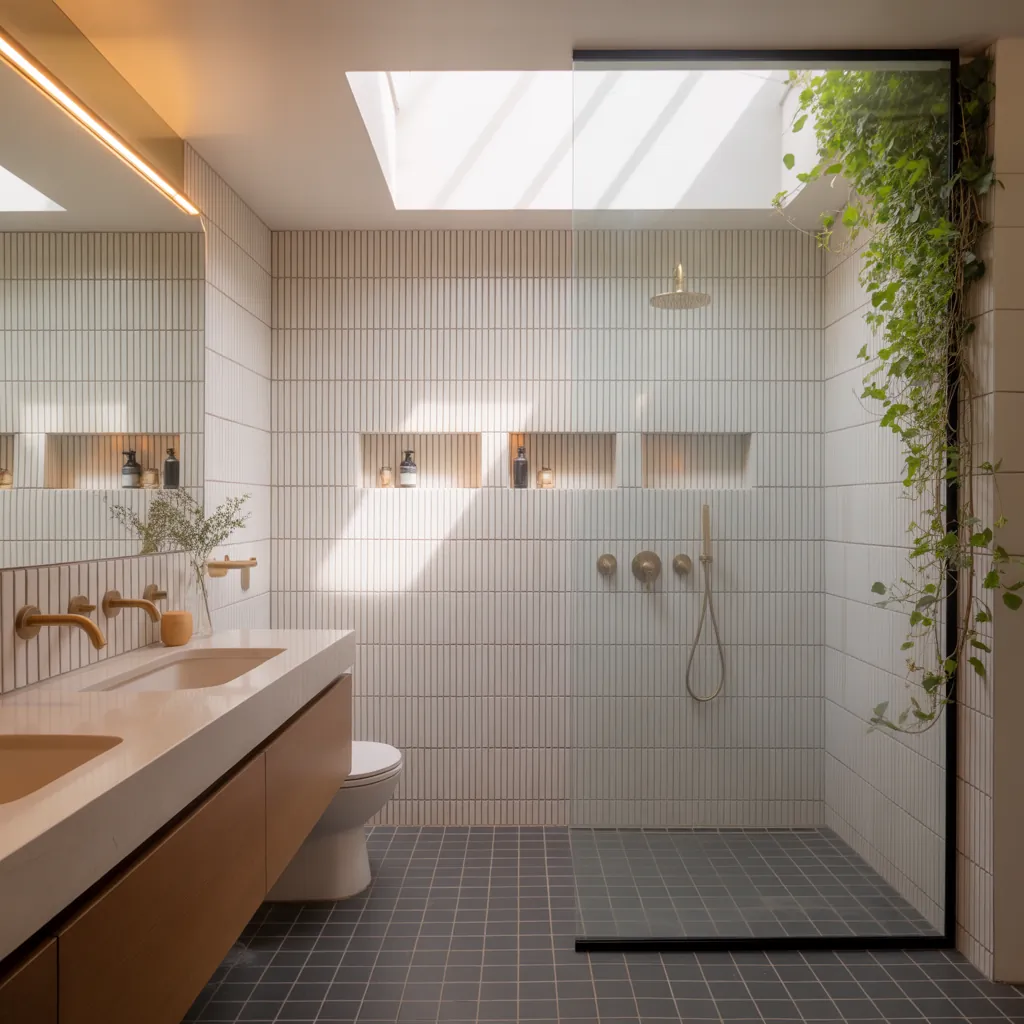
- Placement: Walk-in shower in a corner (36″x48″ or larger) with a floating vanity opposite.
- Best for: Modern look and easy maintenance.
- Design tip: Clear glass and large-format tiles visually expand the room.
3. Split layout for privacy
- Placement: Pocket door or partial wall separates toilet area from shower/vanity zone.
- Best for: Shared bathrooms where two people might need privacy.
- DIY note: Installing a pocket door saves swing space—plan rough carpentry and framing ahead.
4. Corner tub or shower + compact double vanity
- Placement: Corner fixtures free wall space for storage or a larger vanity.
- Best for: Maximizing storage and creating a focal point with tile or lighting.
- Design tip: Recessed medicine cabinets and built-in niches add storage without bulk.
Practical DIY tips and step-by-step improvement ideas
Ready to take action? Use this step-by-step approach to manage a DIY 10×10 bathroom remodel efficiently.
Step 1: Measure and sketch
- Measure walls, door swing, window location, plumbing stacks, and electrical points.
- Sketch at scale on graph paper or use a free layout app to experiment with fixture placement.
Step 2: Plan plumbing and electrical changes
Keep major plumbing moves to a minimum to save money. If you must relocate fixtures, set a realistic budget and consider hiring a pro for rough plumbing and electrical work to meet code.
Step 3: Demo, prep, and choose materials
- Tools to have: pry bar, reciprocating saw, stud finder, level, wet saw for tile, safety gear.
- Use moisture-resistant drywall (greenboard) or cement backer board behind tile. Pick large-format porcelain tile or vertical subway tile to visually increase height.
Step 4: Install fixtures and finishes
Install shower/bath waterproofing first, then tile, then vanity, then lighting and trim. Use silicone caulk around wet areas and install a high-quality vent fan for moisture control.
Design choices that make a small bathroom feel larger
Smart finishes and layout tweaks can transform a modest 10×10 bathroom into a bright, open-feeling space.
- Color palette: Light, neutral tones with one accent wall for personality.
- Tile strategy: Large-format floor tiles, diagonal layouts, or vertical subway tile elongate the room.
- Fixtures: Wall-hung vanities and toilets free up visual floor space.
- Glass: Frameless shower doors reduce visual barriers.
- Mirrors and lighting: Oversized mirrors and layered lighting (recessed + sconces) brighten the space.
Storage solutions and space-saving fixtures
Storage is always at a premium in a 10×10 bathroom. Try these solutions:
- Recessed medicine cabinets and shower niches.
- Vanity with drawers and vertical organizers instead of open shelves.
- Over-the-toilet cabinetry or narrow tall cabinets for linens.
- Multi-functional fixtures like mirrored storage panels and towel warmers that double as radiators.
Budgeting and timeline — realistic expectations
Typical project tiers:
- Budget DIY refresh ($1,000–$4,000): Paint, new vanity, lighting, hardware, and minor plumbing adjustments.
- Mid-range remodel ($5,000–$12,000): New tub/shower, tile, vanity, flooring, and updated fixtures—some hire-outs likely.
- High-end renovation ($12,000+): Structural changes, premium materials, heated floors, and luxury fixtures.
Timeline: A simple refresh can be done over a weekend or a couple of weeks; a full gut remodel typically runs 4–8 weeks depending on scope and contractor availability.
Common mistakes to avoid
- Underestimating ventilation: Install a vent fan sized for the room’s cubic feet per minute (CFM).
- Ignoring door swing: Swap to a pocket door or change swing direction to save space.
- Overlooking clearance: Leave acceptable space in front of vanity and toilet for comfortable use.
Frequently Asked Questions
A: Yes—if you plan carefully. Consider a corner tub or a shorter 54–60″ tub plus a compact walk-in shower, or use a tub/shower combo with a frameless screen to serve both needs while saving space.
A: A single 24–36″ vanity fits comfortably while preserving clearance; if you want double sinks, a 48–60″ vanity can work if you keep other fixtures compact and the door swing managed (pocket door recommended).
A: Paint walls a light color, install a large mirror, use large-format floor tiles, replace heavy shower curtains with a clear glass panel, and declutter surfaces with smart storage—these low-cost changes have a high visual impact.
Conclusion — start your 10×10 bathroom transformation today
With smart planning, a few DIY skills, and the right layout inspiration, a 10×10 bathroom can become a comfortable, stylish retreat. Whether you choose a spa-like walk-in shower, a classic tub layout, or a space-saving double vanity, use the tips and step-by-step ideas above to make confident design choices. Ready to begin? Sketch your layout, set a realistic budget, and tackle one project at a time—then share your progress and inspire others.
Looking for more hands-on ideas? Check out our DIY projects and home design ideas pages for tutorials and room-by-room inspiration. If you want to explore adjacent remodeling projects, see our guide on kitchen upgrades for synergistic design tips.
Call to action: Start with one small change this weekend—replace old lighting, install a new mirror, or redesign storage—and watch your 10×10 bathroom feel brand new. Share your before-and-after or ask for layout feedback to get personalized suggestions.


