Ever stood on a stool with a measuring tape in one hand and a curtain sample in the other, wondering how to turn that plain window into the kitchen’s focal point? You’re not alone. Whether you’re dealing with a tiny breakfast nook window, a large picture window above the sink, or a rental where drilling is off-limits, these kitchen window decoration ideas will help you add style, light control, and personality without stress.
Why your kitchen window deserves attention
Windows influence natural light, ventilation, and the overall mood of your kitchen. Thoughtful window treatments and decorations can boost curb appeal, improve privacy, and even create extra storage or growing space. Below are practical, stylish, and budget-friendly suggestions with step-by-step DIY tips you can start this weekend.
Quick planning tips before you start
- Measure precisely: width, height, and distance to trim. Add 2–6 inches beyond the frame for curtain fullness.
- Think about function: Do you need full privacy, light filtering, or just a decorative splash?
- Choose materials for kitchens: moisture-resistant fabrics, mildew-resistant blinds, and washable treatments.
- Match the style: farmhouse = soft linen or café curtains; modern = sleek roller shades or frosted film; boho = macramé or layered textiles.
Kitchen window decoration ideas (creative ideas and practical how-tos)
1. Café curtains for charming morning light
Why it works: Café curtains cover the lower half of a window for daytime privacy while letting light in from the top. They’re ideal above a sink.
- Measure the lower half of the window for length and full width for gathering.
- Buy a tension rod or slim cafe rod—tension rods are great for renters.
- Sew a simple hem and a rod pocket (many fabrics are ready-made). Hang and adjust gather for fullness.
Tip: Use a crisp cotton or linen blend that’s machine washable and dries quickly.
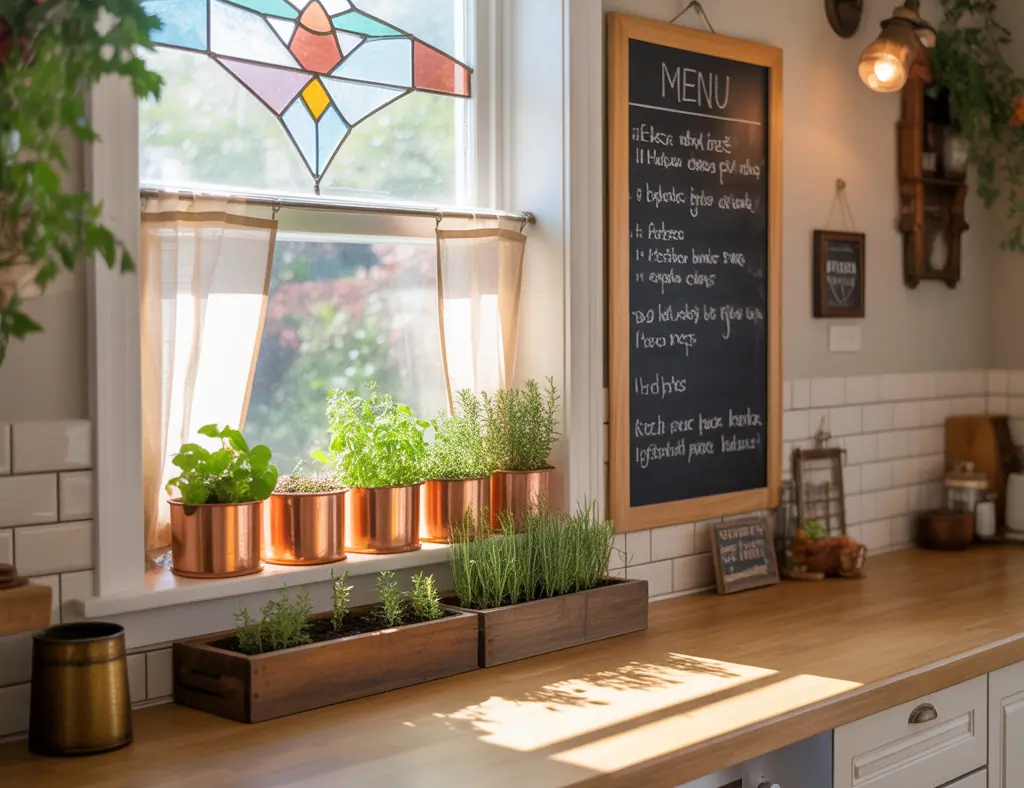
2. Create a windowsill herb garden
A living display doubles as decoration and fresh flavor source. Use shallow pots or a wooden trough and group herbs by water needs.
- Materials: small pots, tray, potting mix, herbs (basil, parsley, chives).
- DIY: Upcycle spice jars for a neat row; add labels with chalkboard tape.
3. Install a simple Roman shade or DIY no-sew roller shade
Roman shades give a tailored, clean look. For a budget DIY, use iron-on hem tape and clip rings with a tension rod for a no-sew option.
4. Use peel-and-stick frosted film for privacy without losing light
Peel-and-stick window film is perfect for renters and adds instant privacy while letting in soft light. Choose patterned films for stained-glass effects or frosted for a minimalist look.
5. Floating shelf or display ledge
Install a slim floating shelf beneath or across the bottom of the window to hold potted plants, vases, cookbooks, or a basket of utensils. Use wall anchors suitable for the weight—pre-drill and level for a pro finish.
6. Hang planters or a macramé display for a boho vibe
Hanging plants soften hard kitchen lines and add texture. Use hooks into studs or a rail system if drilling is limited. Pick low-maintenance plants like pothos or spider plants.
7. Layered treatments for versatility
Combine roller shades for daytime light control with lightweight curtains for evening privacy and style. Layering gives you flexibility and depth.
8. Add a valance or cafe valance for instant polish
Valances are a fast way to add color and hide curtain hardware. Make a boxed valance with a thin wooden board and fabric stretched over it for a custom look.
9. Use decorative hardware to make a statement
Swapping standard rods and finials instantly elevates the space. Brass, matte black, or tapered wood rods can accent your kitchen’s hardware finishes.
10. Lighting accents—string lights or mini pendants
Subtle LED string lights or a mini pendant can highlight the window at night and add cozy ambiance. Keep cords tidy and away from water sources.
Step-by-step DIY project: Build a simple herb ledge (30–60 minutes)
- Materials: 1×6 pine board cut to window width, sandpaper, stain or paint, brackets (2), screws, 3 small pots.
- Sand and stain/paint the board; allow to dry.
- Mark bracket placement on the wall; use a level and locate studs or use anchors.
- Screw brackets and set the ledge on top; secure if desired. Add pots and herbs.
Real-world tip: If your window gets intense afternoon sun, use UV-resistant pots and rotate herbs weekly so all sides get light.
Design inspiration by style
Farmhouse
Light linen café curtains, painted wood valance, and mason-jar herb planters.
Modern
Matte roller shades, frosted film, and a slim metal ledge for minimalist planters.
Boho
Macramé hangers, layered patterned curtains, and a cluster of hanging terrariums.
Budget and material notes
- Low-cost: tension rods, café curtains, peel-and-stick film — under $50.
- Mid-range: DIY Roman shades, floating ledge, decorative hardware — $50–$200.
- Higher-end: custom blinds or professional installation — $200+.
Frequently Asked Questions
Can I decorate a kitchen window if I rent and can’t drill?
Yes. Use tension rods for curtains, peel-and-stick window film for privacy, adhesive hooks for hanging plants, and no-drill floating shelves that use strong adhesive strips rated for the weight.
What fabric is best for kitchen curtains?
Choose fabrics that are easy to wash and resist moisture and stains: cotton blends, linen blends, and polyester fabrics work well. Avoid delicate silks and heavy velvets that trap grease and humidity.
How do I balance privacy with natural light?
Opt for layered treatments: a translucent roller shade or frosted film during the day, plus a lightweight curtain or valance for evenings. Café curtains also offer privacy at eye level while letting light in from above.
Conclusion — bring personality to your sink-side view
Whether you’re after a quick weekend refresh or a full DIY upgrade, these kitchen window decoration ideas give you practical steps and inspiration to transform that blank frame into a functional focal point. Start small with a peel-and-stick film or café curtain, or try the herb ledge project for a weekend win. Ready to tackle the next project? Check out our DIY projects and kitchen upgrades pages for more step-by-step guides and inspiration.
Tell us which idea you’ll try first—or share a photo of your finished window to inspire others!