Have you ever stood in your kitchen juggling a casserole dish in one hand and the microwave door with the other, thinking there has to be a smarter way? If your countertop is cluttered or your microwave feels tacked-on, built-in solutions can transform both function and style. In this article you’ll find practical ideas for built in microwave cabinet that you can adapt to any kitchen size—from quick DIY updates to full custom cabinetry projects.
Why build a dedicated microwave cabinet?
Built-in microwave cabinetry raises your microwave to a more ergonomic height, frees up counter space, and creates a clean, integrated look. Whether you’re renovating or tackling a weekend project, built-in designs also increase resale appeal and can be tailored to match your existing kitchen finishes. Below are tested ideas and step-by-step tips to help you pick the best approach for your space.
Top ideas for built in microwave cabinet
Here are practical and stylish options—each with pros, cons, andDIY-friendly approaches.
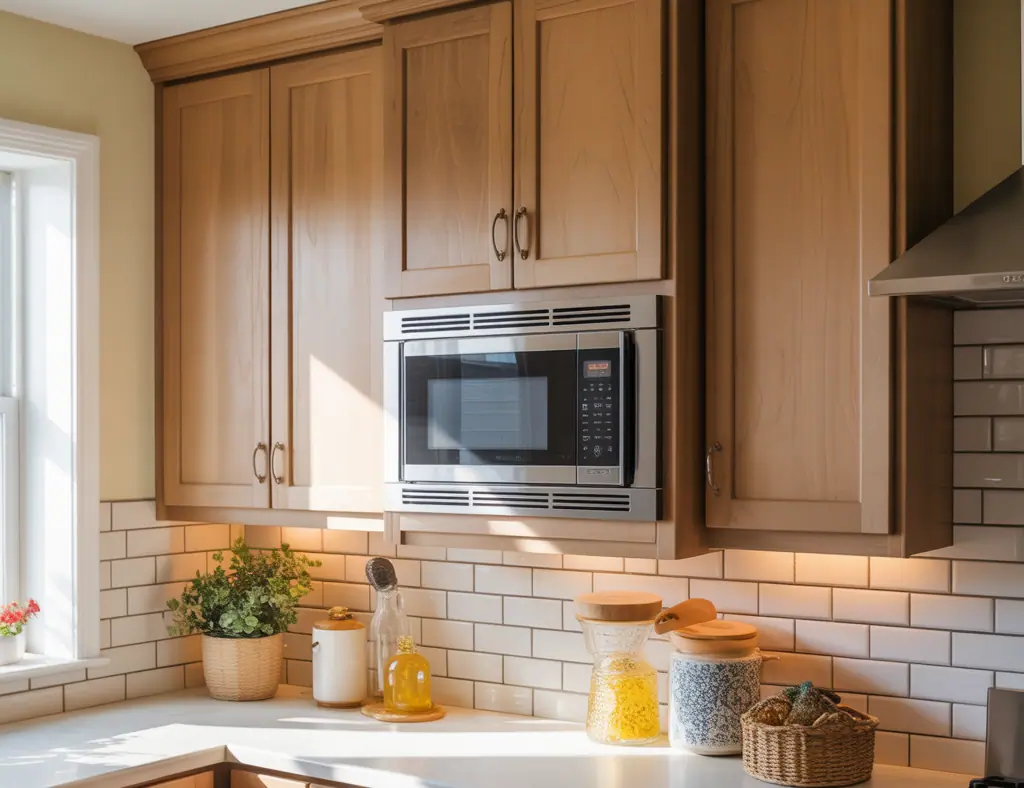
1. Recessed cabinet with a trim kit
- What it is: A built-in cavity that accepts a freestanding microwave, finished with a manufacturer trim kit for a clean, flush look.
- Why choose it: Quick to implement and cost-effective. Trim kits hide gaps and provide a professional finish.
- Tip: Measure both microwave depth and plug location—plan for recessed outlets so cords stay hidden.
2. Microwave drawer in lower cabinetry
- What it is: A drawer-style microwave that slides out from under the countertop or island.
- Why choose it: Perfect for lower cabinets—great for accessibility and for people who prefer not to lift hot dishes.
- Tip: Requires cabinet reinforcement and a dedicated outlet in the cavity.
3. Eye-level built-in in a tall pantry column
- What it is: A microwave housed in a tall cabinet, often stacked with an oven or storage above/below.
- Why choose it: Professional look and convenient ergonomics—ideal for busy cooks.
- Tip: Leave ventilation space according to the microwave manual and consider soft-close doors to protect the appliance.
4. Stack with wall oven for appliance tower
- What it is: Microwave installed above or below a wall oven using a built-in cavity.
- Why choose it: Creates a cohesive appliance wall and saves counter space while keeping hot appliances centralized.
- Tip: Confirm electrical load and circuit requirements when combining high-draw appliances.
5. Under-counter built-in for islands
- What it is: Built into the island cabinetry, this option keeps the microwave accessible and out of sight.
- Why choose it: Excellent for open-plan kitchens—keeps counters clean and contributes to island functionality.
6. Glass-front display cabinet with integrated microwave
- What it is: A stylish solution that combines display shelving with an appliance cavity, ideal for blending form and function.
- Why choose it: Adds visual interest and allows decorative items to frame the appliance.
Step-by-step DIY built-in microwave cabinet: a practical guide
- Plan and measure: Choose your microwave model first. Measure width, height, depth, and ventilation requirements. Account for trim kit specifications.
- Design the cabinet opening: Create a niche with 1/8″–1/4″ clearance on sides and top as recommended. Leave access to the back for service.
- Install an outlet: Move or install a recessed outlet inside the cavity to keep cords hidden. Hire an electrician if you’re not licensed—microwave circuits often require specific wiring.
- Frame and reinforce: Use 3/4″ plywood or MDF to build the cavity and reinforce shelves to support weight. Add mounting brackets where the microwave will secure.
- Ventilation: Ensure proper airflow—some microwaves vent from the back or top. Add a vent grille or gap if required by the manufacturer.
- Finish the opening: Fit the trim kit or custom surround, paint or apply cabinetry veneer, and test fit the appliance before final fastening.
- Final checks: Test power, secure the microwave, and confirm door swing clearance and heat dissipation.
Design inspiration and styling tips
Match finishes to existing cabinets for a seamless look, or make the microwave cavity a focal point with contrasting color or accent tile backing. Consider under-cabinet LED lighting to illuminate controls and create ambiance. For a minimalist kitchen, integrate a panel-ready microwave with a matching cabinet face to make the appliance disappear.
Real-world advice and common mistakes to avoid
- Don’t skimp on measurement: Even small miscalculations can prevent the microwave from fitting.
- Respect ventilation and clearance specs: Overheating is a common failure point and will void warranties.
- Plan electrical early: Rear outlets or dedicated circuits are easier to add during a renovation than after cabinetry is built.
- Avoid placing heavy microwaves on weak shelves—reinforce with plywood and strong supports.
If you’re looking for more hands-on projects, explore our DIY projects page for plans and materials lists. For broader remodeling ideas that pair well with a built-in microwave, check out our kitchen upgrades gallery and additional inspiration on home design ideas.
Frequently Asked Questions
1. Can any microwave be built into a cabinet?
Not necessarily. Only microwaves designed for built-in installation or those with a compatible trim kit should be enclosed. Countertop models may overheat if enclosed. Always check the manufacturer’s installation guide and ventilation requirements.
2. How much space do I need for a built-in microwave cabinet?
Space depends on the microwave model and trim kit, but allow for manufacturer-specified clearances (often 1/8″–1″ around sides and top plus rear clearance). Plan for an accessible electrical outlet and ventilation path.
3. Is it worth hiring a professional for installation?
If your project involves electrical work, load-bearing structural changes, or custom cabinetry, hiring a professional is recommended. For basic cabinet modifications and non-electrical trim work, a confident DIYer can often complete the project with the right tools and measurements.
Conclusion — take the next step
Transforming your kitchen with ideas for built in microwave cabinet is a high-impact upgrade that saves counter space, improves ergonomics, and elevates your design. Whether you choose a simple recessed mount with a trim kit or a full custom appliance tower, careful measurement and attention to ventilation and electrical needs will make the project a success. Ready to start? Bookmark this guide, sketch your layout, and dive into your next DIY projects—your kitchen will thank you.
Call to action: Want step-by-step plans for a recessed microwave cabinet or ideas for pairing a built-in with new cabinet doors? Head over to our DIY projects and kitchen upgrades pages to get free plans, material lists, and pro tips.