Ever tried to prep a big dinner only to wish you had a little more counter space — or found yourself wishing the island could move out of the way for a party? If your kitchen layout changes with every project or you rent and can’t install a permanent island, a moveable solution is a game-changer. In this post I’ll share practical ideas for moveable kitchen island designs, step-by-step DIY tips, and styling advice so you can make a mobile prep station that fits your life and your budget.
If you love hands-on projects, check out our DIY projects and get inspired by easy builds. For more permanent options, browse our kitchen upgrades and home design ideas sections.
Why choose a moveable kitchen island?
Moveable kitchen islands (also called portable kitchen islands, rolling kitchen island carts, or mobile prep stations) give you flexibility, extra storage, and work surfaces without the commitment of a built-in. They’re ideal for:
- Small kitchens that need temporary counter space
- Multi-use rooms where you occasionally need a clear floor plan
- Renters or DIYers who want a no-permit solution
- Entertainers who want to clear space for guests
Creative ideas for moveable kitchen island
Below are practical and stylish concepts you can adapt to your kitchen size and skill level. Each idea includes brief tips on materials and finishes.
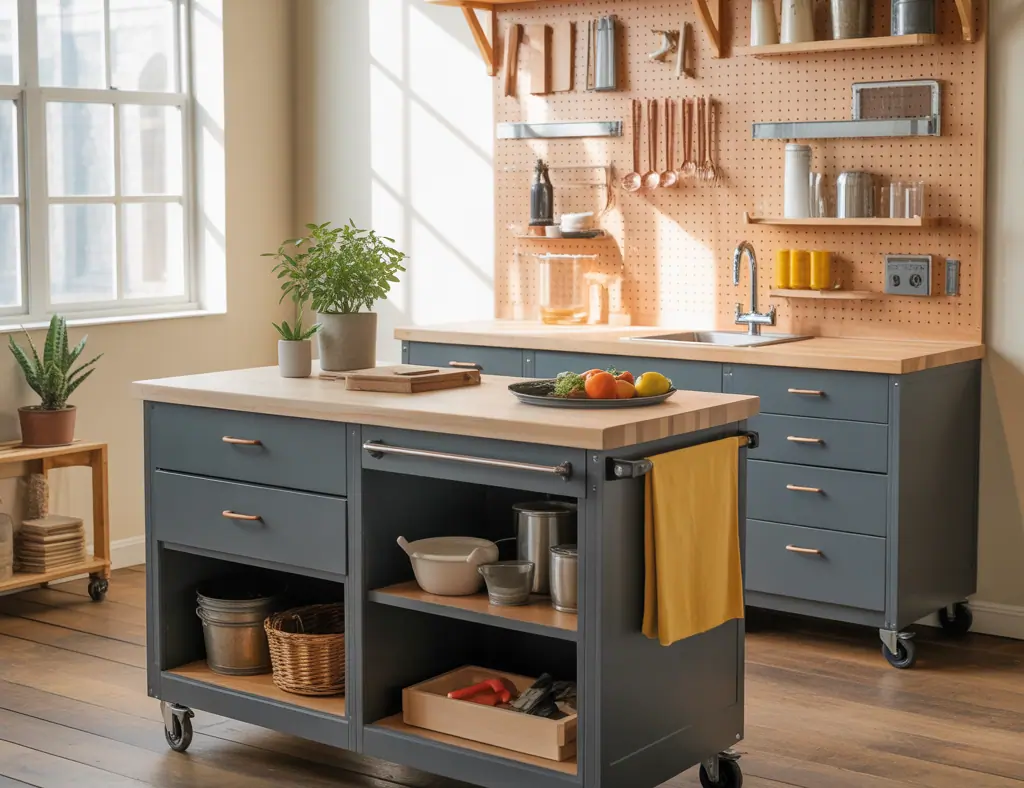
1. Rolling butcher-block island with storage
Use a thick butcher block top on a sturdy base with deep drawers or open shelving. Add locking casters so the island stays put while you chop. This is great for serious cooks who want a durable surface and plenty of storage for pots or mixing bowls.
2. Compact folding island for small kitchens
A narrow cart with a drop-leaf (or fold-out sides) gives you extra workspace when needed and tucks away easily. Choose lighter materials like pine and thin plywood to keep it maneuverable.
3. Island on casters with built-in seating
Build a taller counter with overhang on one side to slide stools under. Use heavy-duty swivel casters rated for the weight and add a footrest for comfort.
4. Mobile island cart with sink or butcher prep bowl
If you want plumbing, consider a portable prep sink unit that connects temporarily to a faucet adapter. These are more advanced but excellent for outdoor kitchens or pop-up bars.
5. Repurposed dresser or buffet turned mobile island
Transform a vintage dresser by adding a counter top and casters for an instant character-filled island with lots of drawer storage. Sand, paint, and seal for a custom look.
6. Modular cubes and stackable islands
Use separate cubes or crates on casters—stack or spread them to change function: prep station, serving area, or extra seating. This modular approach is perfect for renters or flexible spaces.
Step-by-step DIY: build a basic rolling kitchen island
This quick build is budget-friendly and beginner-friendly.
- Measure your space: aim for at least 36″ clearance around the island for working and appliance doors.
- Choose a top: purchase a pre-finished butcher block or laminate countertop. Typical size: 24″ x 48″ for a compact island.
- Build the base: frame with 2x4s or use a ready-made cabinet as the base. Include shelving or drawers as desired.
- Attach casters: use four heavy-duty swivel casters rated at least 75–100% of the total island weight per caster. Add two locking casters for stability.
- Finish: sand and paint or stain the base. Seal the countertop with food-safe oil or polyurethane for durability.
- Install accessories: hooks, towel bars, a knife strip, or a drop-in cutting board make the island functional.
Materials, tools, and safety tips
Materials:
- Butcher block or laminate countertop
- 2x4s, plywood, or a base cabinet
- Heavy-duty casters (locking recommended)
- Screws, wood glue, finish (paint or stain)
Tools:
- Circular saw or table saw
- Drill/driver, sander, tape measure, level
- Clamps, paint brush, screwdriver
Safety tips:
- Check caster weight ratings and center-of-gravity — keep heavy items low to avoid tipping.
- Use locking casters and engage them whenever the island is in use.
- If adding plumbing or electricity, consult a professional to meet code.
- Sand edges and apply a durable finish to prevent moisture damage and bacteria growth.
Design inspiration and styling tips
Make a moveable island part of your kitchen aesthetic:
- Contrast: Pair a darker painted base with a light butcher block top for visual interest.
- Hardware: Upgrade drawer pulls and casters for a polished look—antique brass or matte black are trendy.
- Color zoning: Paint the island a bold accent color to create a focal point without committing to a permanent change.
- Accessory add-ons: Add a wine rack, towel bar, magnetic knife strip, or hanging pot rack for extra function.
Budget vs. premium build options
On a budget, use reclaimed wood, a used dresser, or a pre-made kitchen cart topped with a laminate slab. For a premium mobile island, invest in a thick butcher block, soft-close drawers, and industrial casters. Either approach can look intentional—finish and hardware make a huge difference.
Frequently Asked Questions
Q: Are moveable kitchen islands stable enough for heavy prep work?
A: Yes—if you choose high-quality casters, include at least two locking wheels, and keep heavy storage in the lower portion to lower the center of gravity. A well-built island will be stable for chopping and mixing.
Q: What size should a moveable island be for a small kitchen?
A: For tight spaces, aim for a top 18–24 inches deep and 36–48 inches long. Always maintain at least 36 inches (preferably 42 inches) of clearance around the island for comfortable movement.
Q: Can I add utilities like power outlets or a sink to a portable island?
A: You can add outlets (with a qualified electrician) using a power strip or hardwired outlet, but sinks require temporary plumbing adapters or professional hookup. Check local codes before installing permanent plumbing or wiring.
Conclusion
Whether you want an affordable rolling cart, a DIY butcher-block prep station, or a multi-use modular setup, the ideas for moveable kitchen island designs above will help you add function and style without committing to a permanent renovation. Start small: pick one idea that fits your space and skill level, gather materials, and enjoy a flexible kitchen upgrade. Ready to build? Explore more DIY projects for detailed plans and inspiration — then share your finished island with our community.
Happy building and happy cooking!